
Importing Resources
Step 2: Open a Template Grid from an existing Section
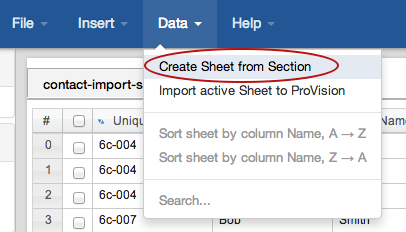
Under the "Data" menu, select "Create Sheet from Section".
The Resource Browser will pop up, showing the list of Sections currently available in Provision. Clicking on the "Details" button will show the fields for that Section.
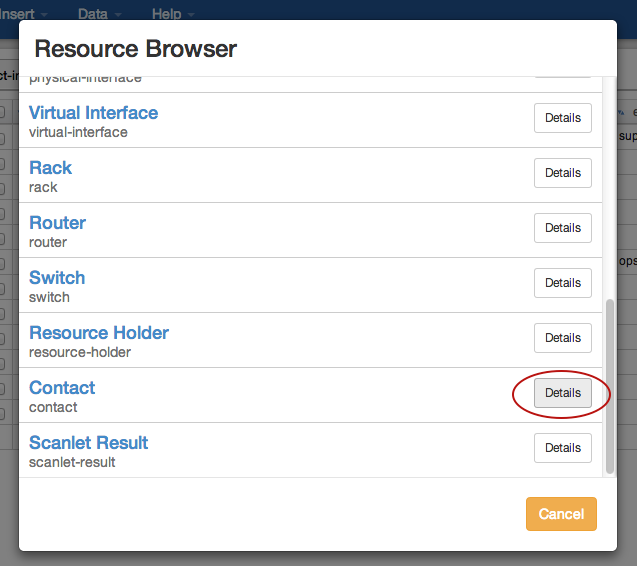
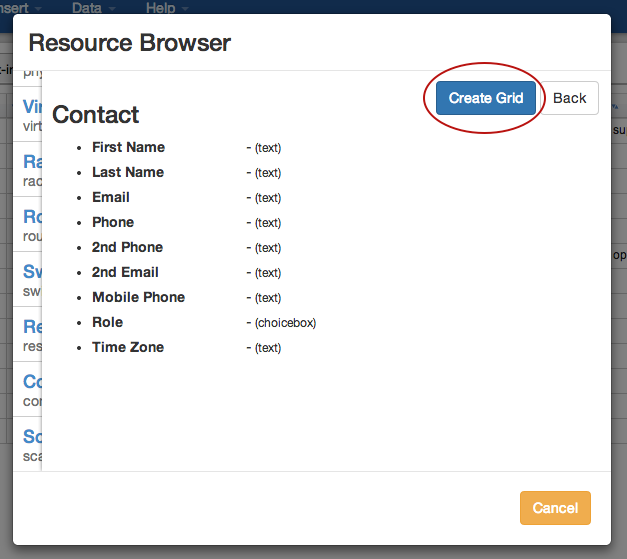
Verify that the Section and available fields match the type of data you are trying to import. In this case, the Section "Contact" has the fields that correlate to our spreadsheet data.
Select "Create Grid" to create a grid based off this Section.
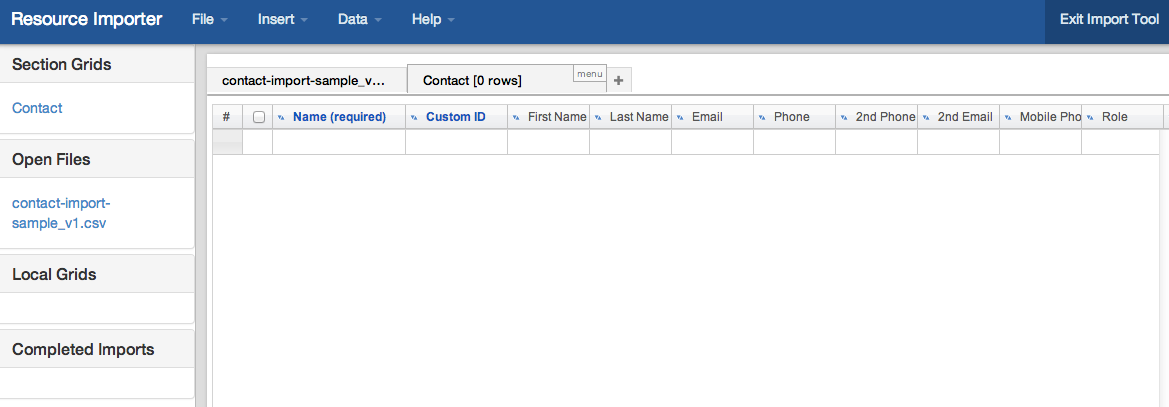
When the Section Grid has been created, required fields will show in blue font with (required) after the header, in this case, "Name" is a required field. The "Custom ID" field is metadata allowing for a unique ID to be associated with each entry, but is not necessary for a successful import. The remainder of the headers directly match the Section's fields.
After you have opened your Section Grid, proceed to Step 3: Reorder .csv columns to match the Section Grid