
This page provides a list of available DHCP related gadgets and how to use them. For an overview of gadgets and how to attach them to resource pages, see Gadgets and Adding a Gadget to a Section .
DHCP Customer Configuration Gadget
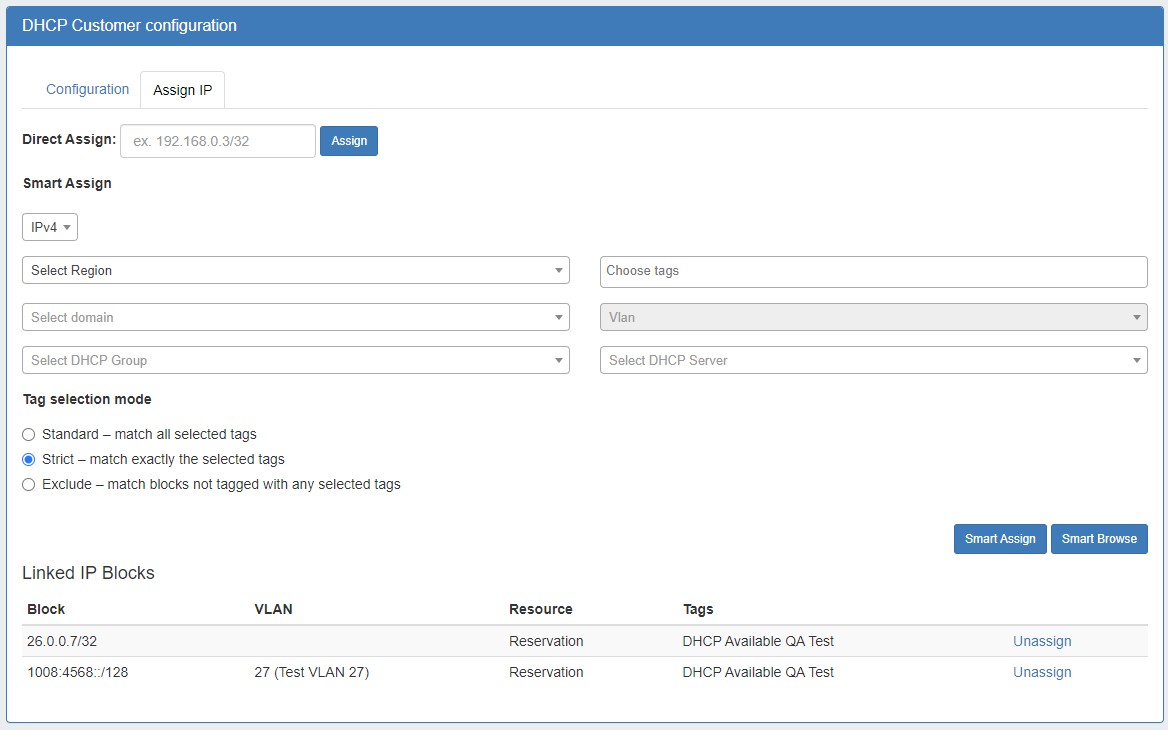
The DHCP Customer Configuration Gadget allows users to assign APNIC IP aggregates to the DHCP server pools and generate DHCP Server Configuration changes.
Setting up the DHCP Customer Configuration Gadget
Before using the DHCP Customer Configuration Gadget, the following should be set up:
-
The associated DHCP server should be created in ProVision and set up in the DHCP Tab - DHCP servers list (See: DHCP Tab).
-
Add the DHCP Customer Configuration Gadget to the desired section. You may want to create a specific "DHCP Customer" section for DHCP customer entries (See: Customizing Sections).
-
Have, or set up APNIC Aggregates for DHCP use from the IPAM Tab with the desired IP space type, Region(s), Tags, and any desired VLAN criteria, and have that aggregate / block allocated as a subnet pool. Regions are a required field when assigning IPs from the DHCP Customer Configuration Gadget. Any APNIC aggregate (once allocated as a subnet pool) may be used for DHCP, so you may want to create a "DHCP" IPAM tag to help denote the desired aggregate(s).
-
If you are planning on Direct Assigning the DHCP blocks in the Customer Configuration Gadget, ensure that the desired blocks in the DHCP are split to individual /32 or /128 size. Smart Assign and Smart Browse will automatically split the block to assign the correct size.
A Note on DHCP Aggregates
ProVision versions prior to 7.0.0 required creating or identifying specific IPAM blocks as "DHCP Aggregates" using the "DHCP Available" status to assign DHCP pools from.
As of 7.0.0, these statuses have been removed, and any IPAM block may be used to assign DHCP pools from, as long as they are subassignable and meet the assignment criteria provided by the user.
This applies to all DHCP Management functions - the DHCP Customer Configuration Gadget, and all DHCP Tab areas.
Set Up APNIC Aggregate & Subnet
The following steps must be completed to prepare an aggregate for use with the DHCP Customer Configuration Gadget:
-
Have or create (Via IPAM → Add Aggregate) an APNIC IPAM Aggregate with an associated region. You may wish to add tags, vlan, or other associated information as well.
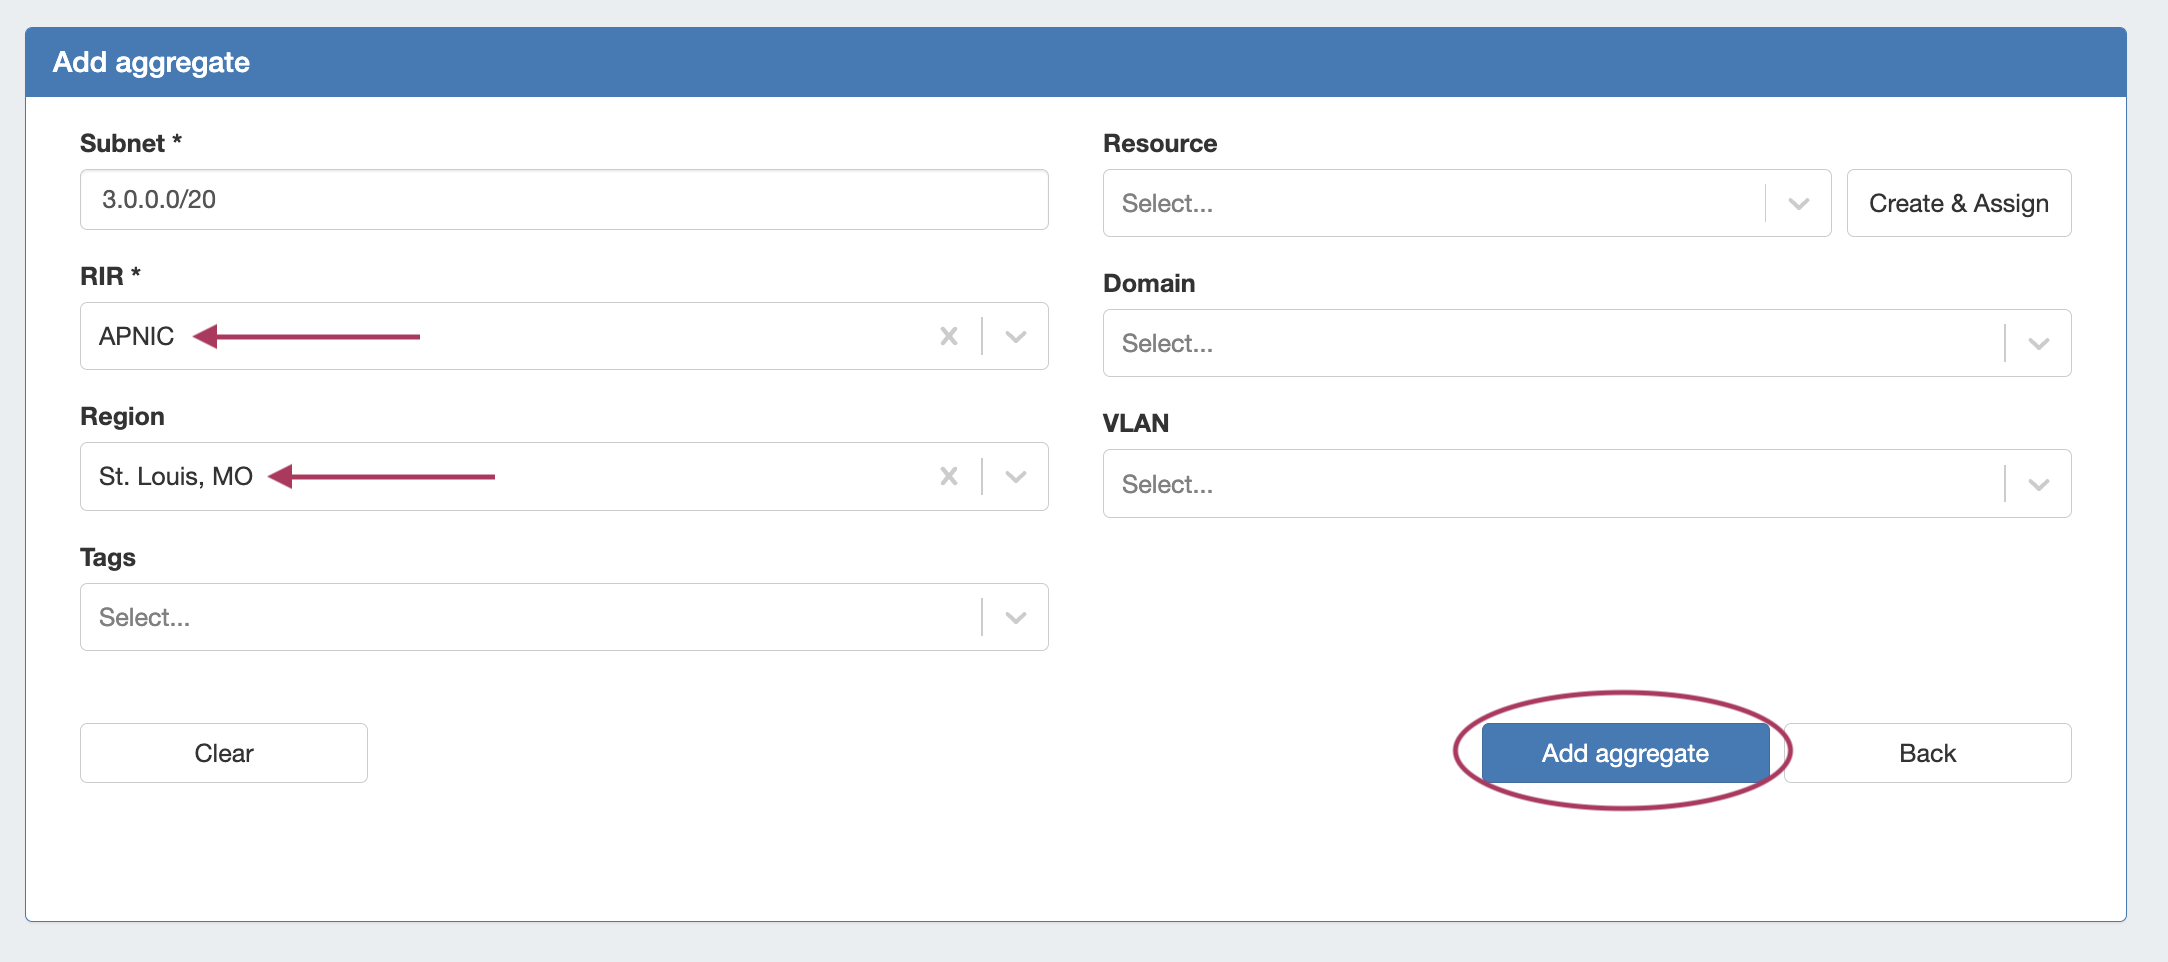
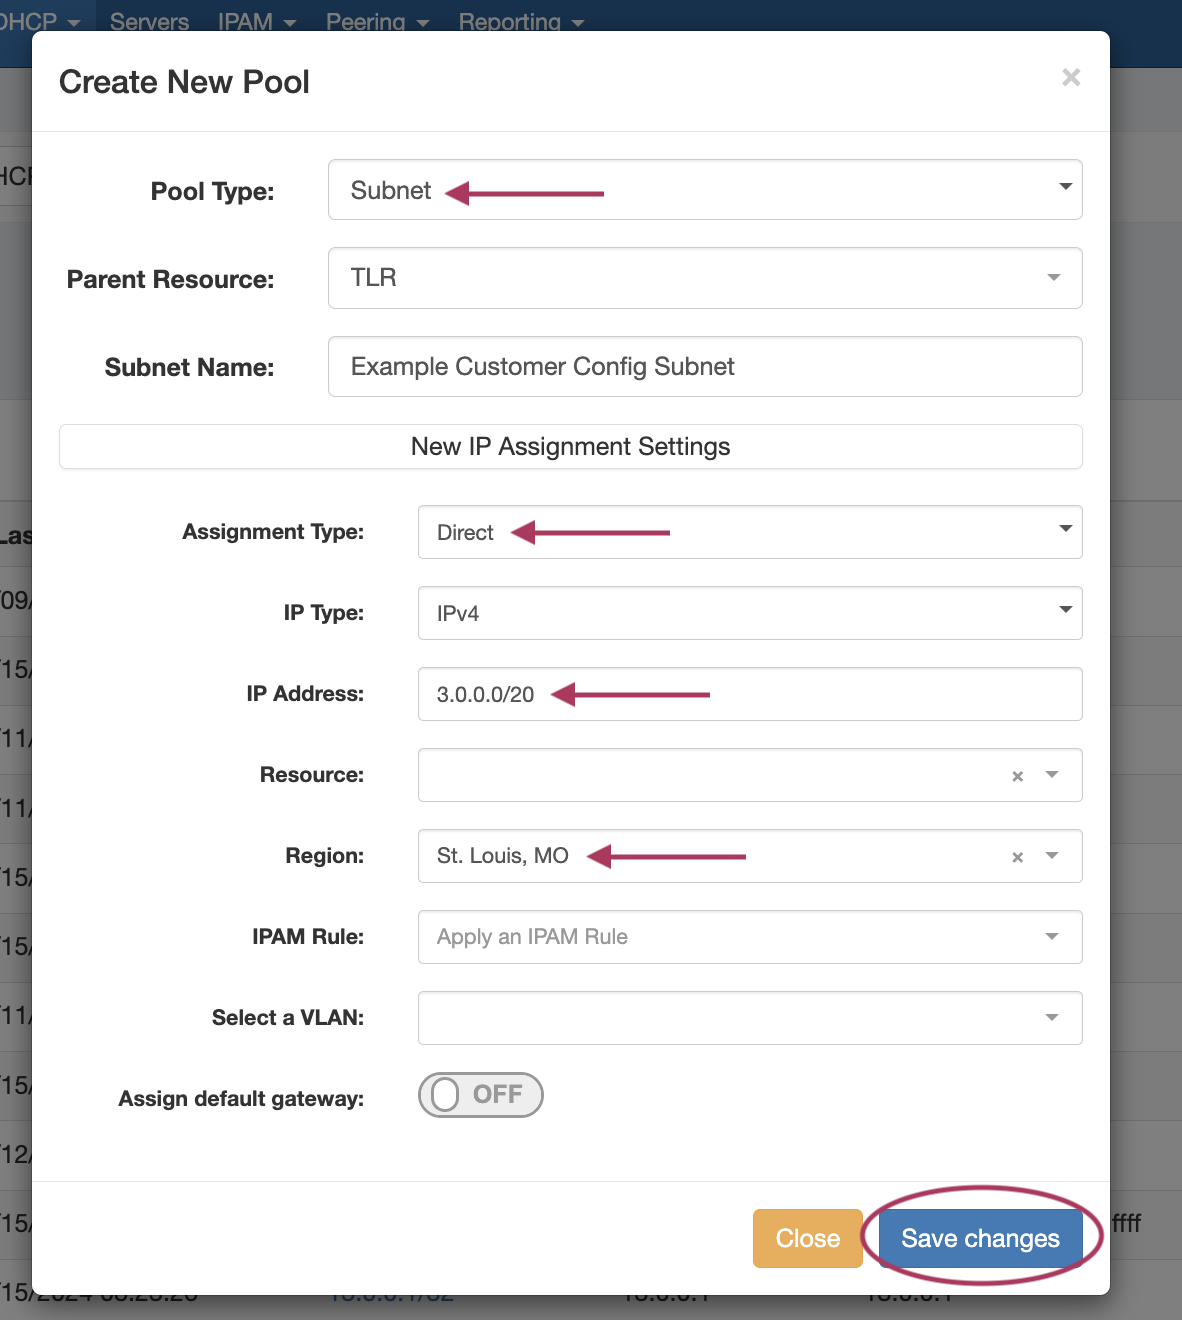
2. Go to DHCP Tab → Add Pool. Direct assign a new subnet pool to that CIDR, selecting the region and other filter criteria associated with the APNIC aggregate. Click "Save Changes" to create the pool.
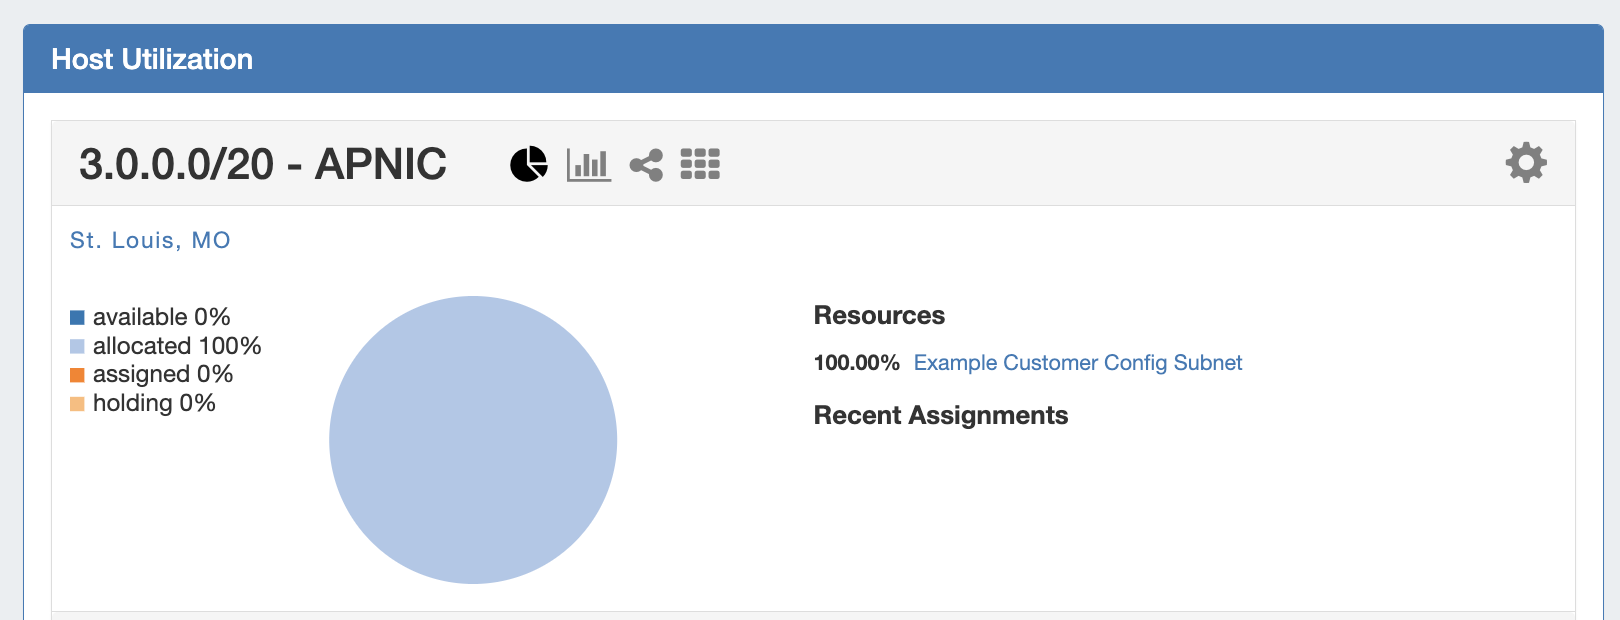
3. If viewed in the IPAM tab, the aggregate will display as allocated to the subnet pool you just created - at this point the aggregate is available for use in the DHCP Customer Config Gadget
Working with the DHCP Customer Configuration Gadget
Step 1: Link the Gadget to the DHCP Server
Link the Gadget with the desired DHCP server by selecting the server from the dropdown, and then click "Continue".

Step 2: Assign IP's
Assign IP's for pools from DHCP aggregates from the Assign IP tab, via Direct Assign or Smart Assign.
Remember, the aggregate must be APNIC, have an associated region, and be allocated as a subnet pool to be assignable in the gadget.
Once assigned, a pool name will be automatically generated under "Resource". Pools may be unassigned by clicking the "Unassign" button.
Step 3: Add Configuration
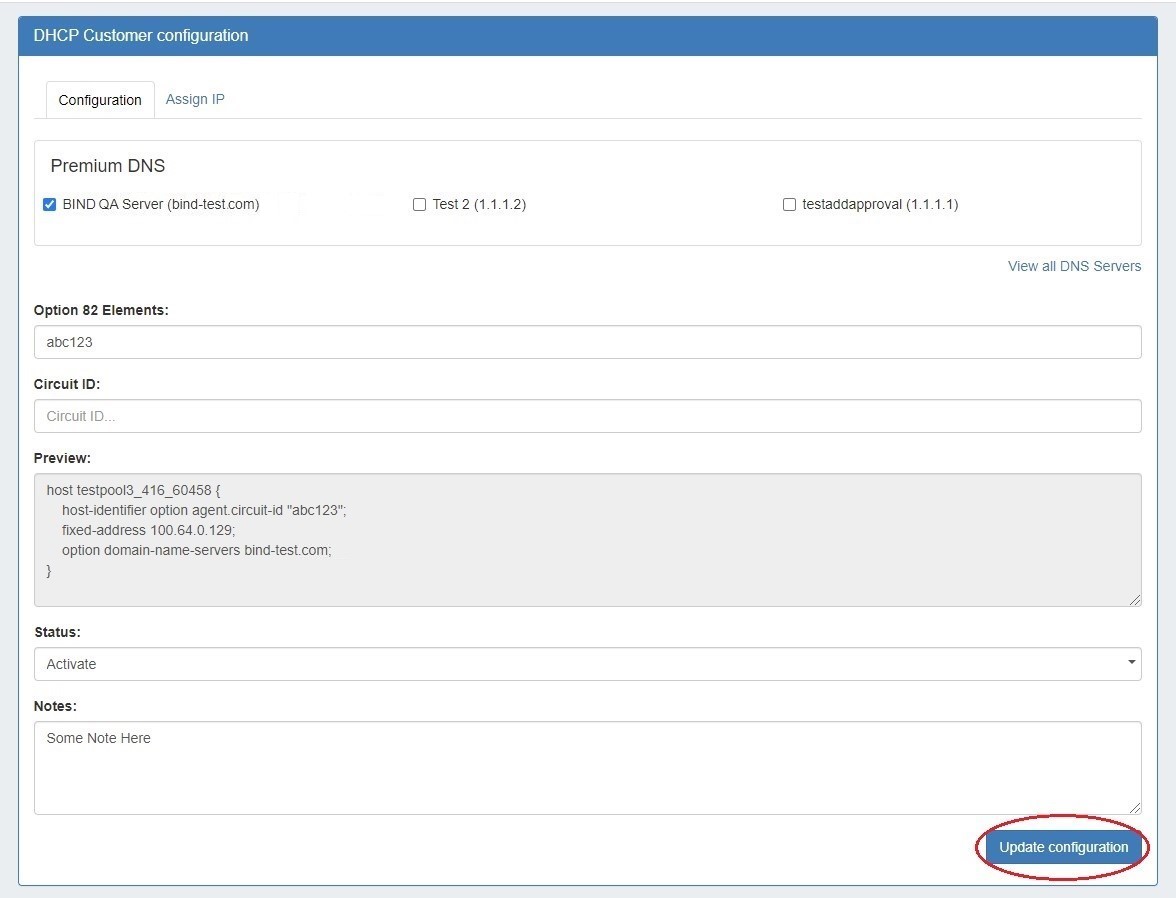
Next, set up configuration information - add Option 82 Elements, Circuit ID, and notes. Use the "Preview" field to confirm the accuracy of the data, and select the status as "Activate" or "Terminate".
Step 4: Push Configuration
An admin user may manually push the updated configuration from the DHCP tab, or use a scheduled DHCP push task to automate the pushes.