
The Managed Server installation can be run more than once.
If we already have running components, they will be stopped before the real installation continues.
If there is newer version of any component, it will be downloaded and used.
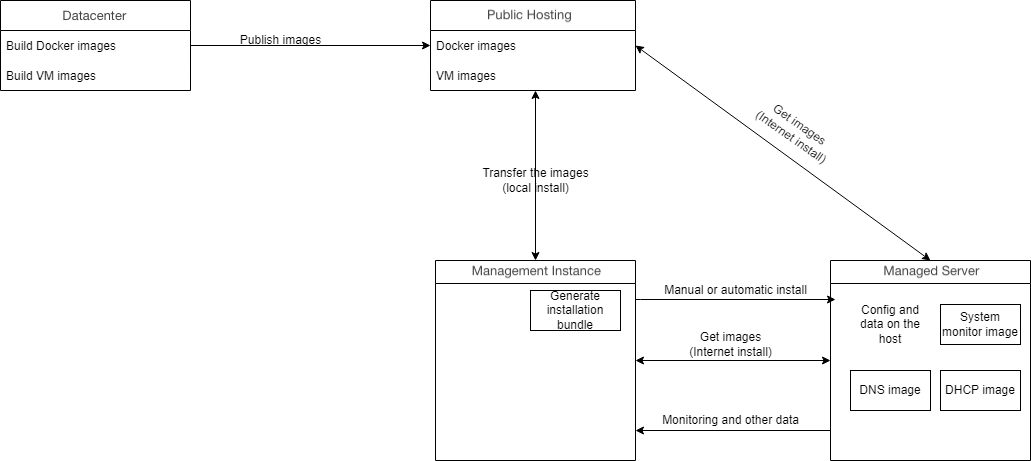
The overall process is:
Requirements
Python 3.6+ and Docker are the only requirements. If we run the installation with root (see below) and we have internet access, the installation process will install Docker.
The overall process is always the same - ProVision generates an install bundle, it is transferred to the server, extracted there and run some scripts from it. This can be done by ProVision (automatic install) or by the user (manual). In case of automatic install ProVision will automate the steps, which the user would do manually. All the components can run without root access, but we need it for user creation, folders creation, network and heartbeat service setup.
Automatic (Recommended)
This is the recommended and easiest setup method. If you have root access, ProVision can do all the necessary actions.
Go to the details page → Settings tab → "Run Actions" → "Push Install"
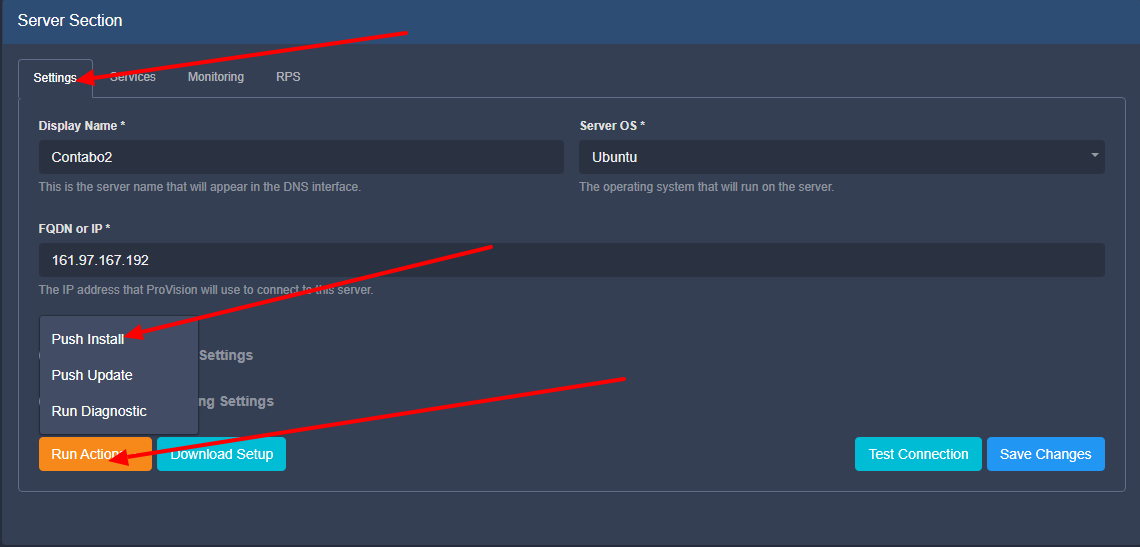
Confirmation dialog will be shown:

Popup with the progress will be shown.:
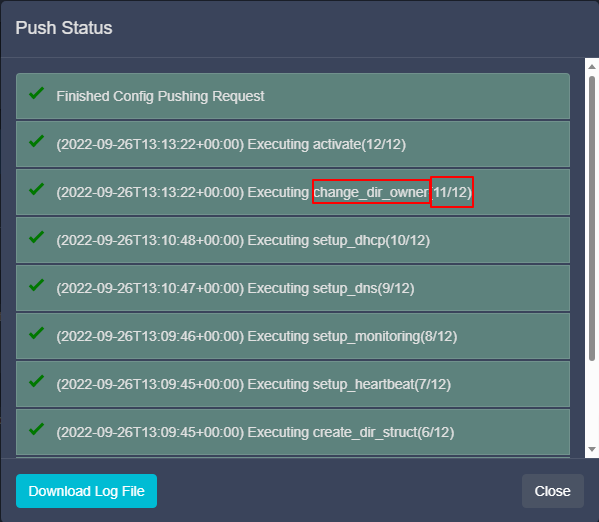
Each command/step is shown together with the overall progress.
Manual (Command Line)
This case is usually when the user doesn't want to input the root user in ProVision, but he has root access. The setup bundle should be downloaded and saved on your local computer:
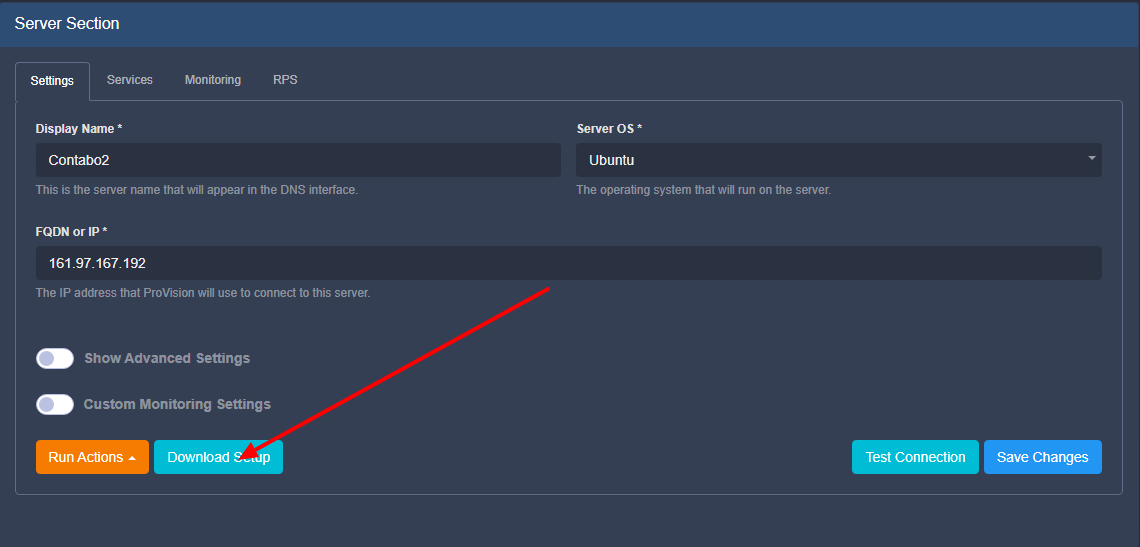
The setup bundle name will be in format "setup-XXX.tar" where XXX is the resource ID of the managed server. The rest of the process is:
-
copy the file to the managed server (with SCP or any other suitable way)
-
extract it with "tar -xf setup-XXX.tar"
-
execute "sudo /bin/bash install_python3.sh" - this should finish with "PVOK"
Without Root
This is the used if root access to the server is not available. In this case, an admin with root access should first do the following:
Install Docker
Install docker with the relevant commands for the OS. This can be done by running "install_docker.sh" from the setup bundle with root or any other suitable way
User and directory setup
Create the relevant user, add it to "docker" group, create "/provision" directory and make the created user owner of this directory.
useradd -m <user>
passwd <user>
usermod -a -G docker <user>
mkdir -p /provision
chown -R <user>:<user> /provision
Update Network config
Make the necessary network changes. This can be done by running "network_config.sh" from the install bundle
Create Service File (pv_heartbeat.service)
Create service file and edit ﹤user﹥ with the correct system user.
# https://www.cloudsavvyit.com/3092/how-to-add-your-own-services-to-systemd-for-easier-management/
# https://www.opentechguides.com/how-to/article/centos/169/systemd-custom-service.html
# https://computingforgeeks.com/how-to-run-systemd-service-without-root-sudo/
# https://unix.stackexchange.com/a/497011

[Unit]
Description=pv_heartbeat Service, which reports the current status.
After=network.target
# StartLimitIntervalSec=0

[Service]
Type=simple
Restart=always
RestartSec=1
User=<user>
ExecStart=/usr/bin/python3 /provision/libs/pv_heartbeat.py

[Install]
# WantedBy=multi-user.target
WantedBy=deault.target
Alias=pv_heartbeat.service
Make Symlink to file (pv_heartbeat symlink)
Make symlink to this file (replace /provision/libs/pv_heartbeat.service with the correct file path):
ln -s /etc/systemd/system/pv_heartbeat.service /provision/libs/pv_heartbeat.service
Create Sudoers File
Reload Systemctl Services Daemon
Reload the systemctl daemon:
systemctl daemon-reload
From this point automatic or manual setup can be done with the non-root user.