Fields are individual pieces of data that you can associate with a particular section. For example, you may want to have "Operating System", "Make", and "Model" fields for a server or device. There are many default fields to choose from, but you may also create custom fields and edit fields to suit your needs.
Once a field is added (assigned) to a particular section, it will be available to add to the Field Gadget for later to edit, manage, or remove.
Adding Fields to a Section
From the Edit Section -> Manage Fields tab, you can add custom fields of different types (text input, text area, choice box, radios, checkbox, encrypted) as well as any existing fields that are available in the Field Catalog.
Add Existing Field
Add Existing Field
When working with Fields, In order to prevent duplicate fields, it is recommended to use existing fields where possible, and to ensure that a field does not already exist prior to creating a new custom field.
To search for a specific field, type a field name into the searchbox for the Field Catalog.
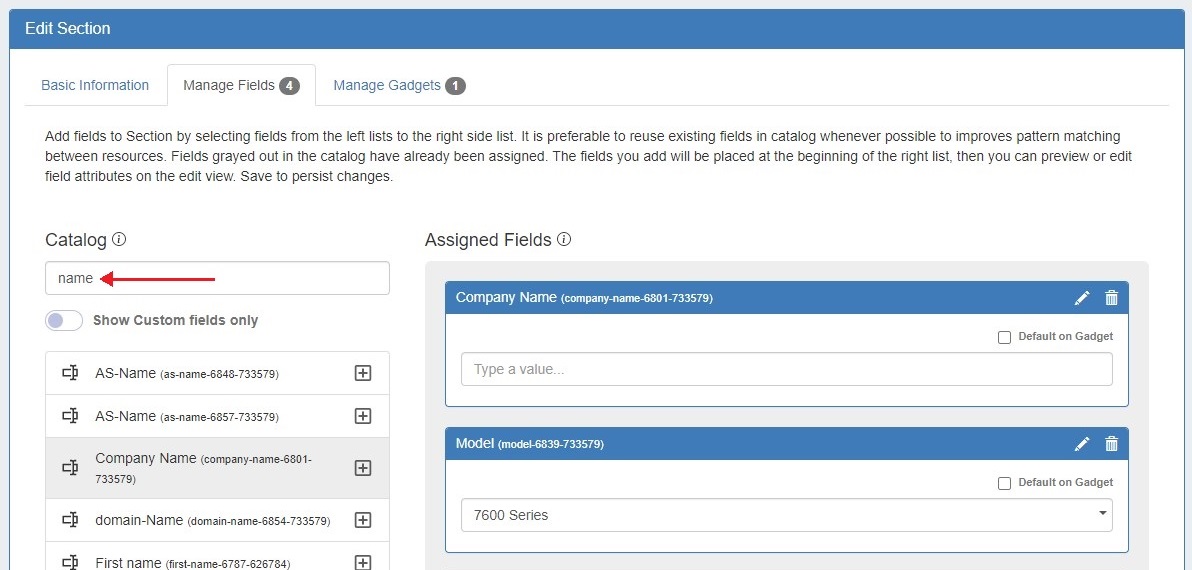
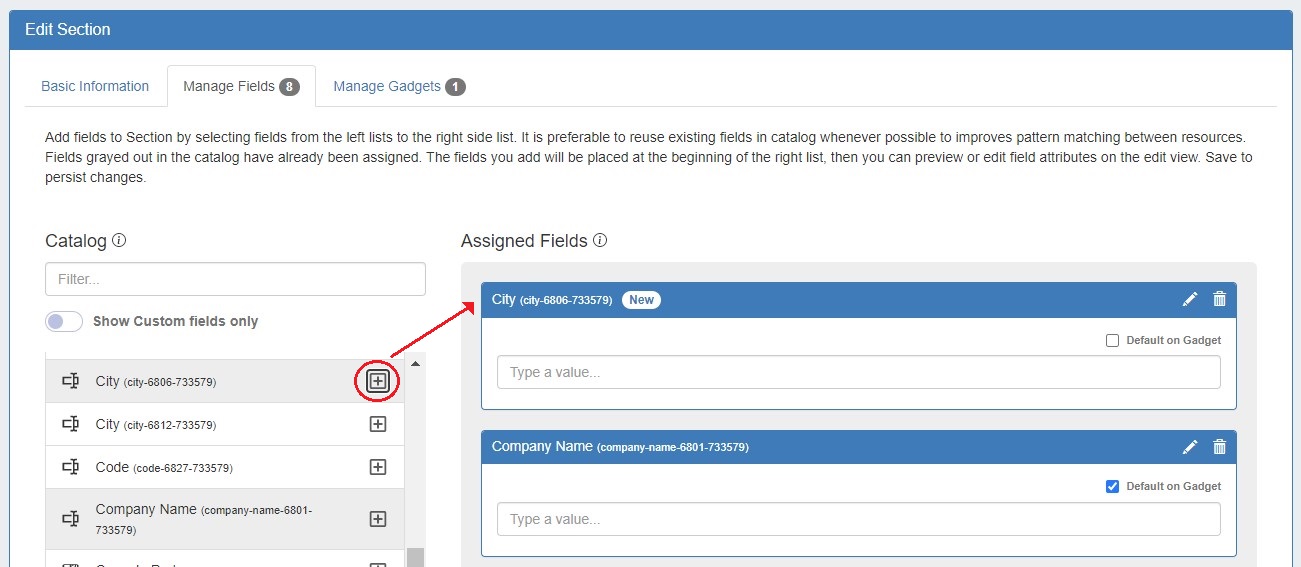
To add a field to a section, click on the + icon of a field list in the Field Catalog and it will be added at the top of the "Assigned Fields" section. Fields already added to the section are shaded grey.
You may add duplicate fields to a section, however duplicates are not recommended. A message will prompt for confirmation that you wish to add the duplicate field.
Add Custom Field to a Section
Add Custom Field to a Section
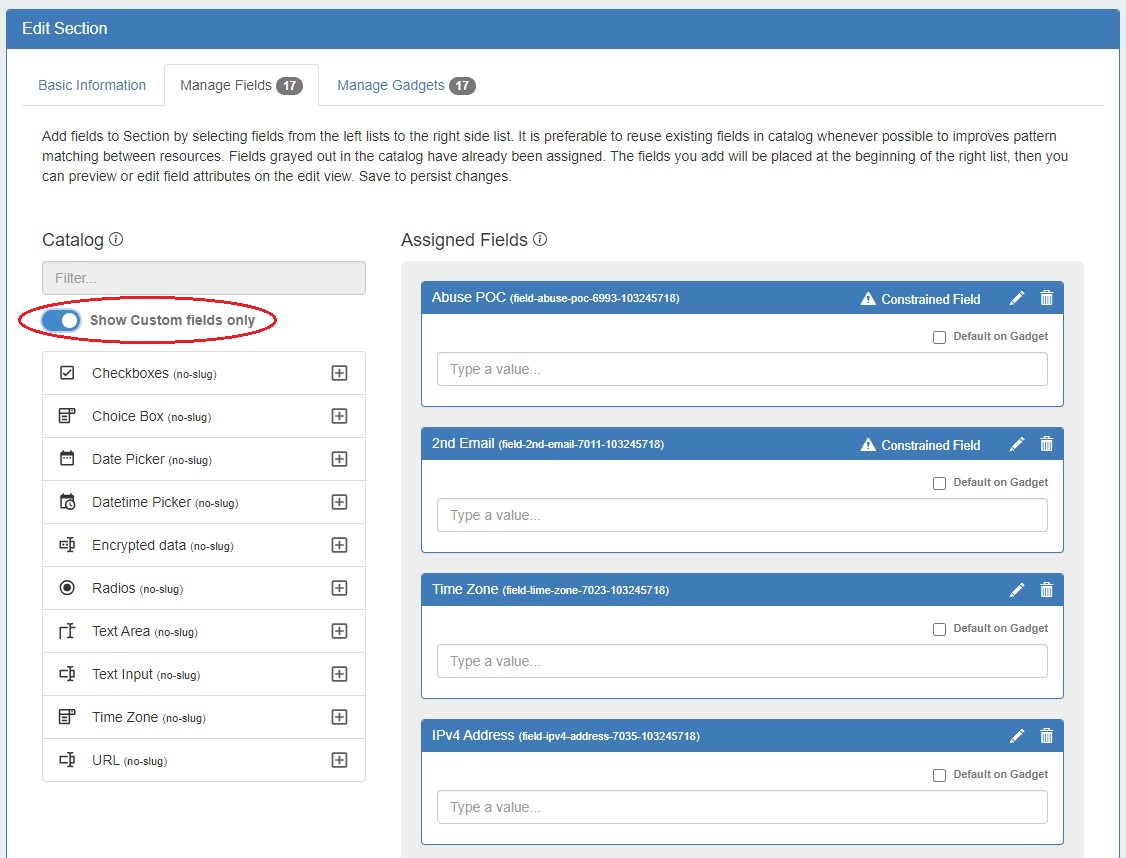
Users can add custom fields of various types (text input, text area, choice box, radios, checkbox, encrypted, date) to a section.
To view only unedited custom fields, enable the toggle below the Field Catalog search box.
Editing/Removing Assigned Fields
Once fields are added to a section, they may be renamed and have other attributes updated by clicking on the edit icon.
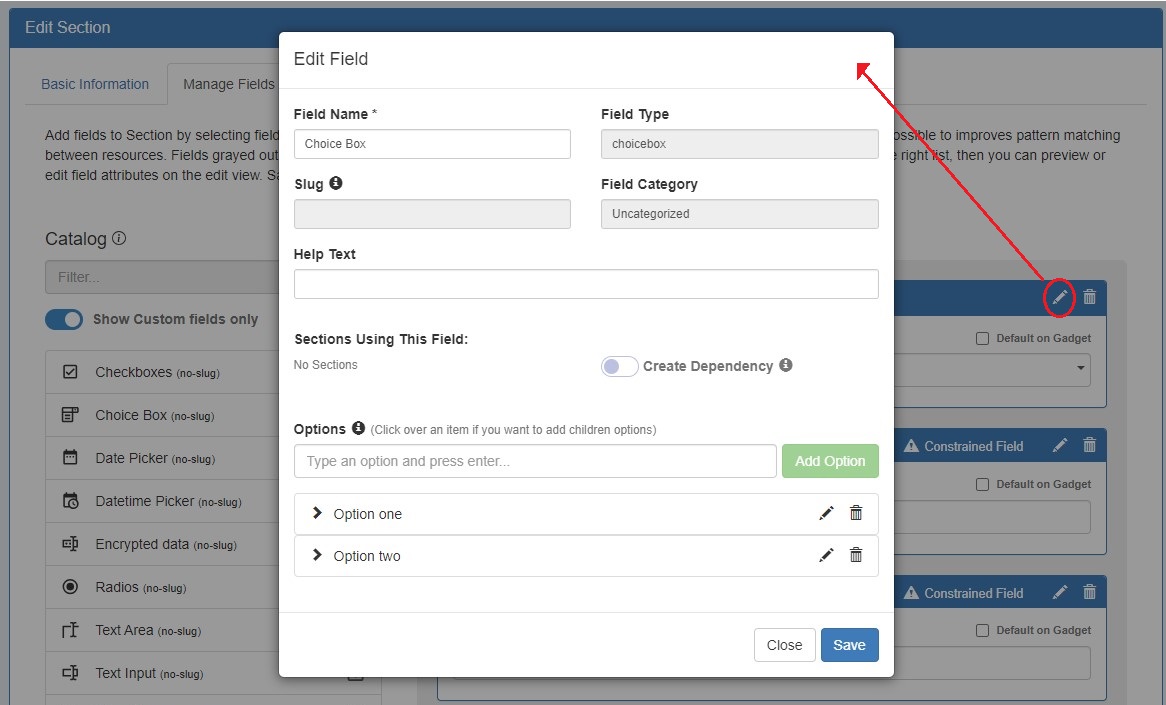
To remove a field, click the delete (trash can) icon on the blue header for the assigned field. This will remove the field from the "Assigned Fields" column, but the field will still exist for repeat use in the field catalog.
Other actions available under Edit Field include:
Adding Dependent Fields
Adding Dependent Fields
Dependent fields improve data accuracy by limiting the information able to be entered in a field dependent on the information entered in another (i.e. make/model). Dependencies may only be added to choicebox type fields.
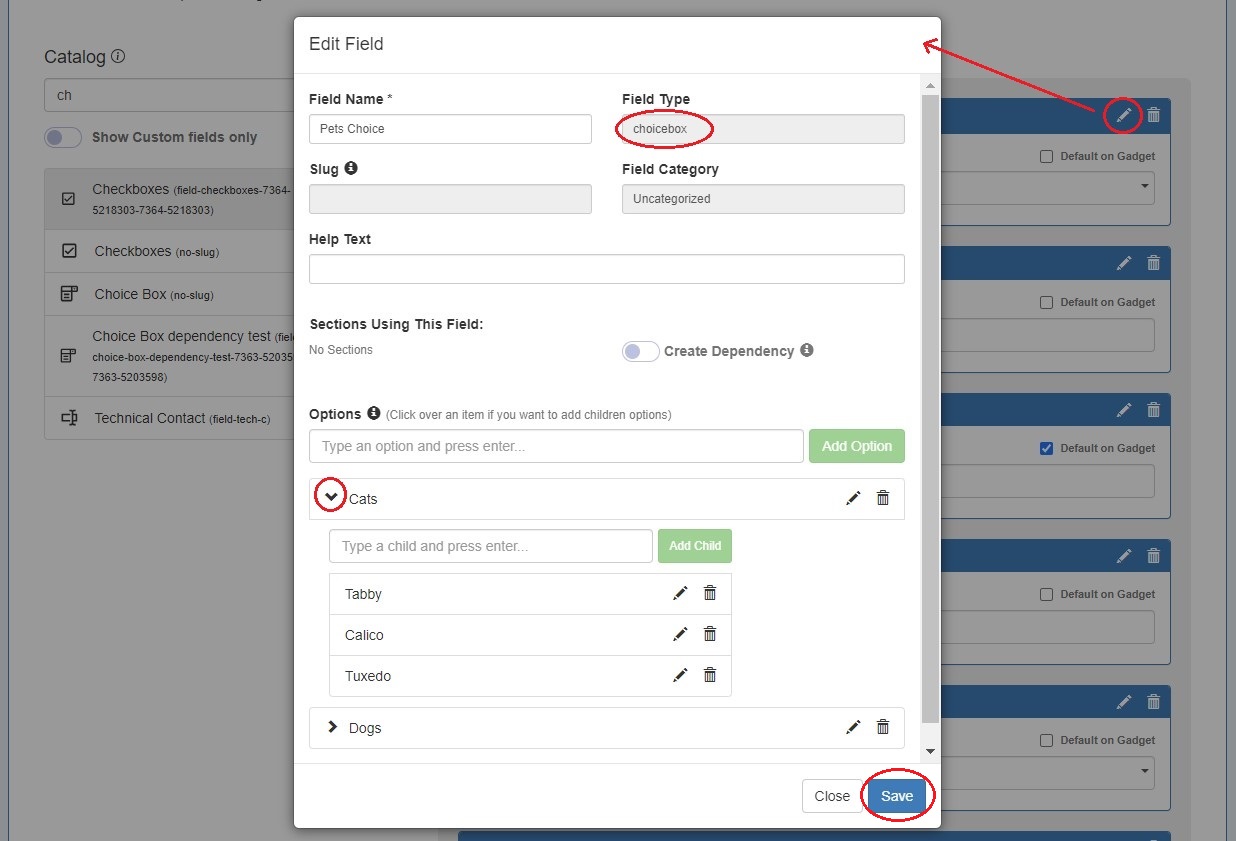
To add a dependent field, you must first set up the field on which it will be dependent. Add a choicebox field from the catalog and open edit. Add or edit options, then add children to the options. Click save. If adding a new custom choicebox field, you will need to save from the main "Manage Fields" tab as well before proceeding to the next step.
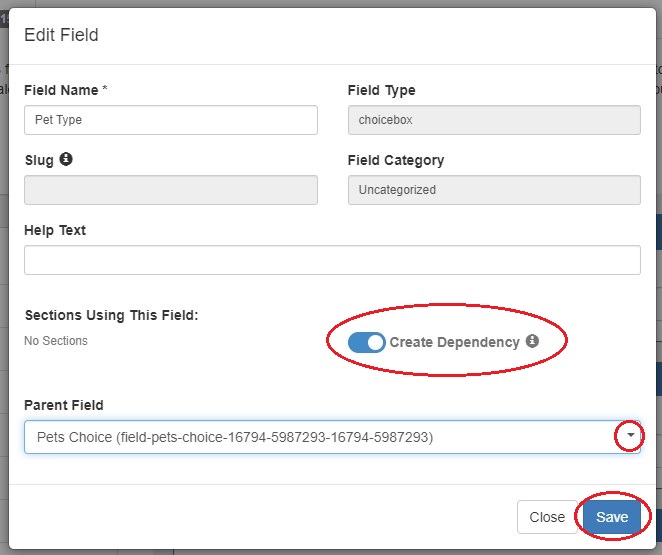
To add the dependent field, add another choicebox field. Open edit and enable the "Create Dependency" selector. Choose a Parent Field from the dropdown and click save. Remember to click save again before exiting the tab.
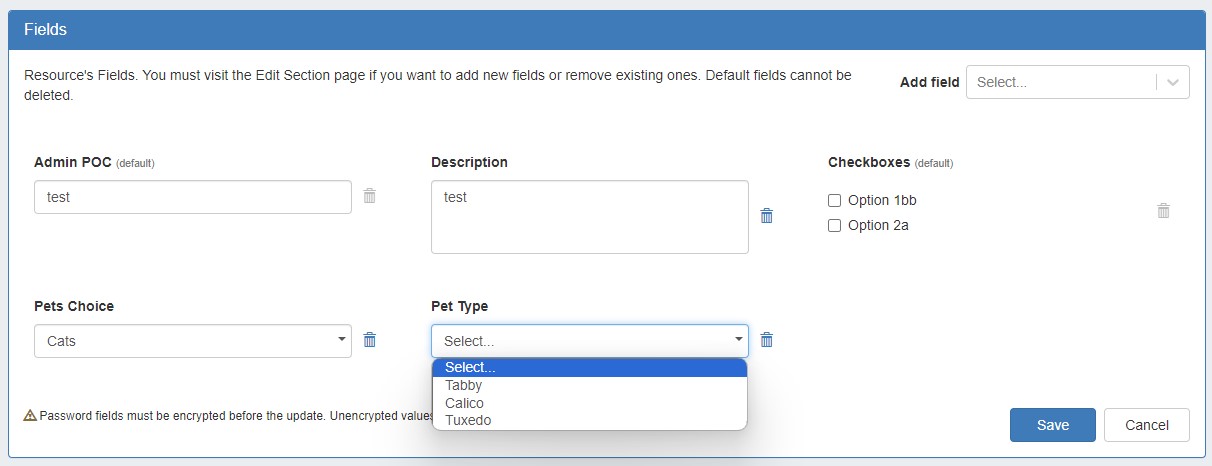
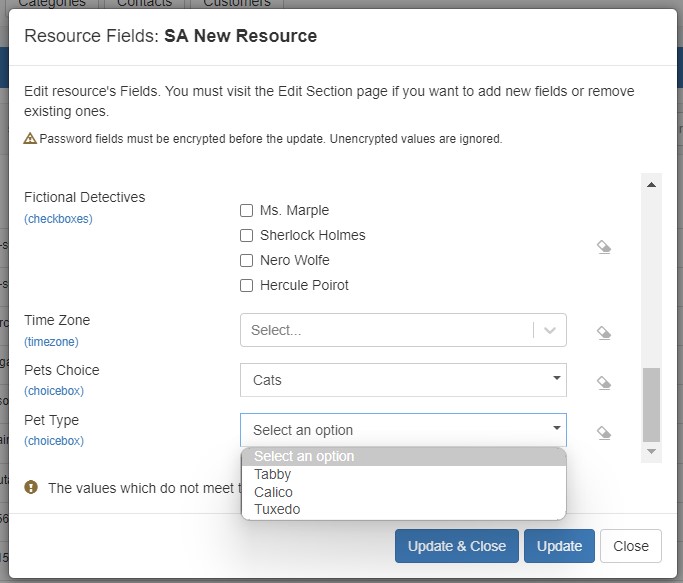
Once the fields are added to the section, they are available in the Fields Gadget and Edit Fields modal.
Applying Constraints to Fields
Applying Constraints to Fields
The Constraints system allows Admin users to configure custom field validation and limitations into Resource fields. Many constraint types are available to create in the Admin section. For more details on creating constraints see Constraints in the Admin Guide.
To apply a constraint to a field, open the edit modal for an assigned field. Select a constraint from the dropdown and click "Save".
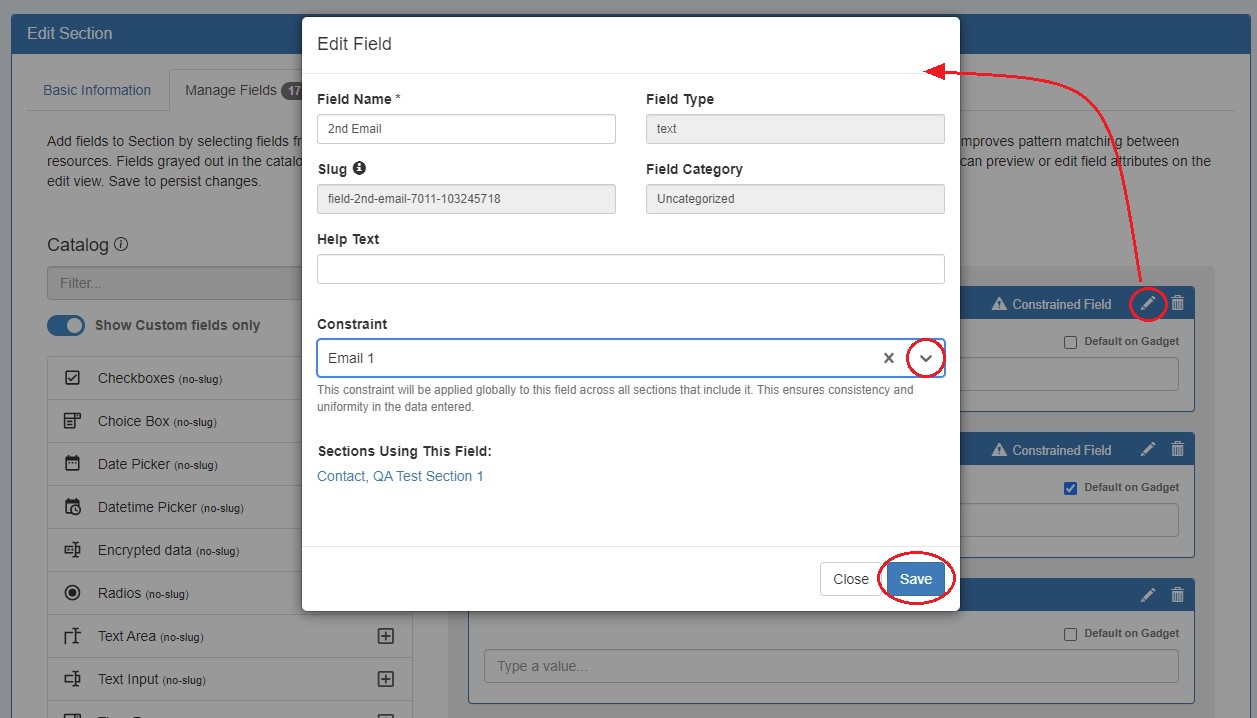
Applying a constraint to a field affects all sections to which a field is assigned. In the above example, adding a constraint to a field in QA Test Section 1 will also apply the constraint to the field in the Contact Section. You can see which sections are using the field displayed in the Edit Field modal.
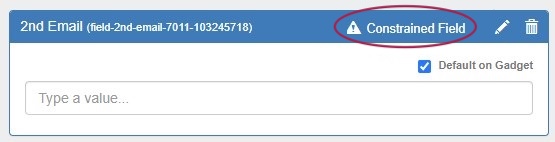
Once a constraint is applied to a field, it will be visible to the user.
Preview Fields
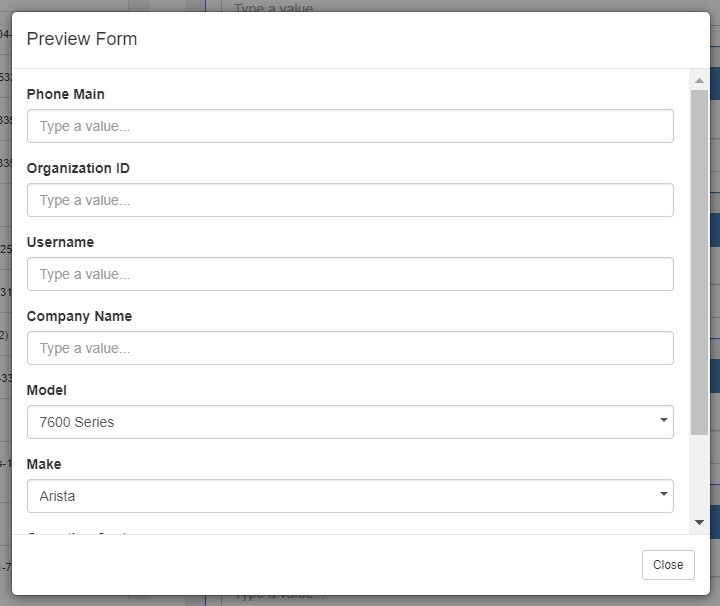
Once assigned to a Section, Fields may be previewed by clicking the "Preview Form" button at lower right.
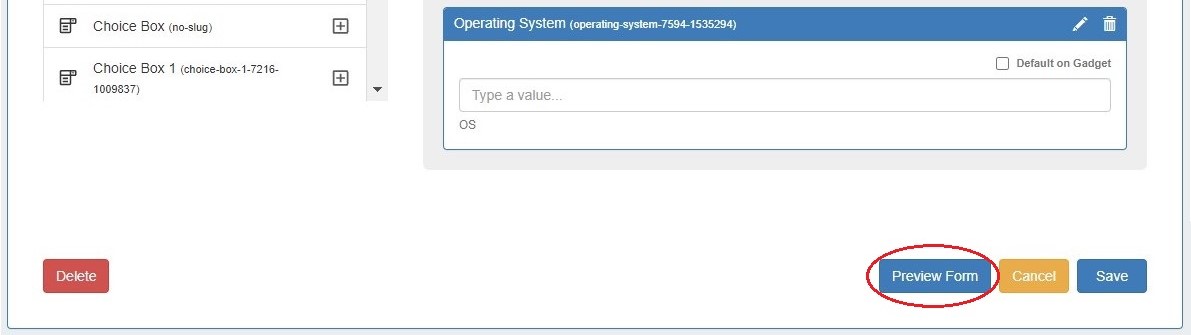
This will open a modal where you can review and test how fields will look and behave.
Default Fields
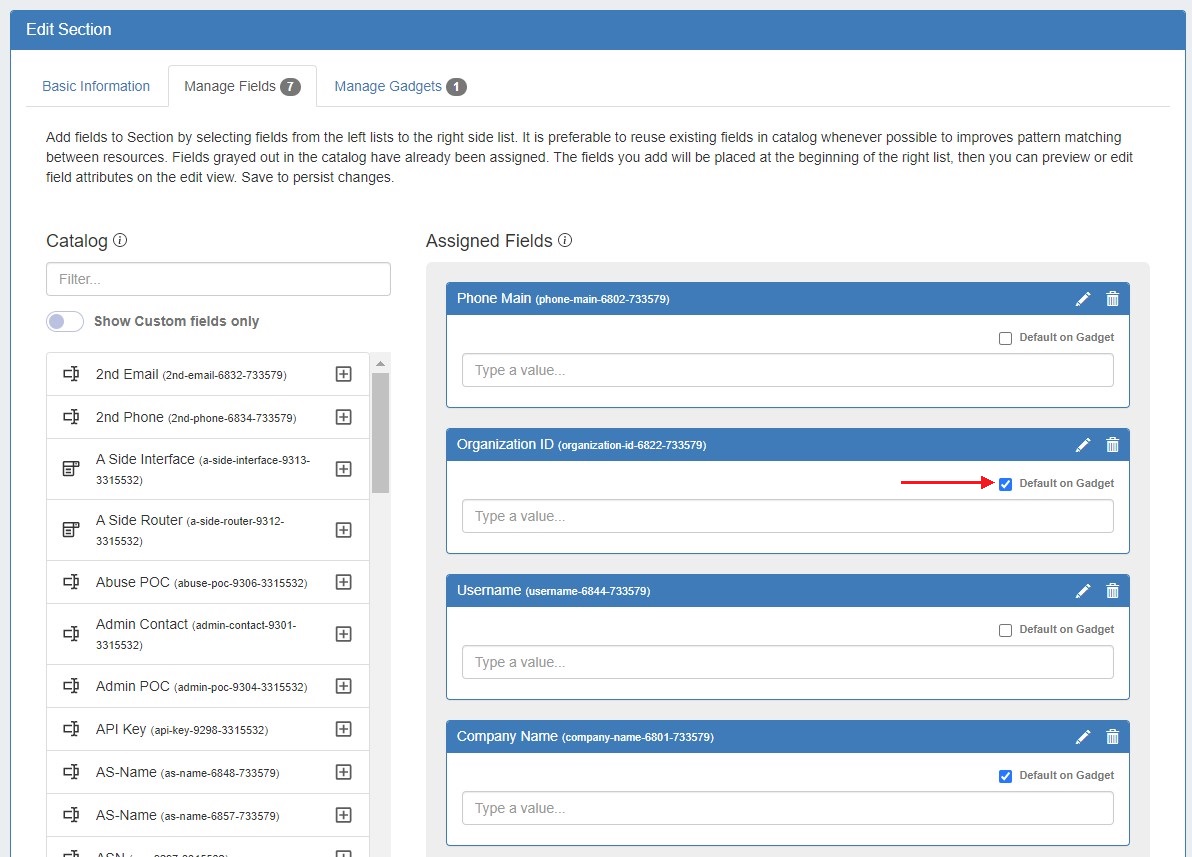
Users can designate fields to be auto-added to the Field Gadget for all resources assigned to a section by selecting the checkbox "Default on Gadget" once a field has been added to the Assigned Fields column.
This will keep the selected fields added and visible by default in the Field gadget.
Deselecting default on gadget will remove any empty fields (Note: spaces / non-visible characters do count as values!), and require manual selection of fields to display via the Field Gadget.
Delete Fields
Unused (non-system) fields may be permanently deleted from the field catalog. To be eligible for delete, the field must not be use in any sections.
Fields able to be deleted will display with a trash can icon next to them in the field catalog.
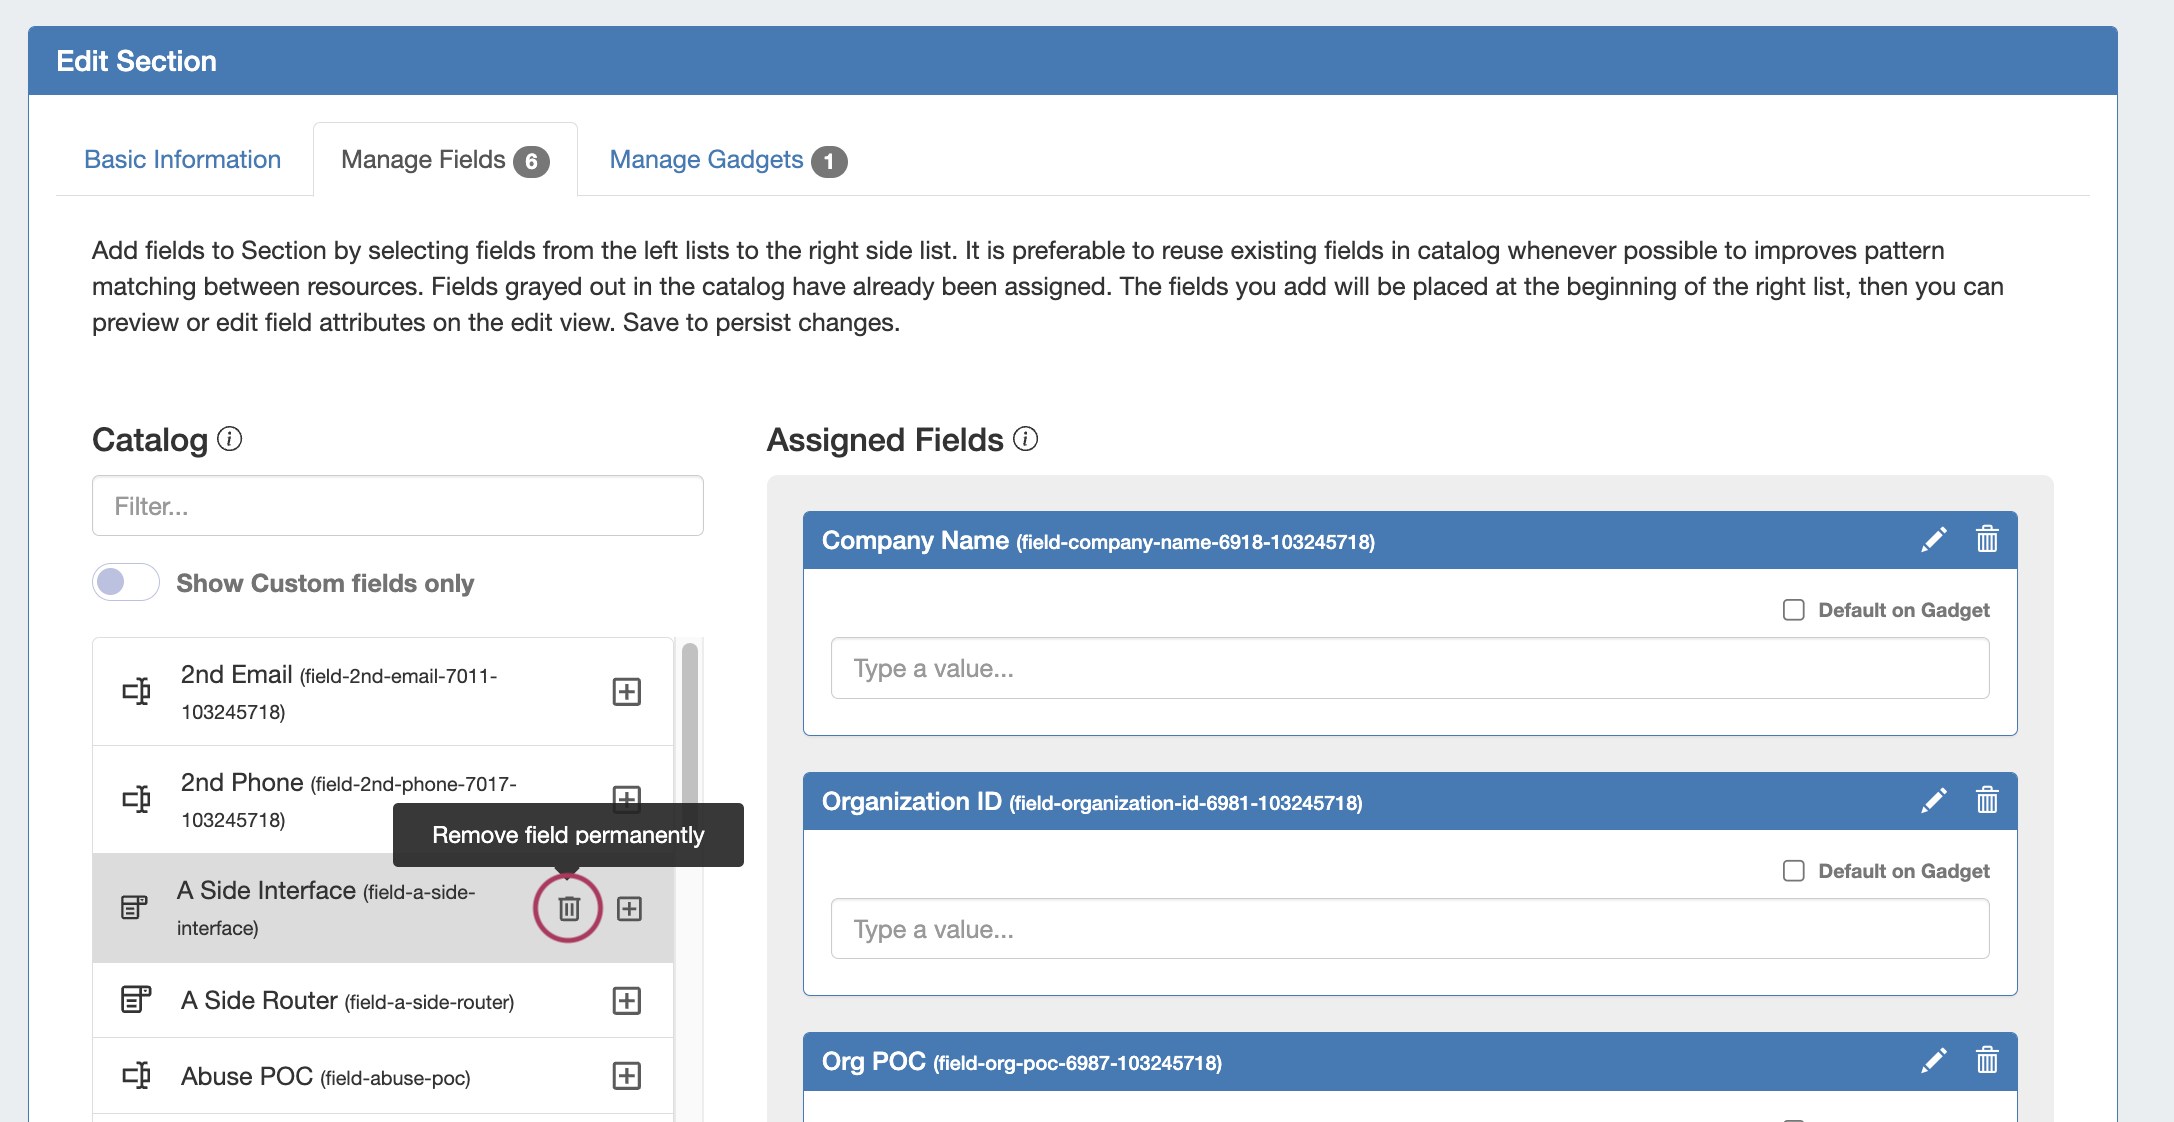
To permanently delete a field, click on the trash can icon for the field in the field catalog. A confirmation dialog will appear to confirm. Once confirmed, the field is deleted permanently and is non-recoverable.
Using the Field Gadget
The Field Gadget displays the information fields that have been added to the section, and have been added for the specific resource that is being viewed.
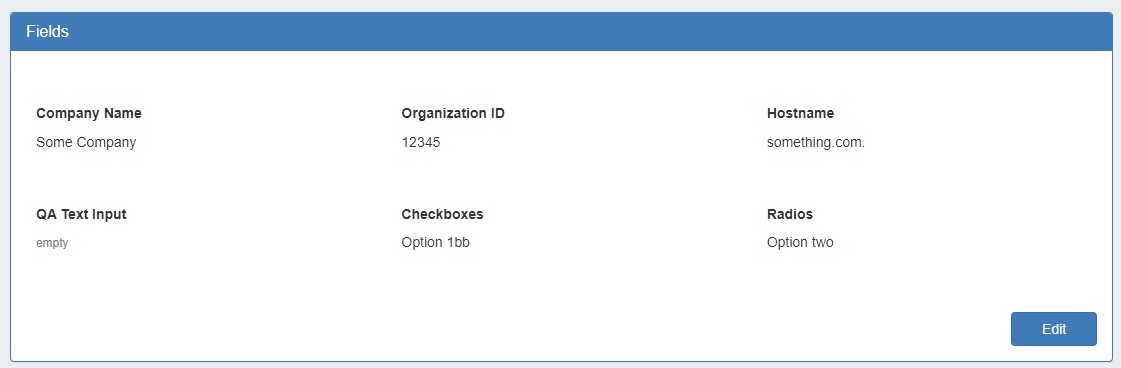
Users may add enabled fields to the resource, edit field values, and remove fields from the resource through this gadget.
Managing Fields in the Field Gadget
Managing Fields in the Field Gadget
The Field Gadget and the individual fields must both be enabled and added to the resource's section before they can be used in the Field Gadget on the resource entry page.
Once the fields are added to the section, they will be available to add to the Field Gadget for any resource of that section, from the Field Gadget's "Add New Field" dropdown.
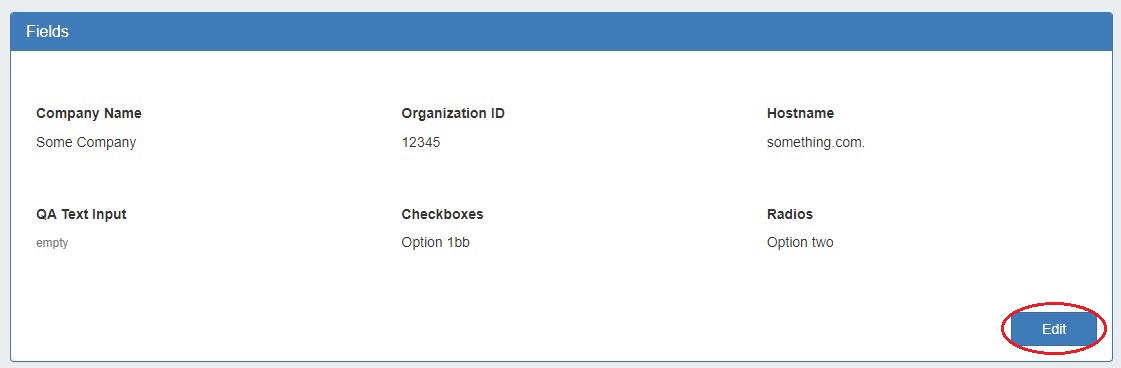
To Add, Edit, or Remove fields, click the "Edit" Button at the bottom right corner of the Field Gadget.
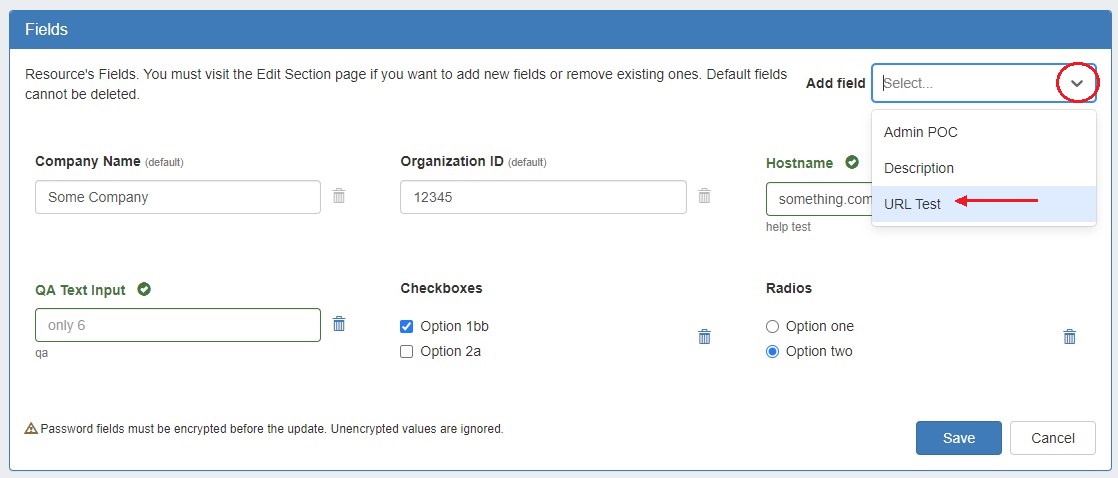
To add an available field to the gadget, select one of the available fields from the "Add New Field" dropdown.
Once added, the field will be available to edit or remove.
Edit the field value(s) by typing into the input box, and/or selecting the desired option, then click "Save". You may also remove a field from the gadget by clicking the "Delete" icon - it will be available to re-add later, if needed.
Default fields cannot be removed from the Field Gadget and the "Delete" icon will appear shaded.
Applied Constraints
When a field is viewed that has a constraint applied, a "check" icon will display next to the field name. If a value that does not meet the constraint is entered, there will be a visual indicator that the input does not meet the constraint requirements.
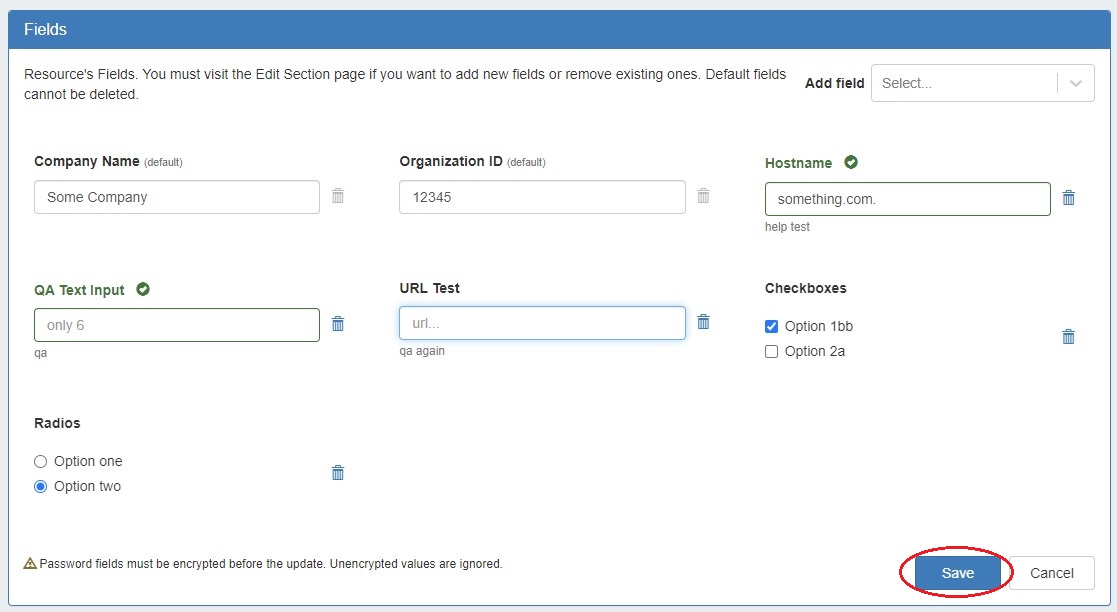
When done with your edits, click "Save" to return to view mode.
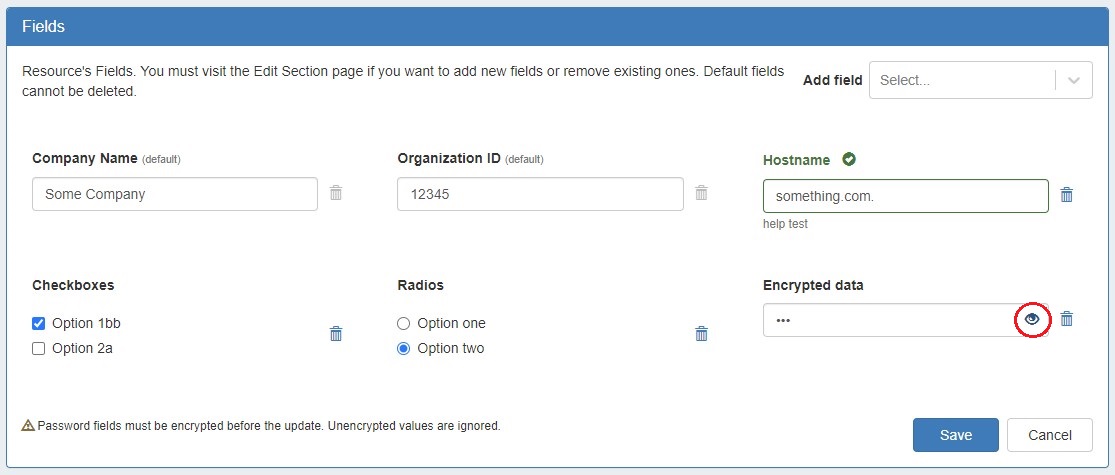
Encrypted values must be encrypted prior to saving or the value will not be retained. Click the eye icon after inputting a value and click "Save".
Exporting Fields
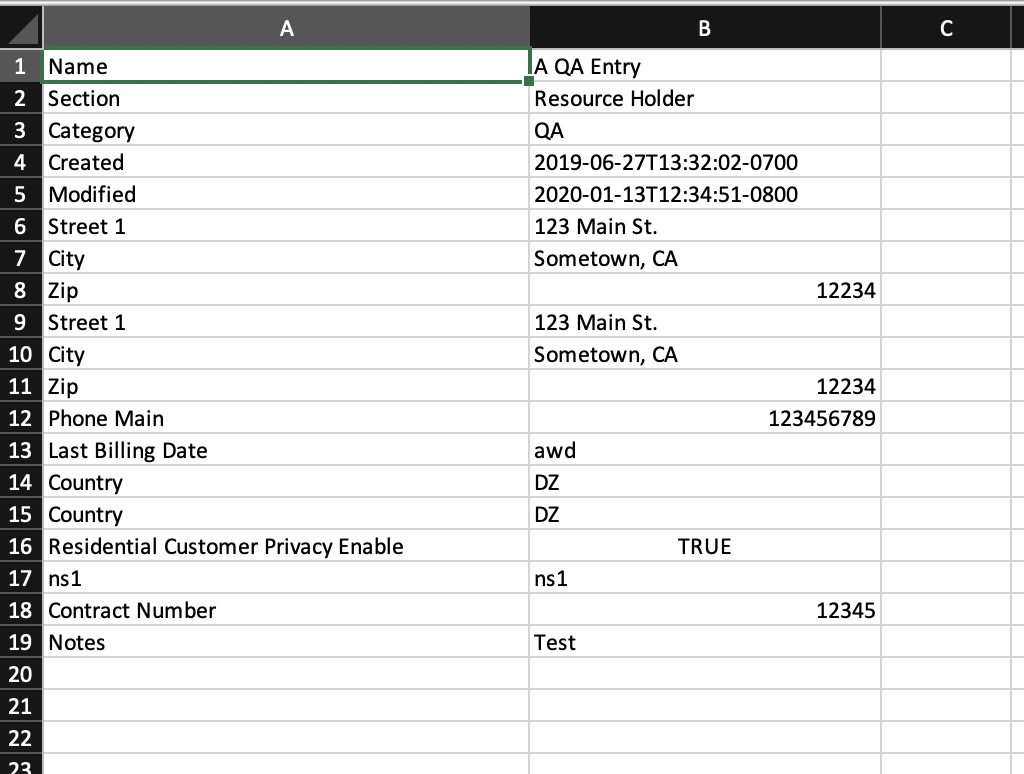
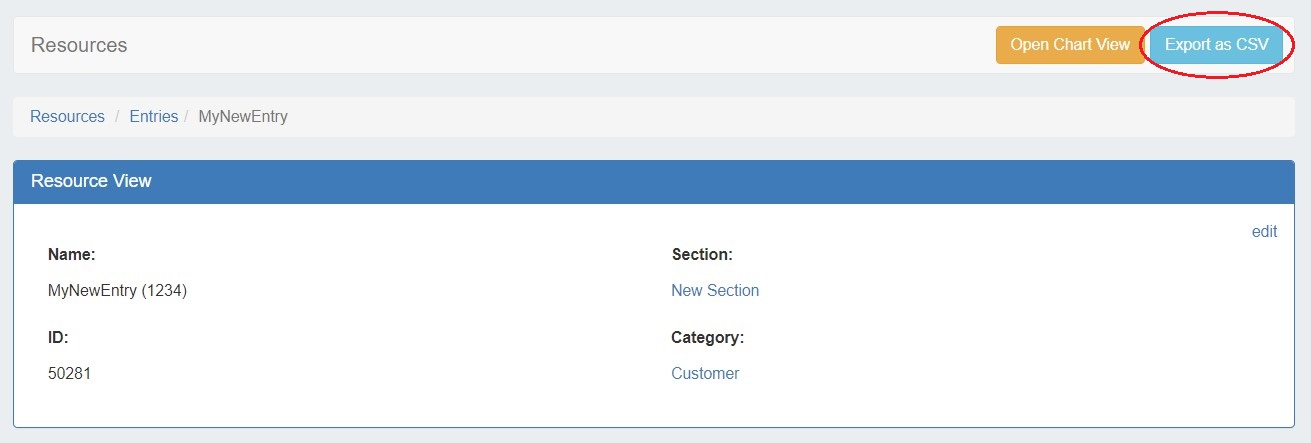
Resource entry pages have an "Export As CSV" button, which generates a .csv file containing the resource's basic field information.
To export the resource, click the "Export as CSV" button in the header on the resource entry page.
Export As CSV Details
The downloaded .csv file will contain the fields containing values from the Resource View, Contact Info, Tech Info, and Resource Field Gadget(s), with the field name in the first column, and the field values in the second column.