
The Contacts List displays existing contacts and provides options to import new contacts. You can create new contacts manually, or import contacts from RIR. Contacts may then be assigned to resources through the Contacts Gadget.
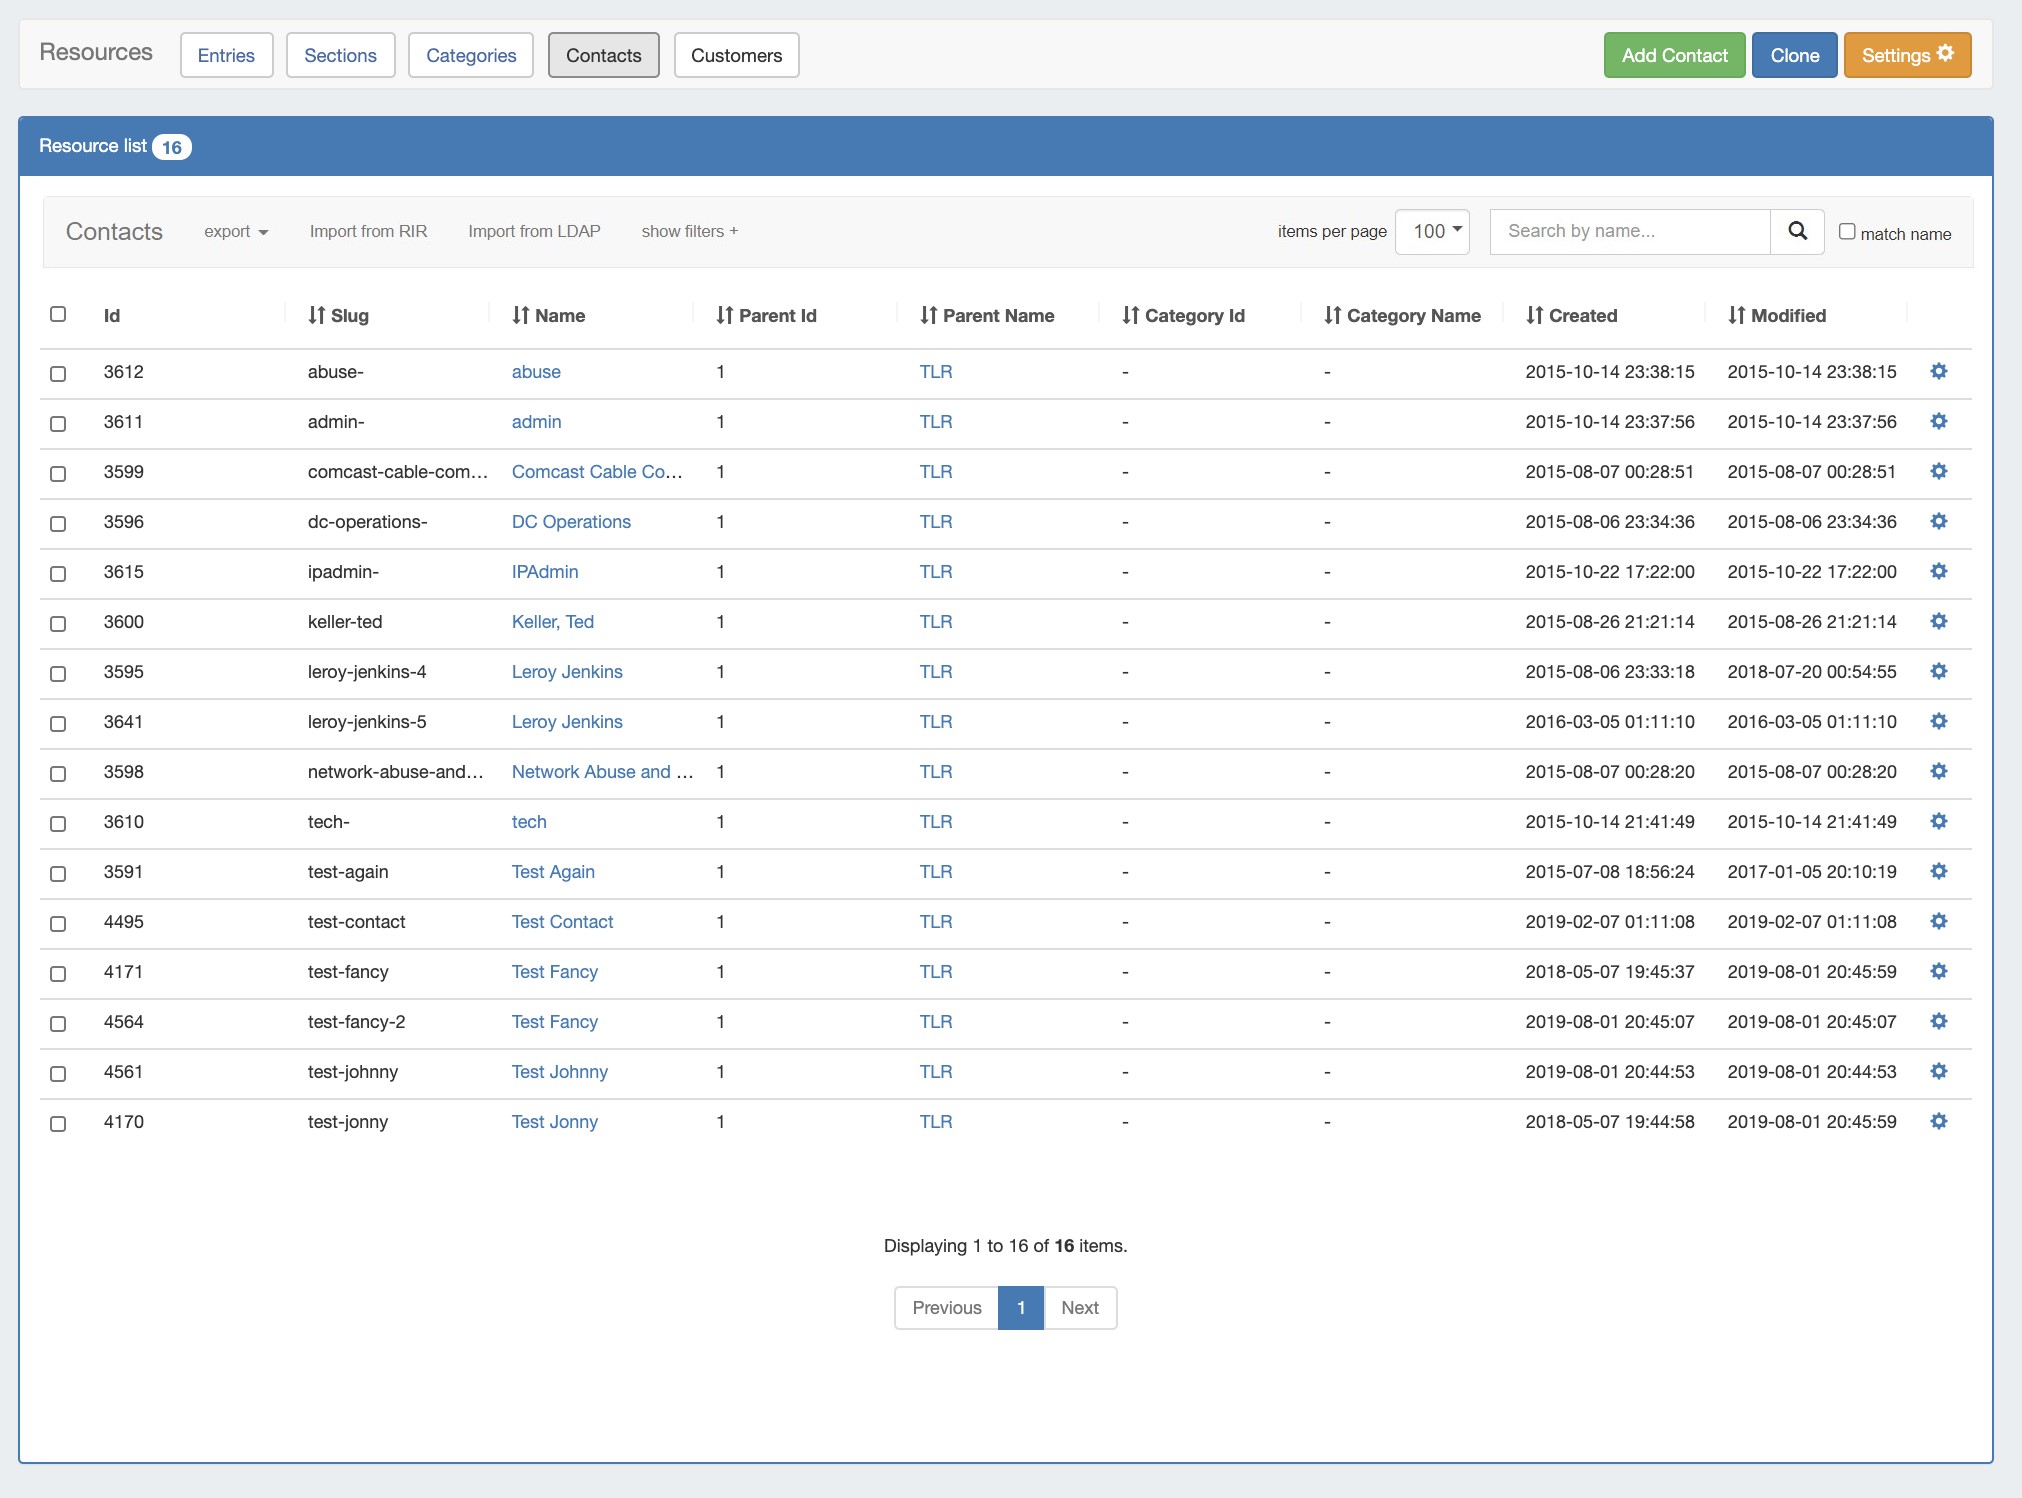
View the Contacts List by clicking "Contacts" from the Resource Tab, or from the Resource Tab dropdown menu, under "Contacts".
Working with Contacts
View Contact Details
To view the contact details, click on the contact's name in the Resource Contact List. You will be taken to the contact details page.
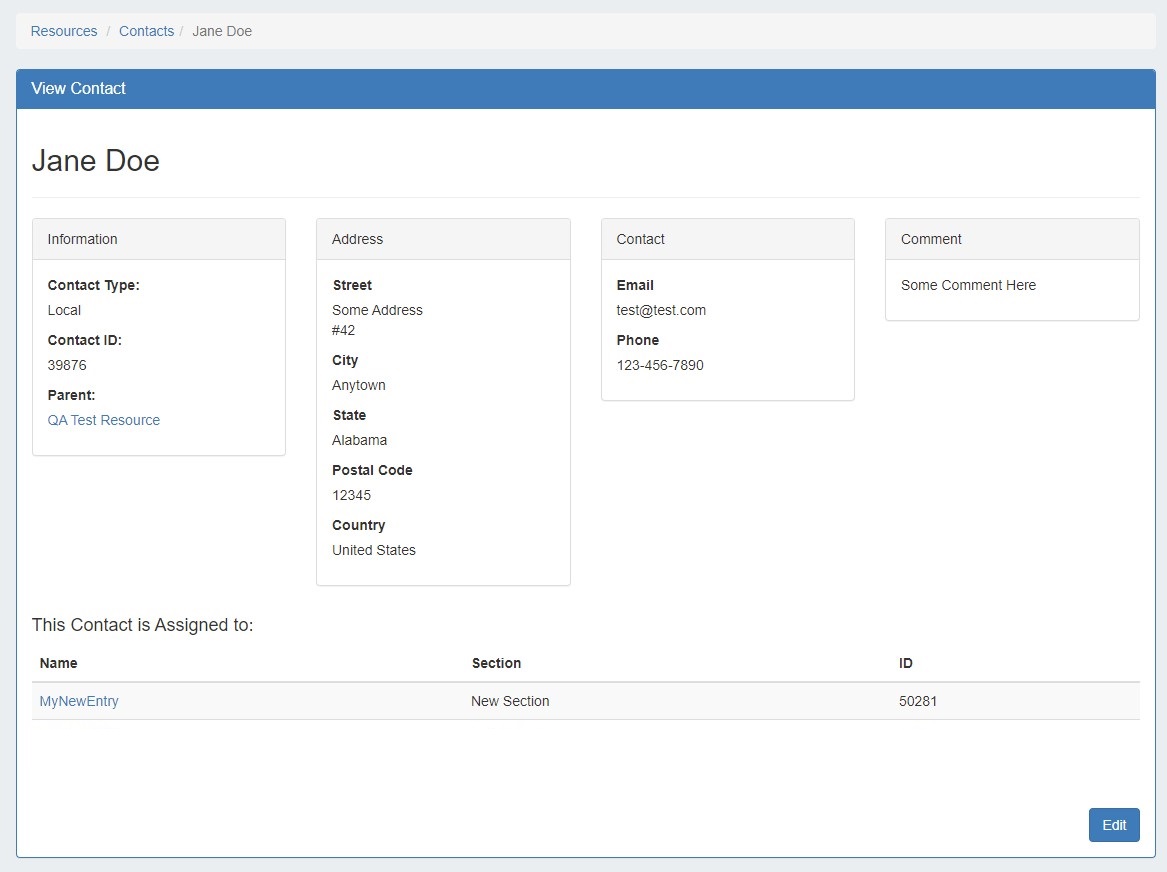
A local contact will have modules shown for Address, Email/Phone, and Comments, as well as a list of any resources that contact is assigned to via the Contacts Gadget. You may edit or delete a Local contact by clicking the "Edit" button at the bottom of the page.
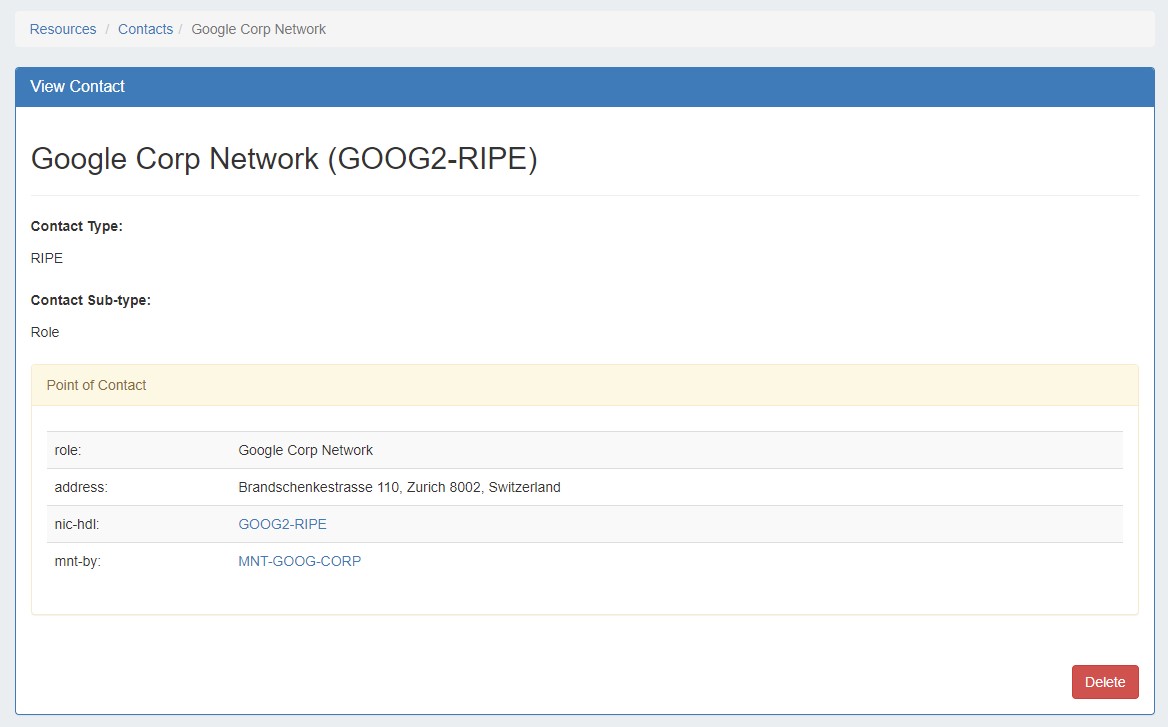
A contact imported from a RIR will have its details shown as determined by the imported RIR module - this data is not editable in ProVision.
Create New Contact
Create a new local contact manually:
-
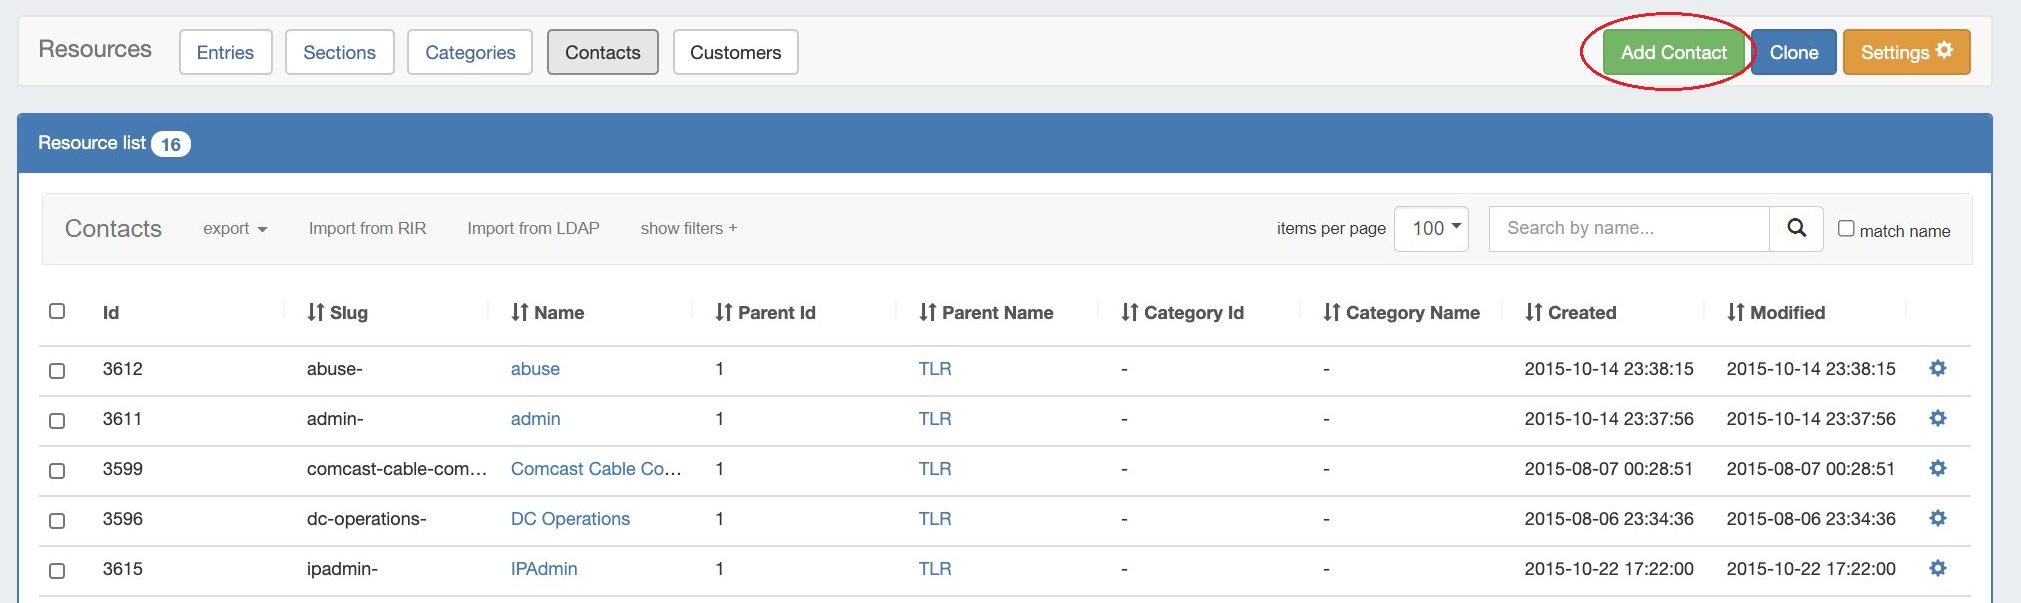
Click on "Add Contact" from the Contacts List View.
-
Mark whether the contact should be a global contact or limited only to the Parent Resource.
-
To mark a contact as globally accessible in ProVision, select the “Global Contact” checkbox in the top right corner. This ensures the contact is viewable and able to be added to any resource in ProVision.
-
If unchecked, the contact scope will be limited to only the users and functions with access to the selected Parent resource.
-
-
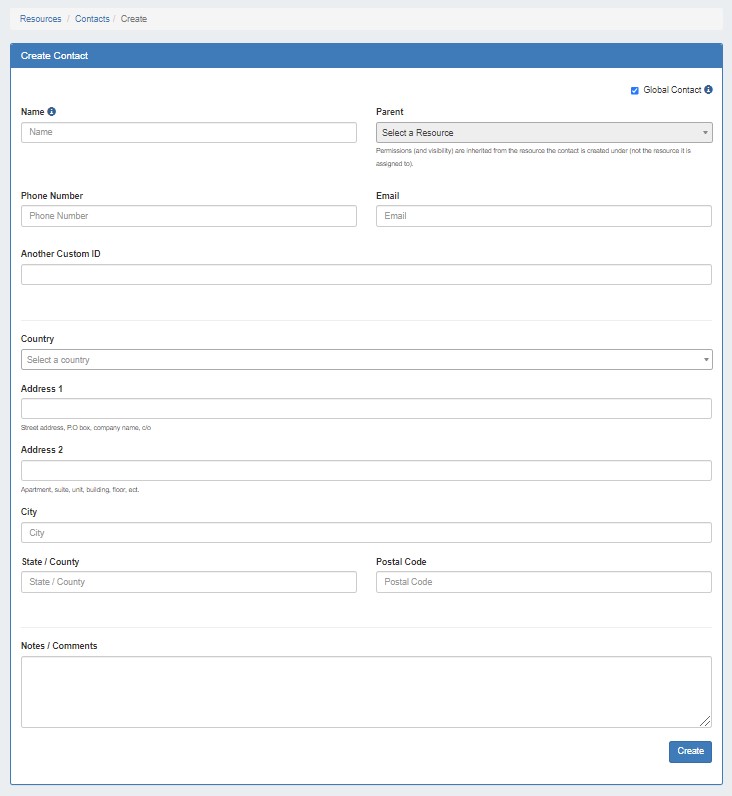
Fill in the contact's information for: Name, Parent Resource (if desired), Phone, Custom ID, Email, Address, and any Notes/Comments.
-
When done filling out the information fields, hit the "Create" button to save your contact.
Parent Field
The parent field relates the contact to a resource's permissions structure, only allowing users with permissions for that resource to view and assign the affiliated contact(s). To allow the contact to be viewed globally, check the "Global Contact" box above the Parent Field.
Import Contact from RIR
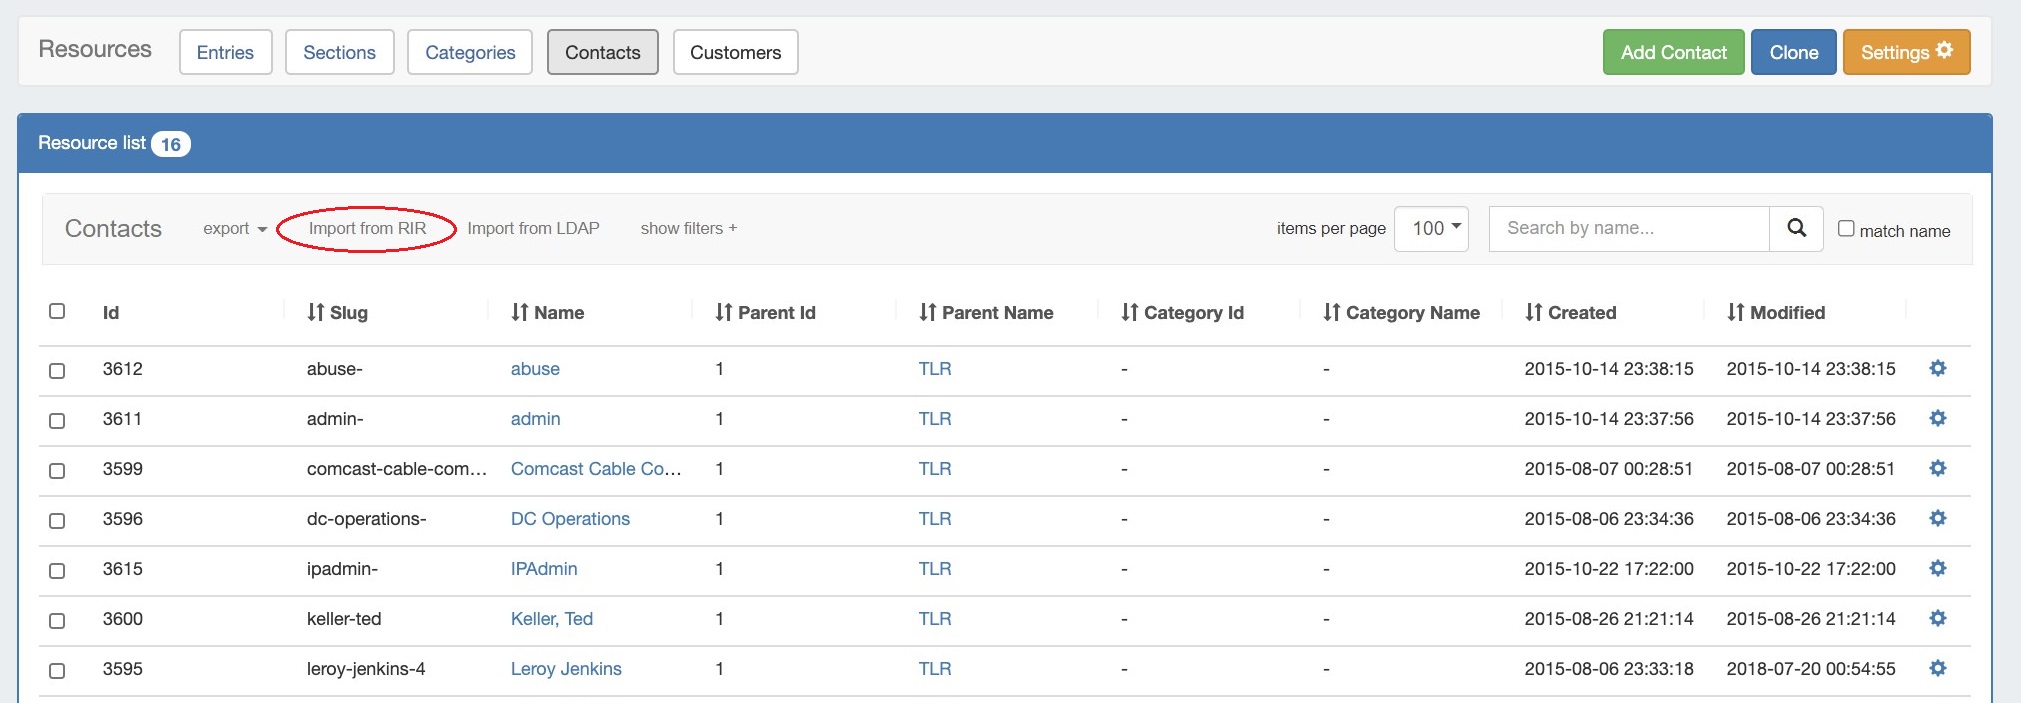
To import a contact from ARIN or RIPE, click the "Import from RIR" button from the contacts page.
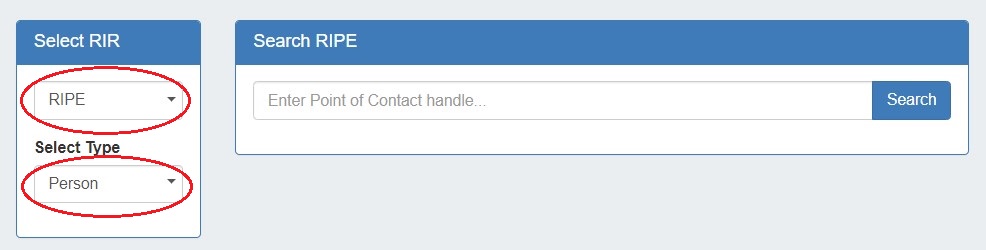
Step 1: Select RIR / Type
1) Select RIR / Type
Once on the the Import from RIR page, on the left hand side of the page select the RIR from which you wish to import - ARIN or RIPE.

If you select RIPE, you will also be prompted to choose whether you are importing a "Person" or "Role".
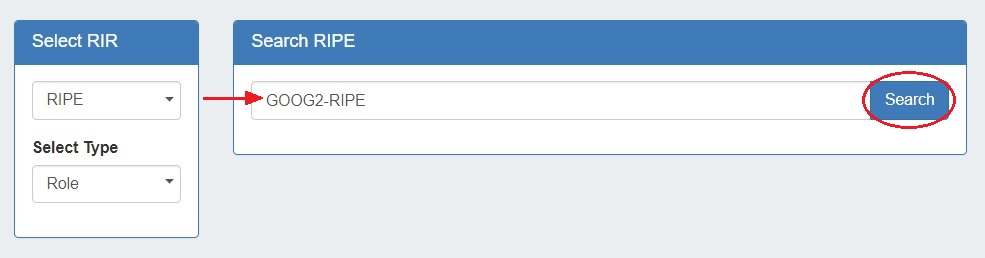
Step 2: Enter Point of Contact
2) Enter Point of Contact Handle
After selecting the RIR / Type (if applicable), enter the ARIN or RIPE Point of Contact Handle for the contact you are importing, then click "Search".
Point of Contact Handle is the only search term that is valid. Attempting to search by name or keyword is not valid, and will return an error.
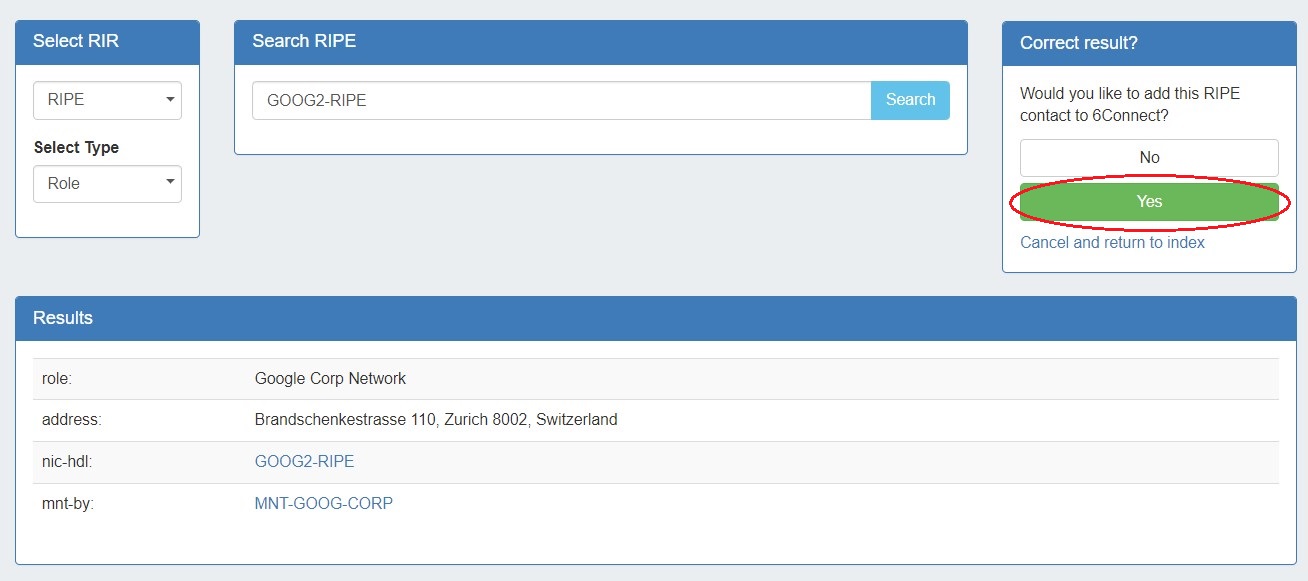
Step 3: Confirm and Add
3) Confirm and Add
If the search is successful, the found contact information will display in the results panel at the bottom of the screen.
Click the "Yes" button on the right hand side of the page under "Would you like to add this RIPE contact?" to confirm and add the result.
Click "No" to decline adding, or to cancel and return to the index.
Import Contact from LDAP
Before you Begin
Ensure that the LDAP authentication server is enabled and setup in Admin Settings - LDAP Authentication prior to import.
Import LDAP Contact requires that an LDAP authentication server is enabled and setup in Admin Settings, and that access credentials are provided prior to import.
To import a contact from LDAP from the Contacts List:
Import LDAP Contact from Contacts List
-
From the Resource Tab → Contacts List, click the "Import from LDAP" button at the top of the list.

-
Use the search box to find an LDAP contact and click the "Import Contact" button.

Import LDAP Contact from the Contacts Gadget
To import a contact from the Contacts Gadget under a resource:
-
Go to the Resource Entry page for the desired resource and view the Contacts Gadget. Tip: If the Contacts Gadget does not display for the resource, verify that the Contacts Gadget is added to the applicable Section.
-
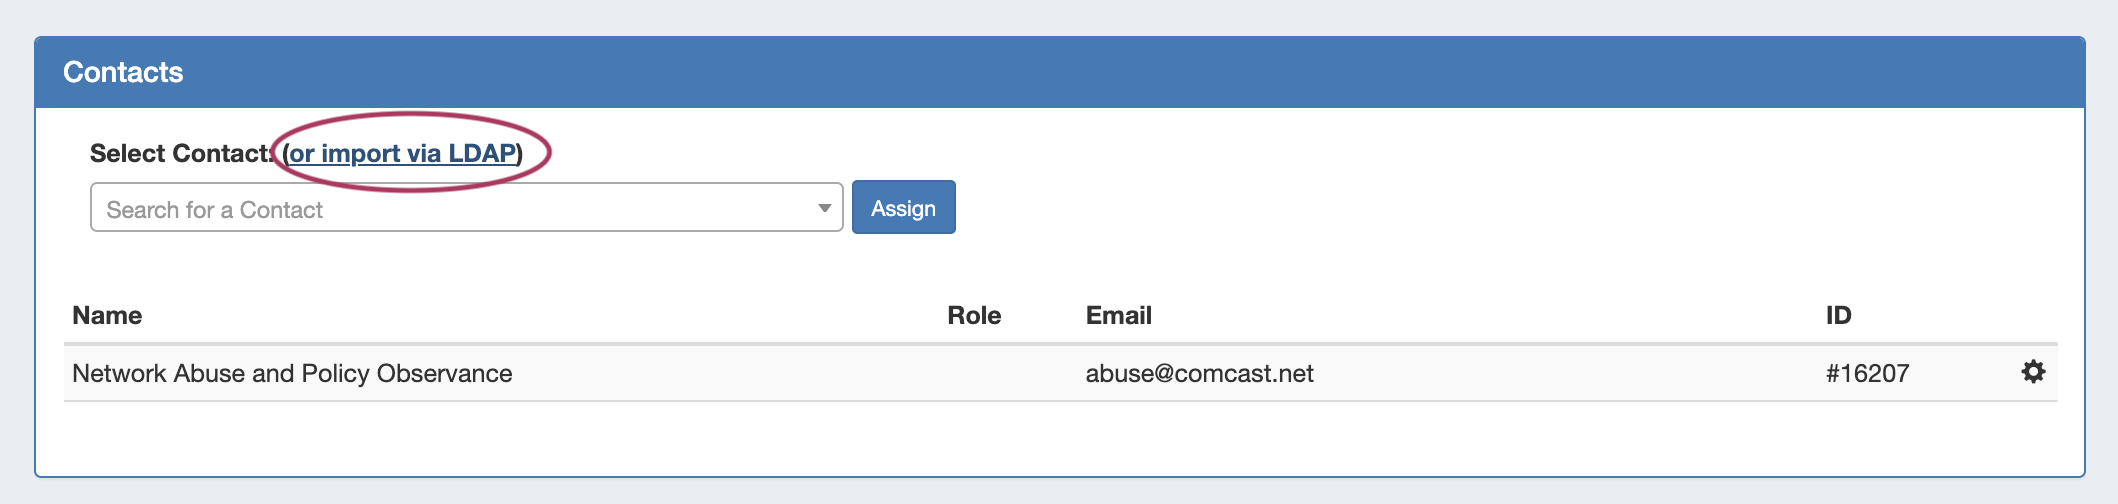
In the Contacts Gadget, click “Import via LDAP” next to Select Contact. The Select LDAP Contact field appears.
-
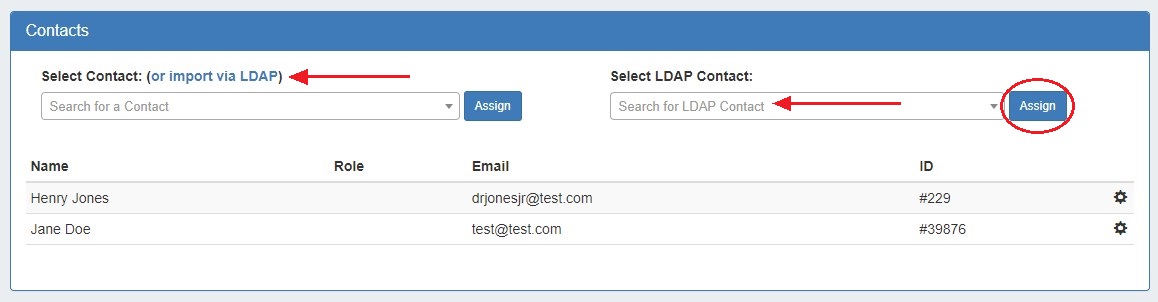
Select the LDAP contact from the search tool and click “Assign”. Once imported, the LDAP contact will be available to add to the Contacts Gadget and will show in the Users List.
The contact will be imported and assigned to the resource. If a contact has already been imported, a notification will appear and the gadget will assign the contact to the resource, but the contact will not be imported again.
Note: The Scheduler task "LDAP - Sync LDAP Contacts" must be manually created at the desired interval in order to automatically update the LDAP user based on the server information. This task updates imported LDAP users with any changes made on the LDAP server.
Edit or Delete Contact
To Edit or Delete a local contact, click on the contact's name in the contact list to go to its detail view page. From there, click "Edit".
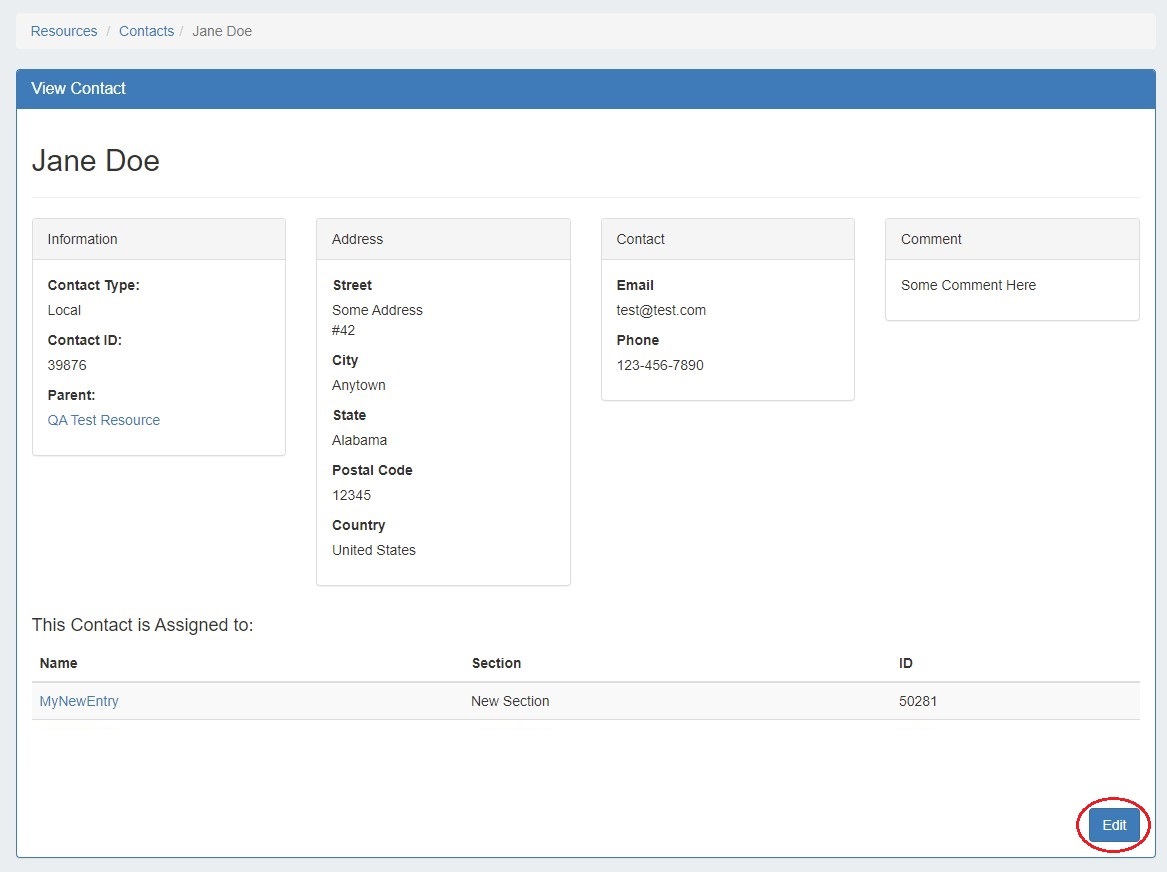
This will take you to the detail information page, where you may edit fields as desired.
When done editing, hit "Save" to save your changes, or "View" to cancel without saving and view the contacts list.
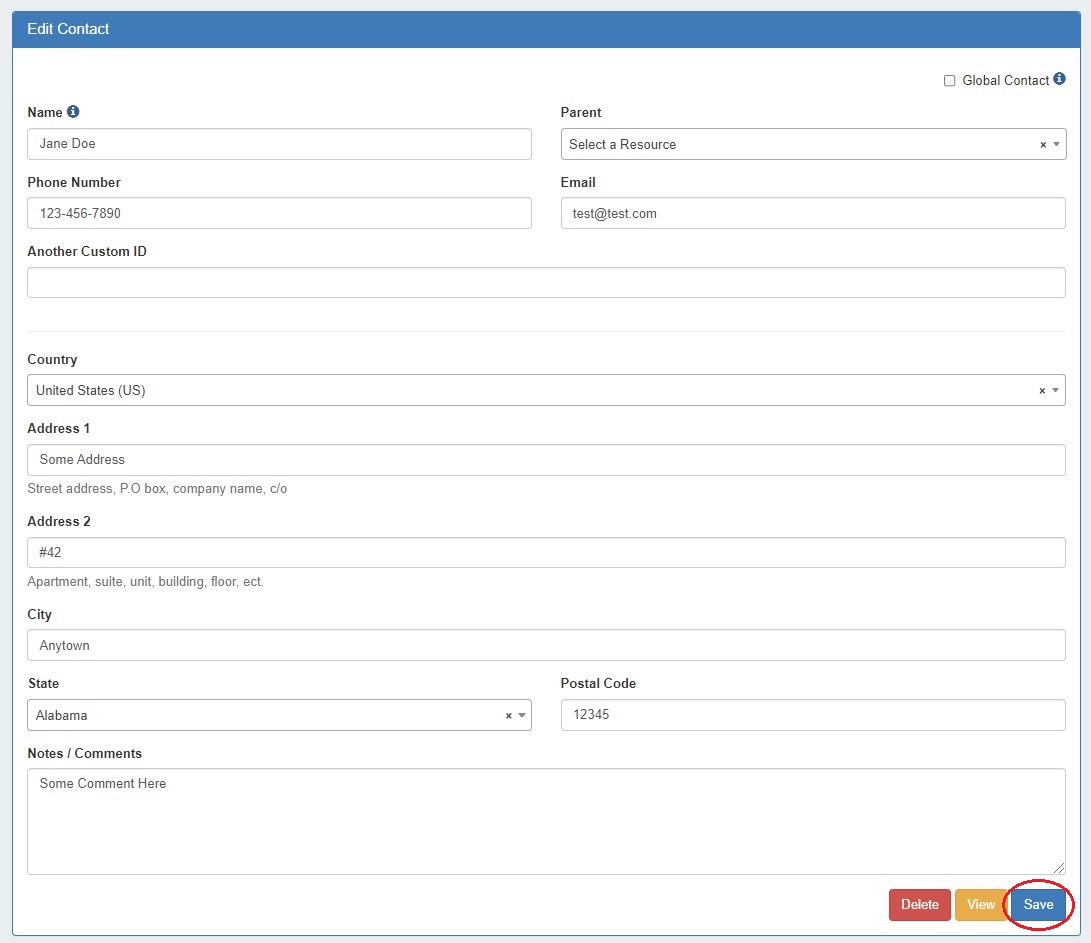
To delete the local contact, click the "Delete" button while in the contact details page.
To delete a non-editable imported contact, click the "Delete" button located at the bottom of the view contact page.
Working with the Contacts Gadget
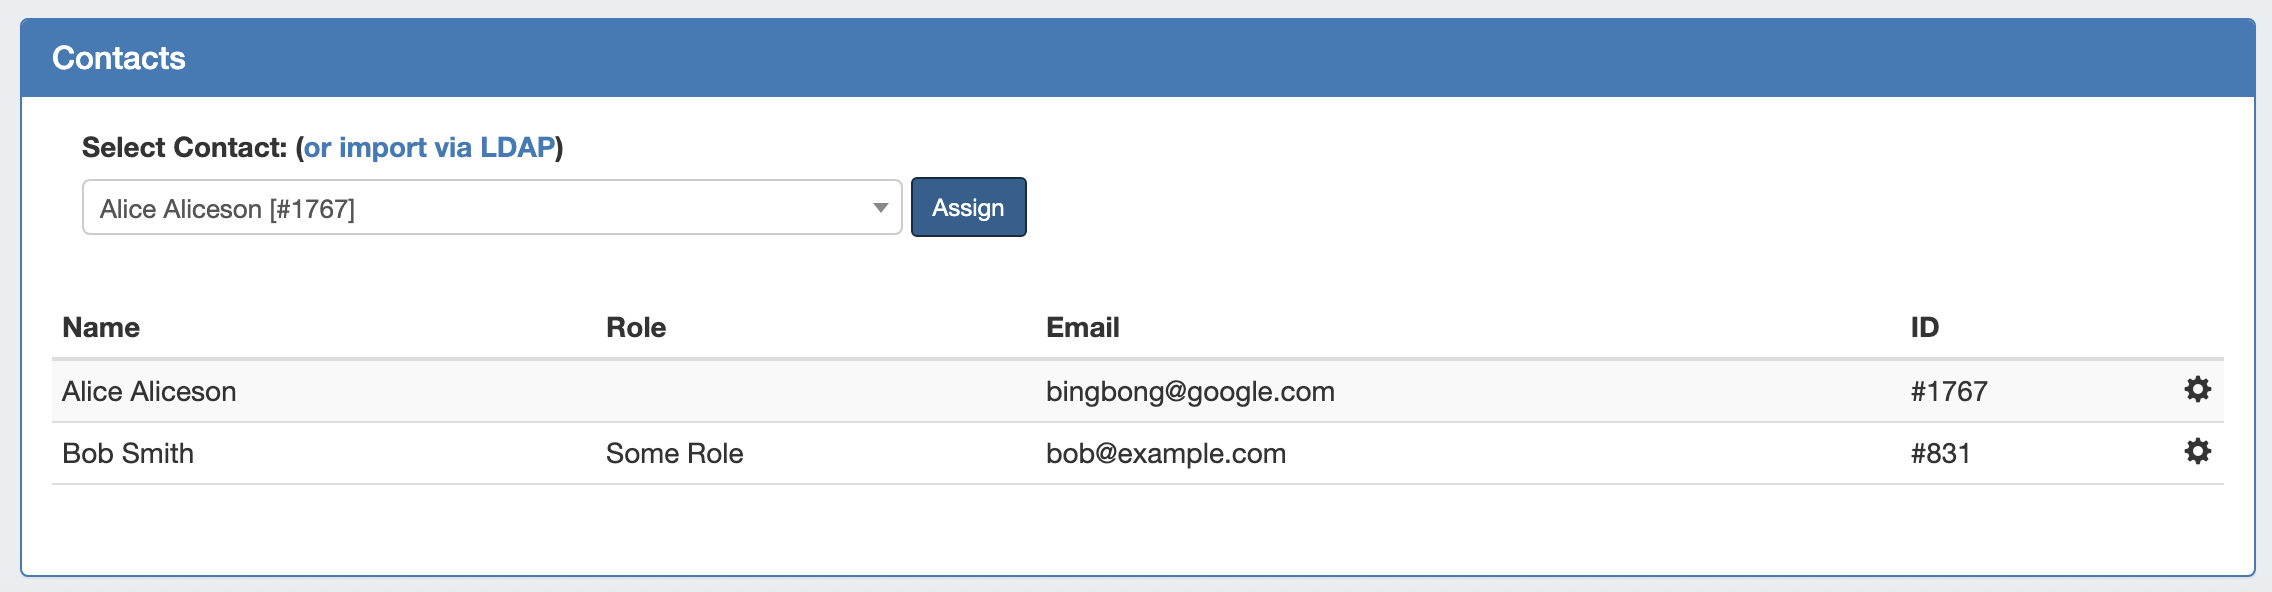
The Contacts Gadget. may be used to assign a contact to a resource, view contact details, and to set contact roles. To add a gadget to a Resource's Entry page, see Customizing Sections and Gadgets.
Once the Contacts Gadget has been added to the desired section, go to the resource entry page for the resource you wish to assign the contact to, and navigate to the Contacts Gadget.
Managing Contacts in the Contacts Gadget
Assign the Contact to a Resource
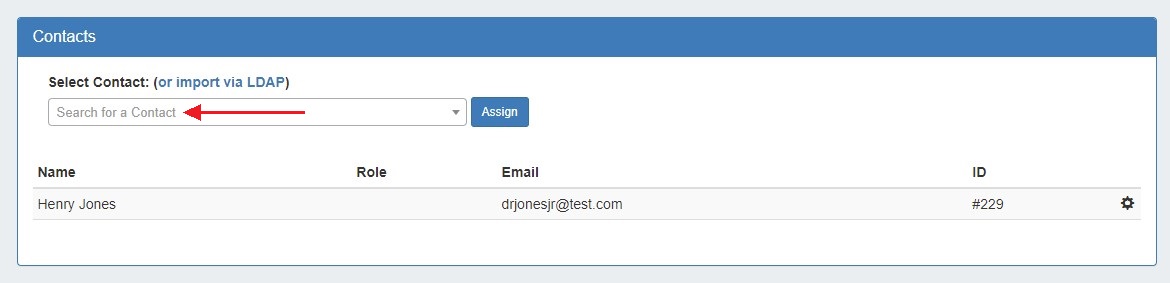
In the Contacts Gadget, search for a contact by typing the first few letters of the contact name in the search box, then click on the desired contact.
Then hit "Assign".
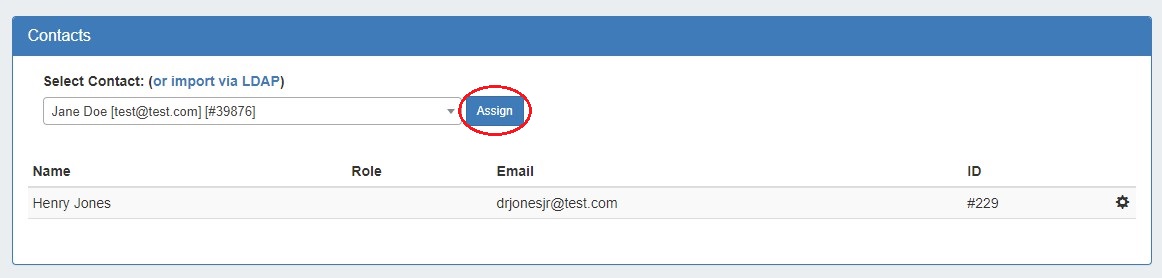
The contact will show in the list below.
View Contact Details
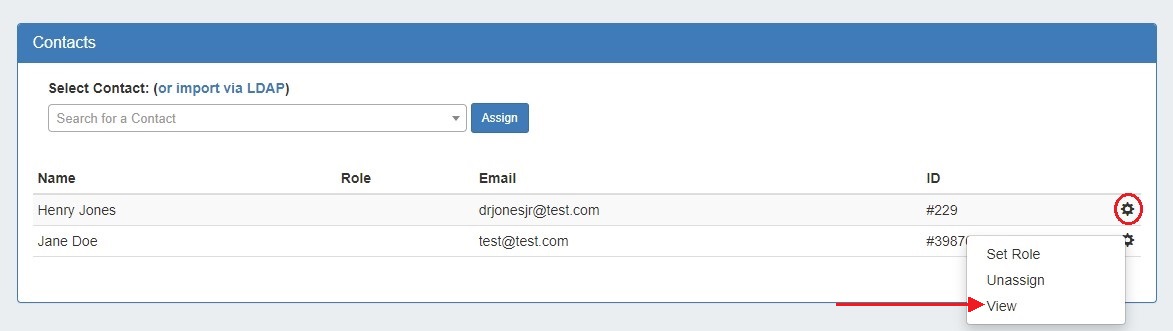
To view the contact's details, click the Action Menu, then select "View". You will be redirected to the contact's detail page.
Unassign a Contact
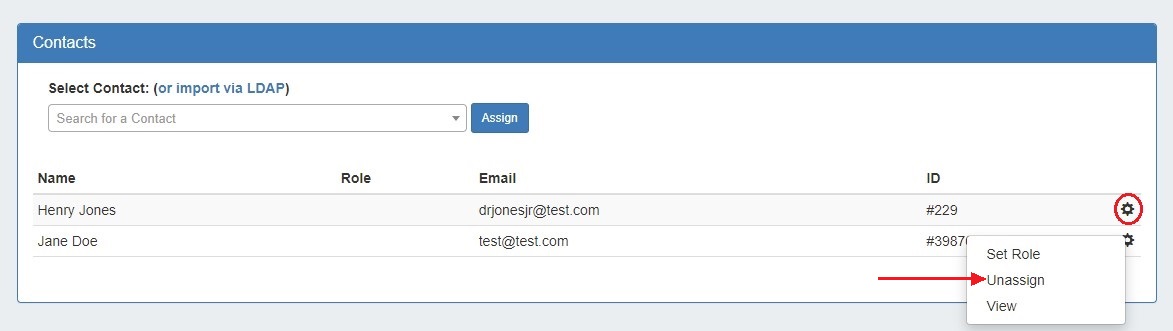
To unassign a contact from a resource, in the Contacts Gadget click the Action Menu, then select "Unassign".
Import LDAP Contact from the Contacts Gadget
To import a contact from the Contacts Gadget under a resource:
-
Go to the Resource Entry page for the desired resource and view the Contacts Gadget. Tip: If the Contacts Gadget does not display for the resource, verify that the Contacts Gadget is added to the applicable Section.
-
In the Contacts Gadget, click “Import via LDAP” next to Select Contact. The Select LDAP Contact field appears.
-
Select the LDAP contact from the search tool and click “Assign”. Once imported, the LDAP contact will be available to add to the Contacts Gadget and will show in the Users List.
The contact will be imported and assigned to the resource. If a contact has already been imported, a notification will appear and the gadget will assign the contact to the resource, but the contact will not be imported again.
Note: The Scheduler task "LDAP - Sync LDAP Contacts" must be manually created at the desired interval in order to automatically update the LDAP user based on the server information. This task updates imported LDAP users with any changes made on the LDAP server.
Manage Contact Roles
Contact roles allow for a role or title to be associated with a contact - such as Tech POC, Admin POC, Relationship Manager, etc. Once created, contact roles are available for all contacts in ProVision.
Create a Contact Role
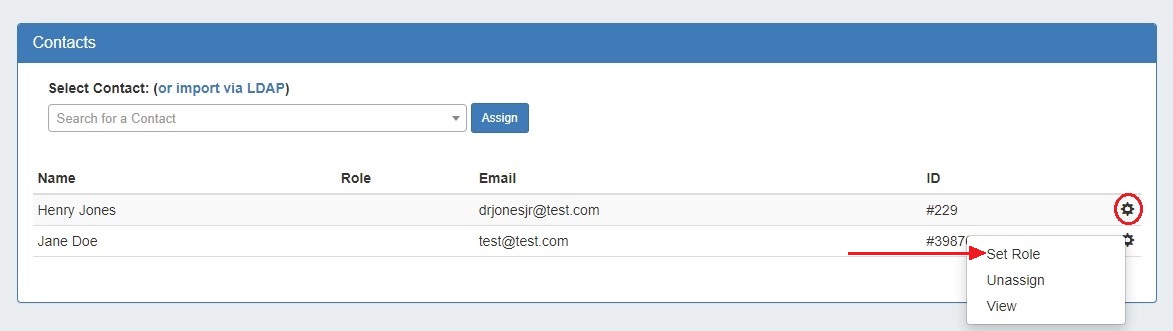
Once a contact has been assigned, you can create and set a role for the contact by clicking on the Action Menu (gear icon).
Then, select "Set Role".
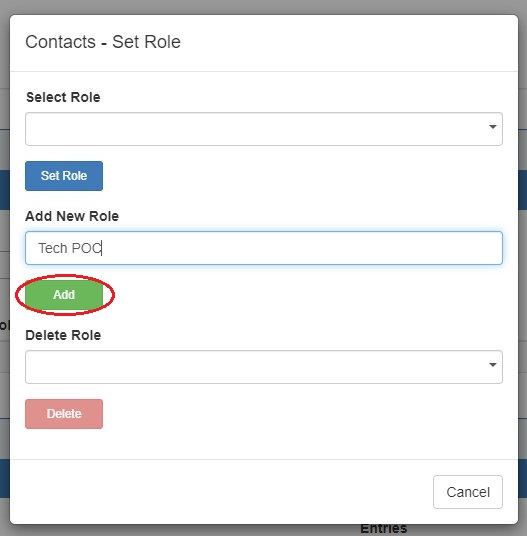
Under the "Add New Role" section, type in the desired tole name and click the "Add" button.
Assign Contact Role
Once a contact has been assigned, you can set a role for the contact by clicking on the Action Menu (gear icon).
Then, select "Set Role".
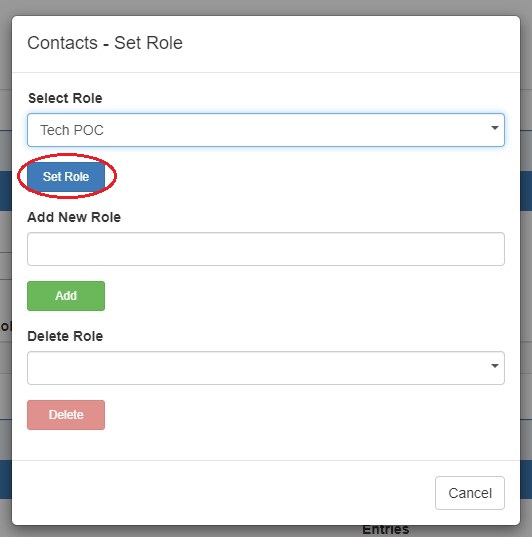
Under the "Select Role" section, choose the desired role from the dropdown list, and click the "Set Role" button.
Delete a Contact Role from the Roles List
Deleting a contact role deletes the role type for all contacts throughout ProVision.
Access the contact roles list by selecting "Set Role" for a contact.
Under the "Delete Role" section, choose the desired role from the dropdown list, and click the "Delete" button.
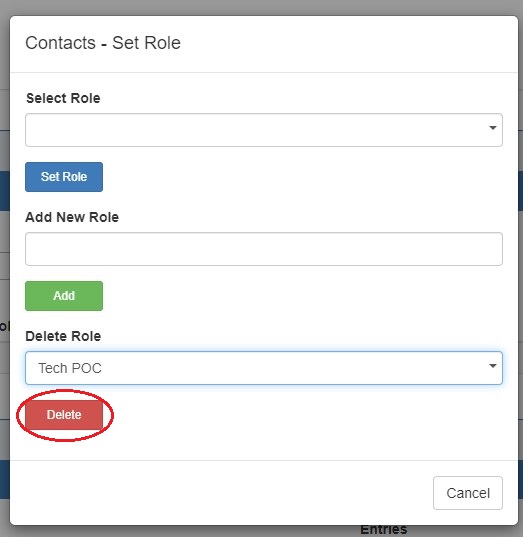
This removes the role from the "Select Role" list.