
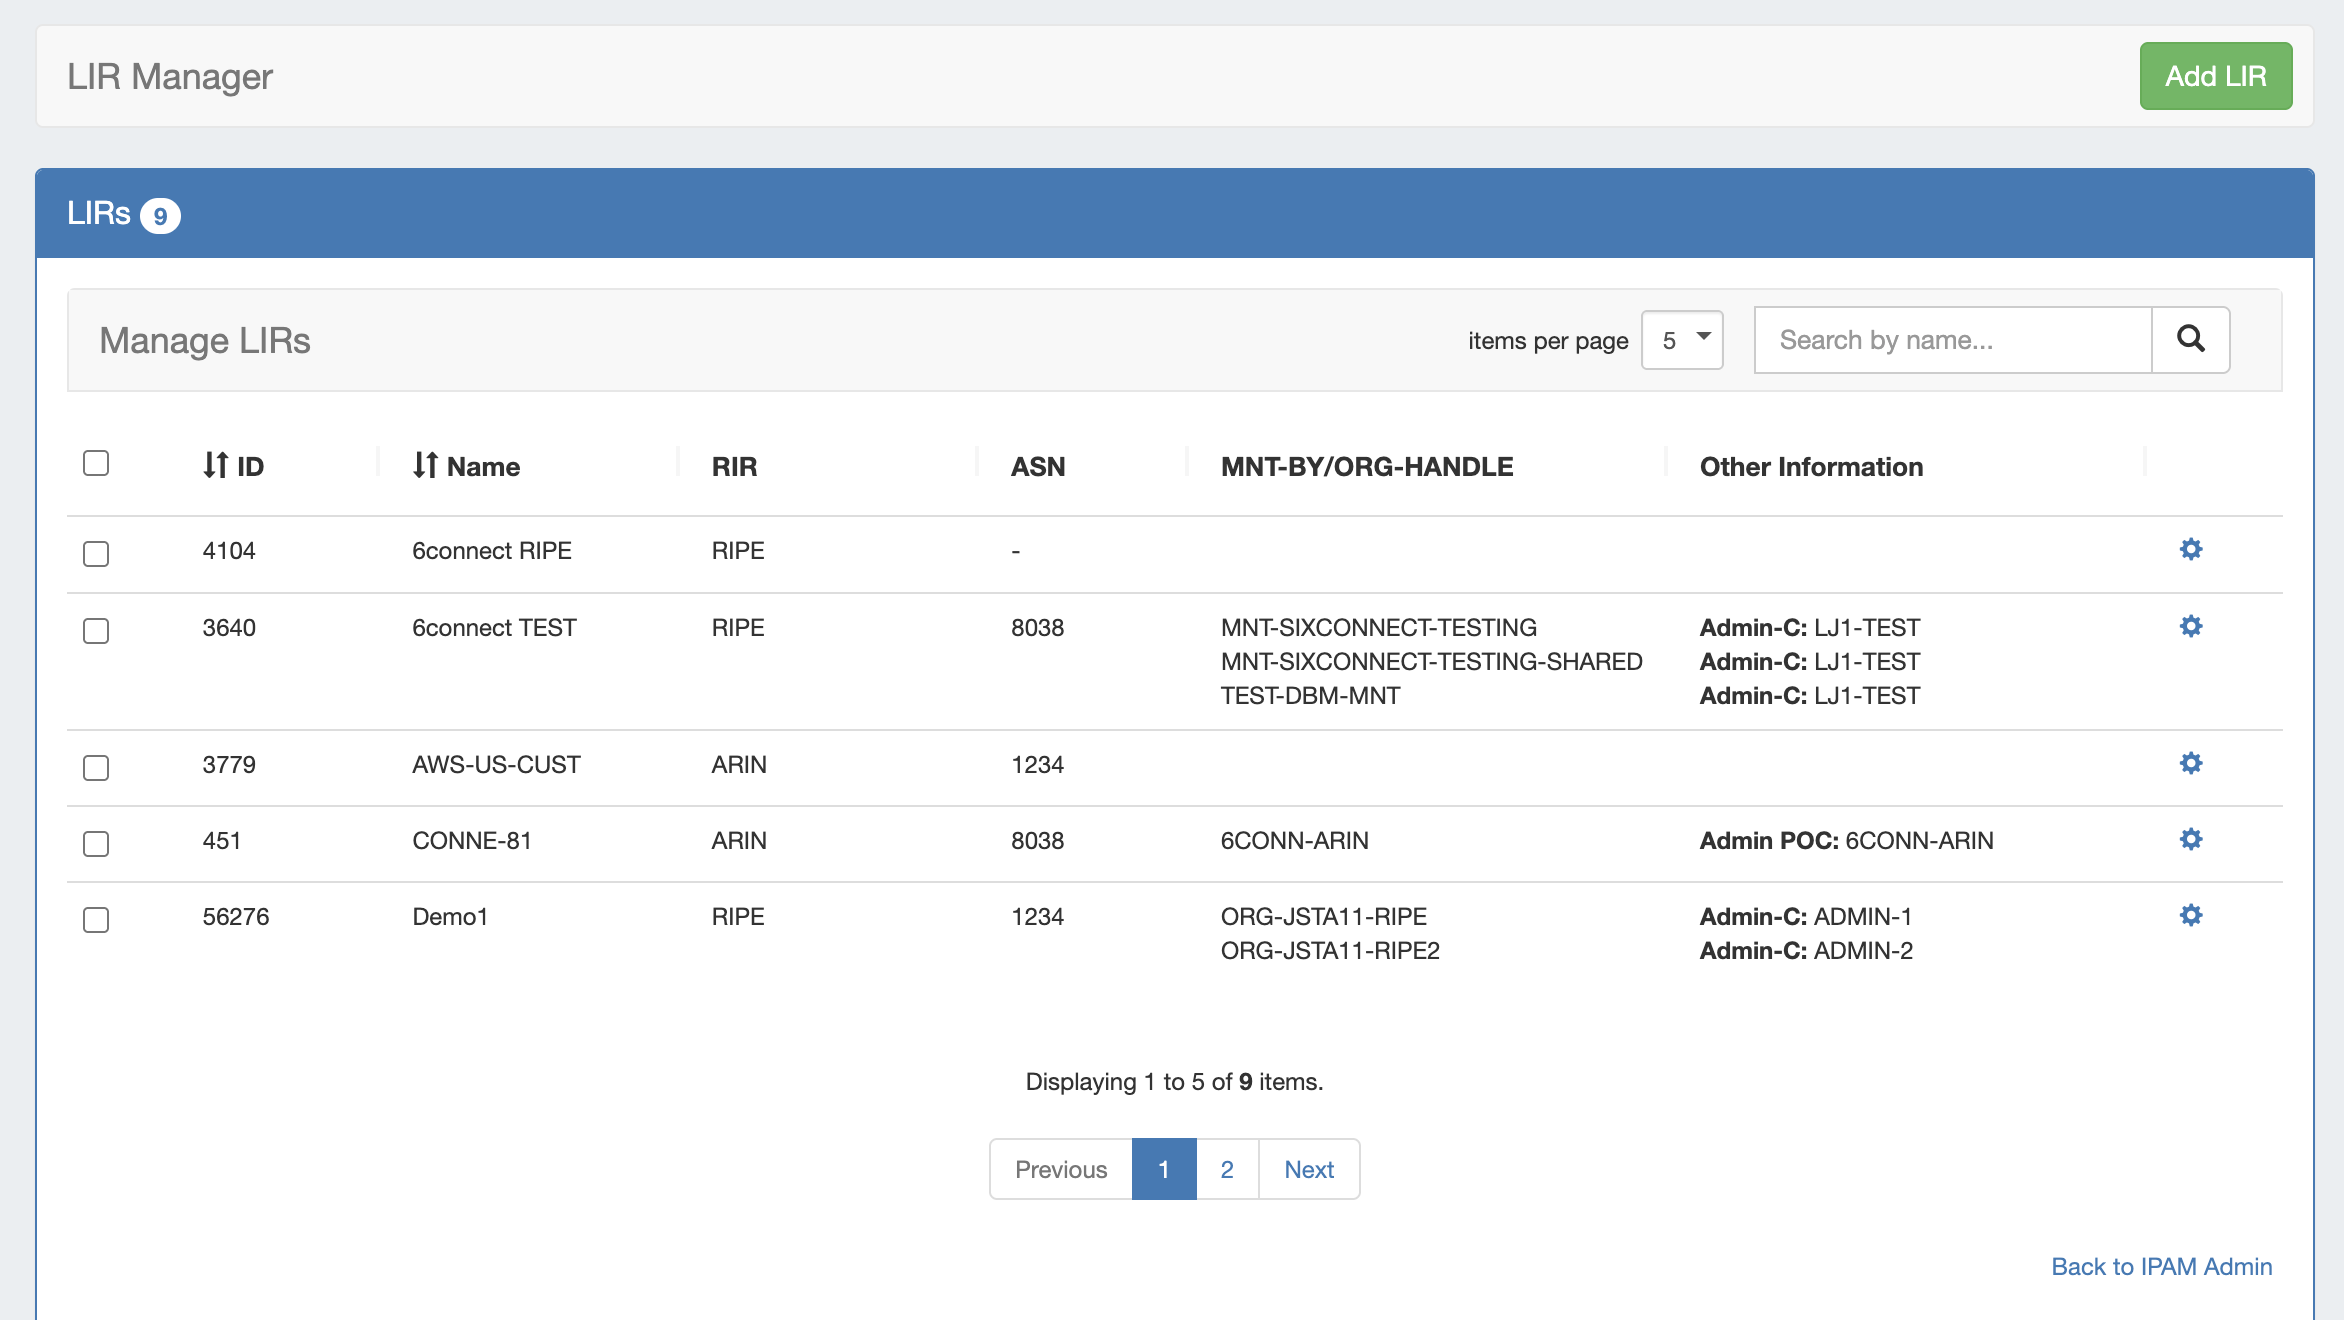
Setting up an ARIN LIR in ProVision has three steps:
-
Add the LIR information to ProVision via the LIR Manager
-
Assign a block in ProVision (via IPAM Manage or IPAM Gadget)
-
Update SWIP information for the block (IPAM → RIR Integration)
For a detailed walkthrough, expand the areas below.
Walkthrough - ARIN LIR Setup
Before you add a new LIR, be sure that you have your LIR / ARIN ORG information available:
-
LIR Name
-
ASN
-
ORG ID
-
POC information (Admin POC / Tech POC / Abuse POC)
-
NET Name Prefix
-
ARIN API Key
Once you have your information gathered, proceed with the following steps:
Step 1 - Add LIR to ProVision (LIR Manager)
Step 1 - Add LIR to ProVision (LIR Manager)
The LIR Manager is accessed from the Admin area of ProVision → IPAM Admin (dropdown menu) → Manage LIRs link.
Add a New LIR by clicking "Add LIR" at the top right of the LIR Manager page.
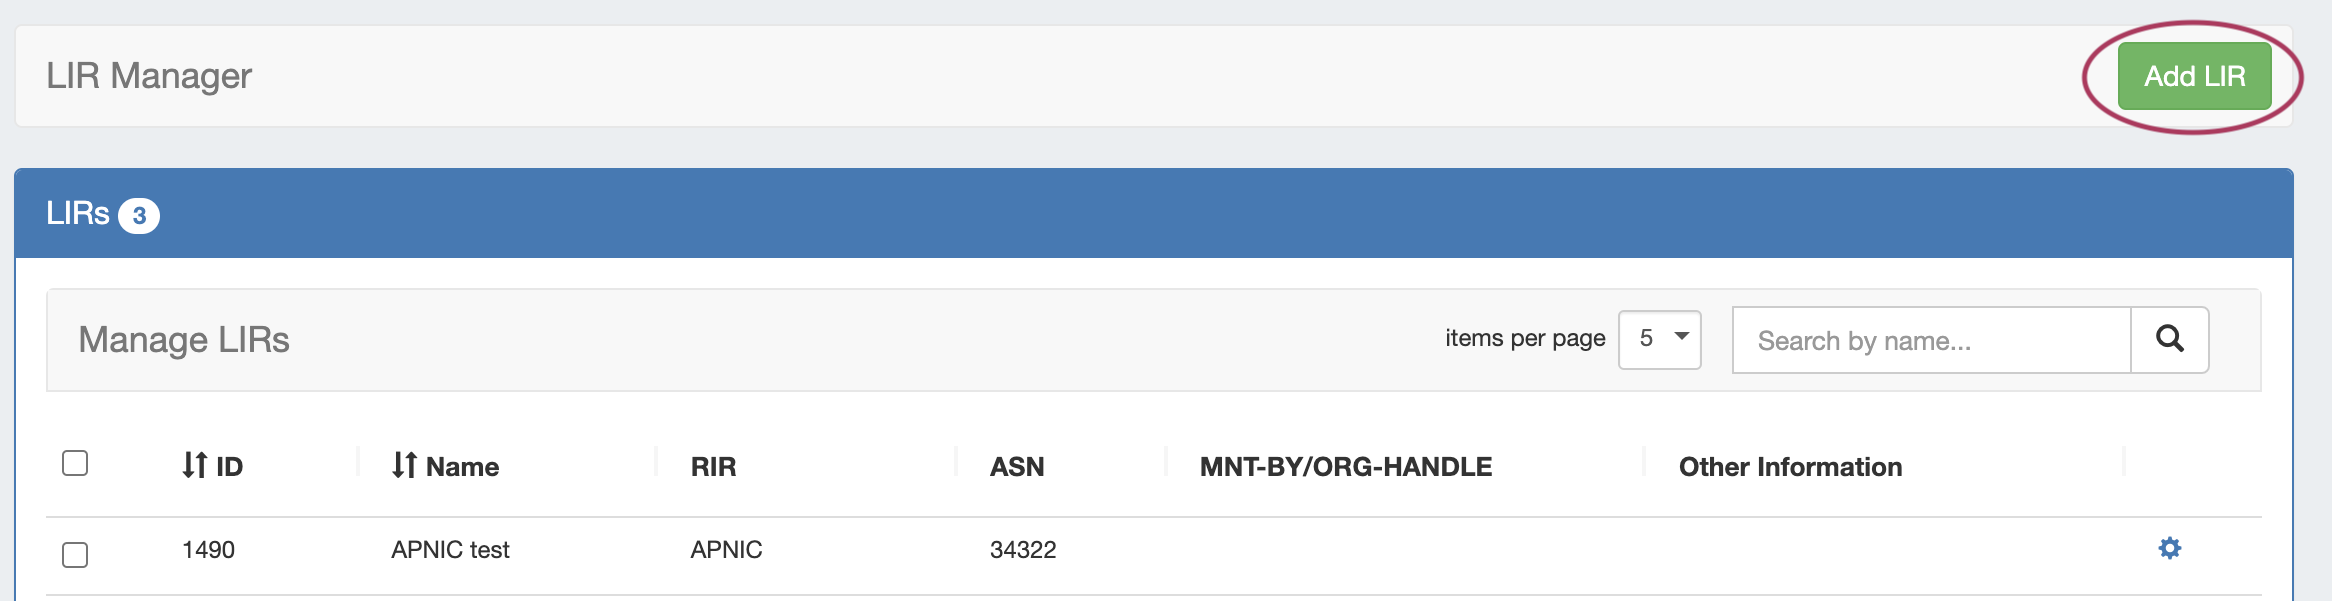
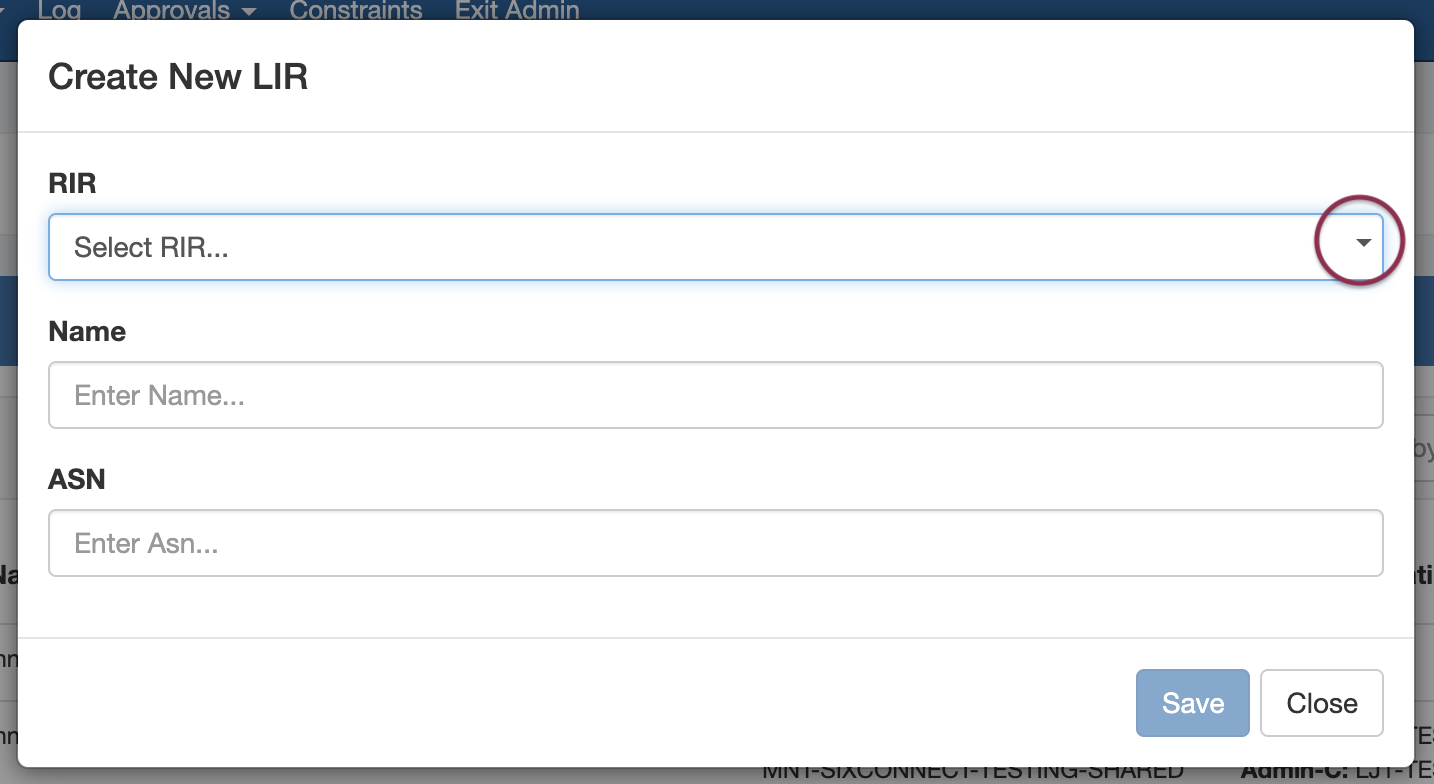
You will be prompted to the select the RIR:
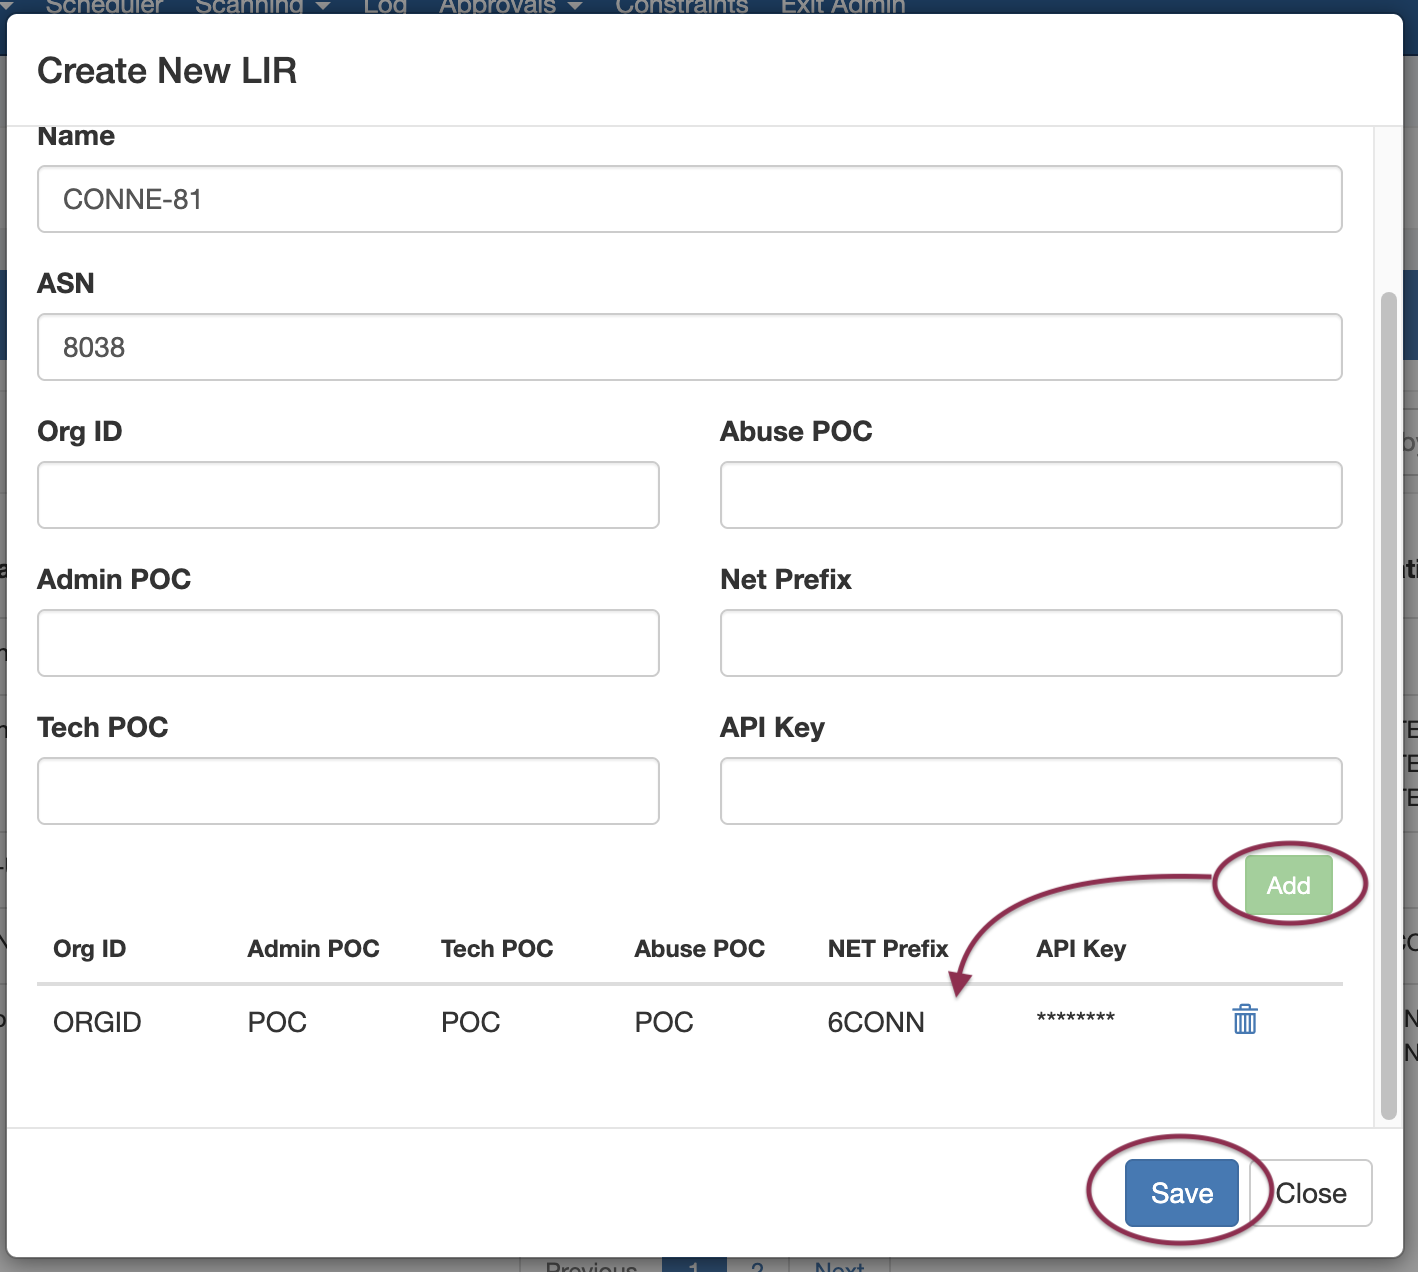
Select ARIN for the RIR, then add in the requisite Org and POC information:
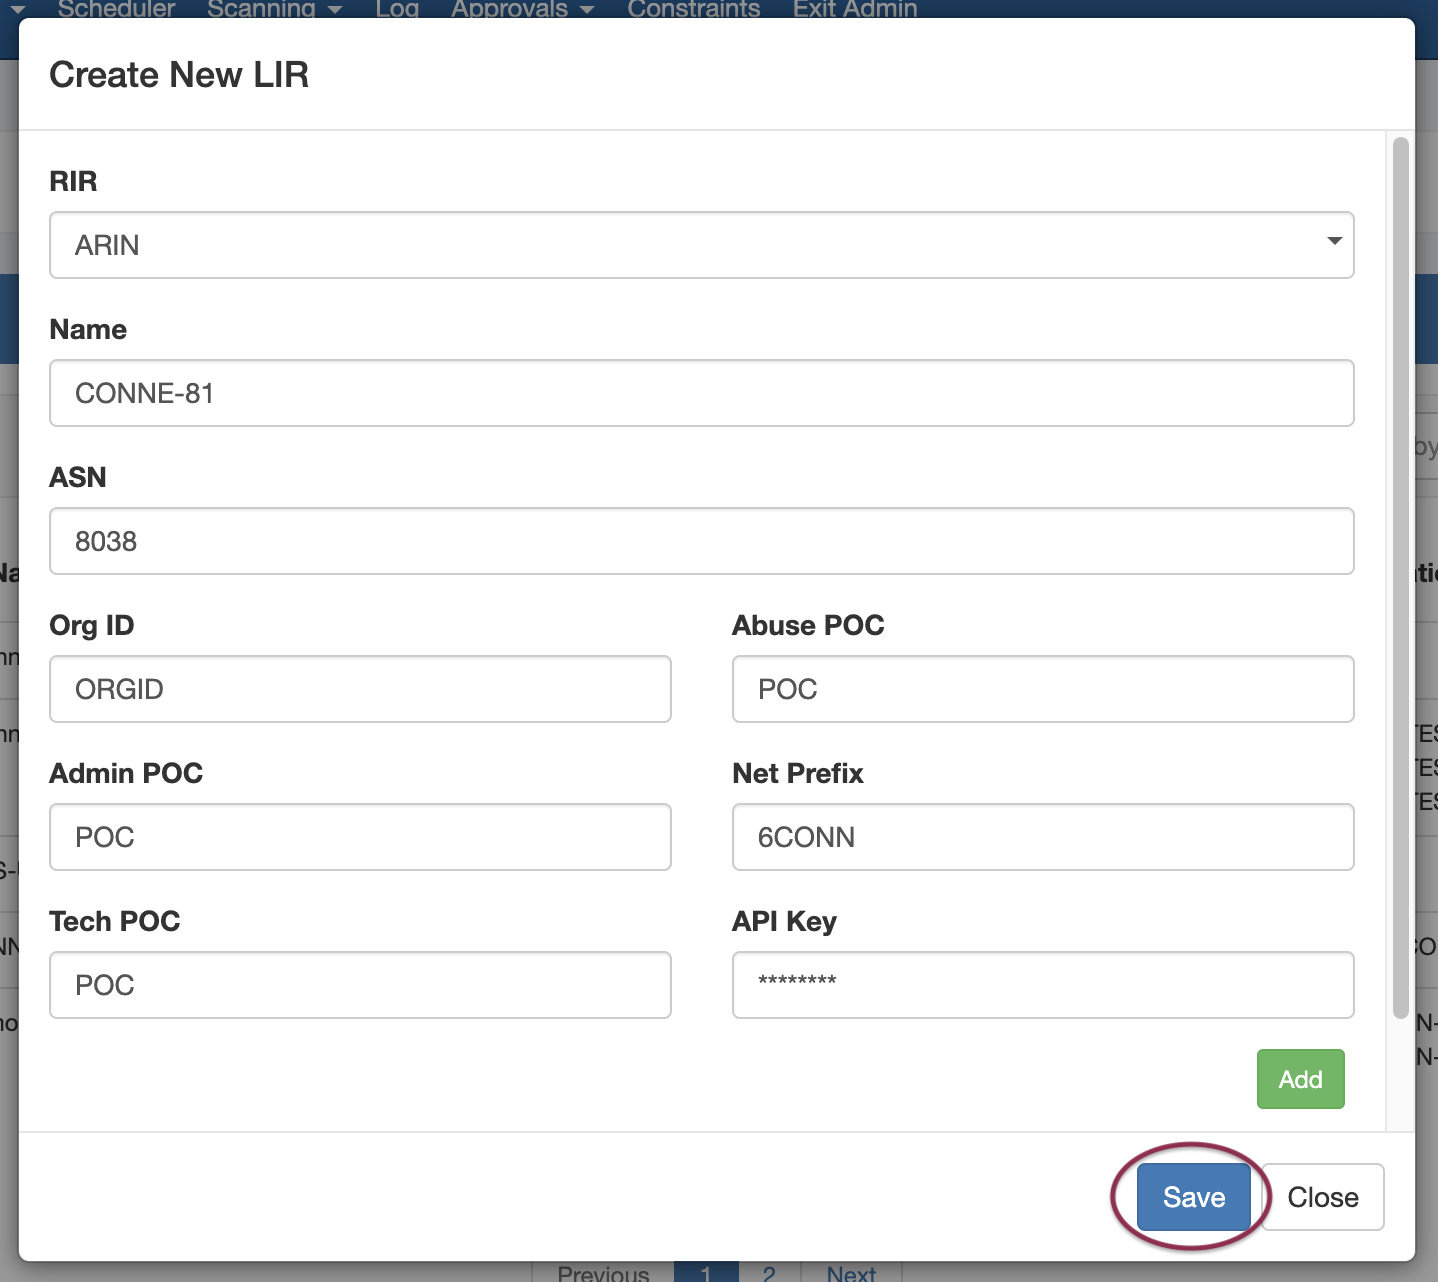
Be sure to click Save when done to save your changes.
Multiple Org Support
Note that we support multiple Org Handles per ARIN entry. Simply complete the Org Handle fields and click "Add" after each addition. A list will display at the bottom of the Add LIR dialog box.
Step 2 - Assign an IP block in ProVision (IPAM Manage / IPAM Gadget)
Step 2 - Assign an IP block in ProVision (IPAM Manage / IPAM Gadget)
Next, go to the IPAM Tab → IPAM Manage for an aggregate (or into the IPAM Gadget for a resource) to assign a block.
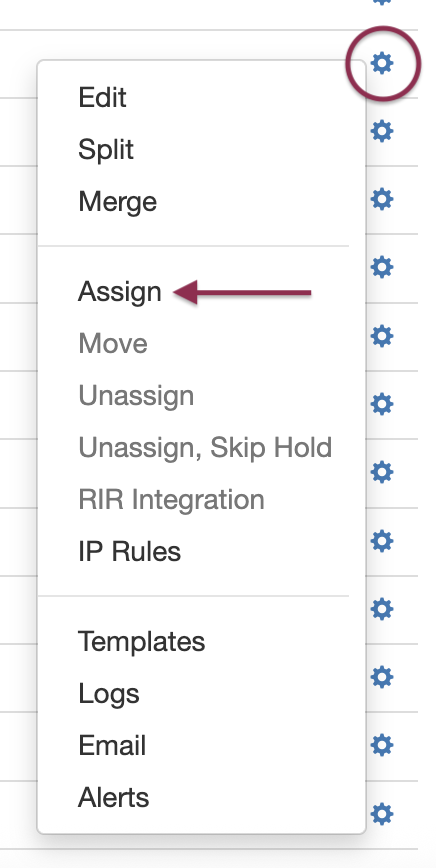
Right click on the Action Menu (gear icon) for the block, and select Assign. If prompted, select the resource to assign to the block. See Working with IP Blocks for additional detail.
Step 3 - Update SWIP information (RIR Integration)
Step 3 - Update SWIP information
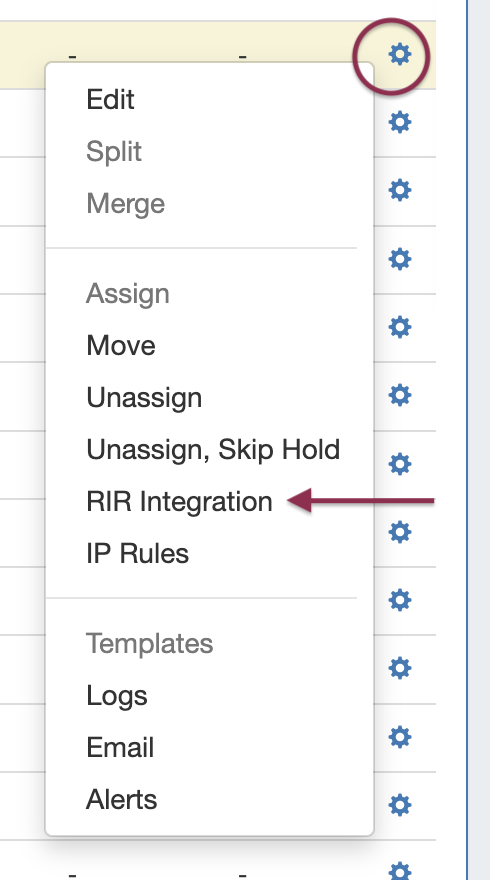
While still in IPAM Manage / IPAM Gadget, open the Action Menu for the for the block that you assigned in the prior step. Select RIR Integration from the menu.
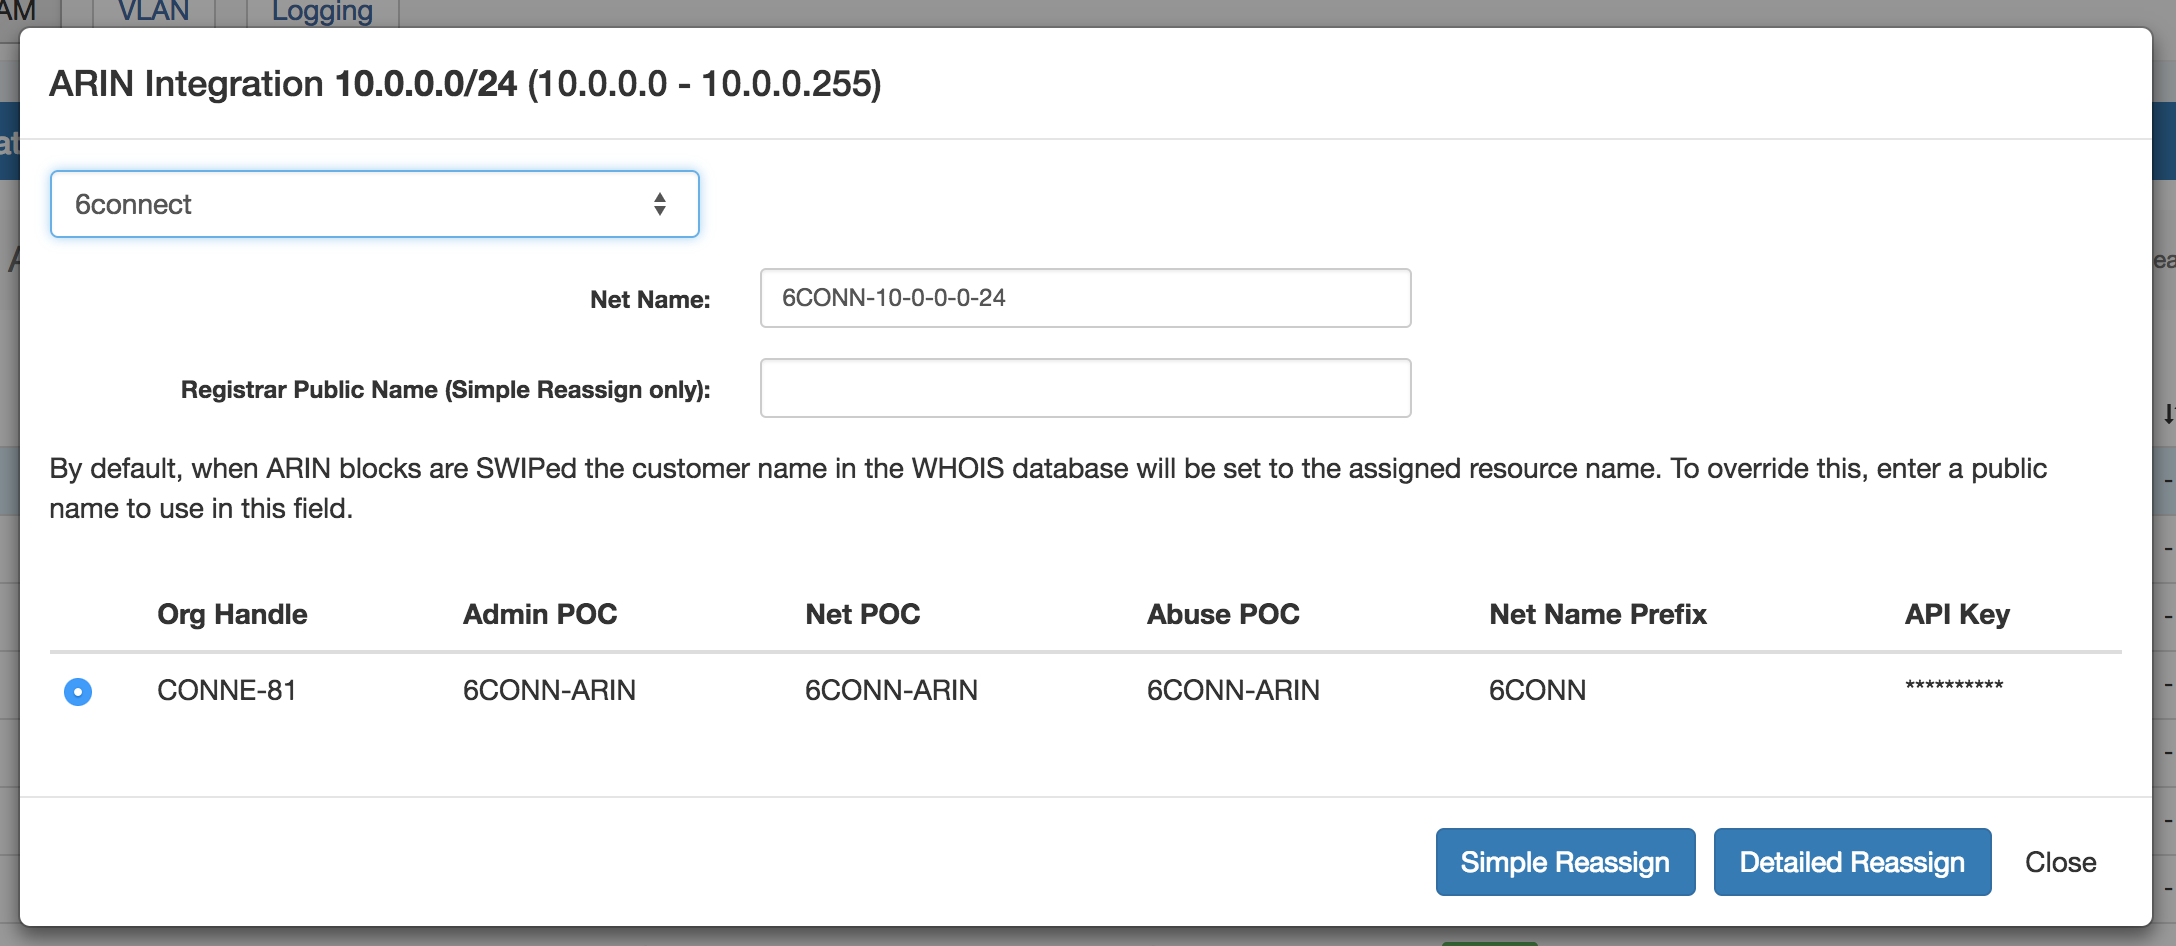
It will bring up an RIR Integration dialog, dependent on the selected RIR (ARIN example shown):
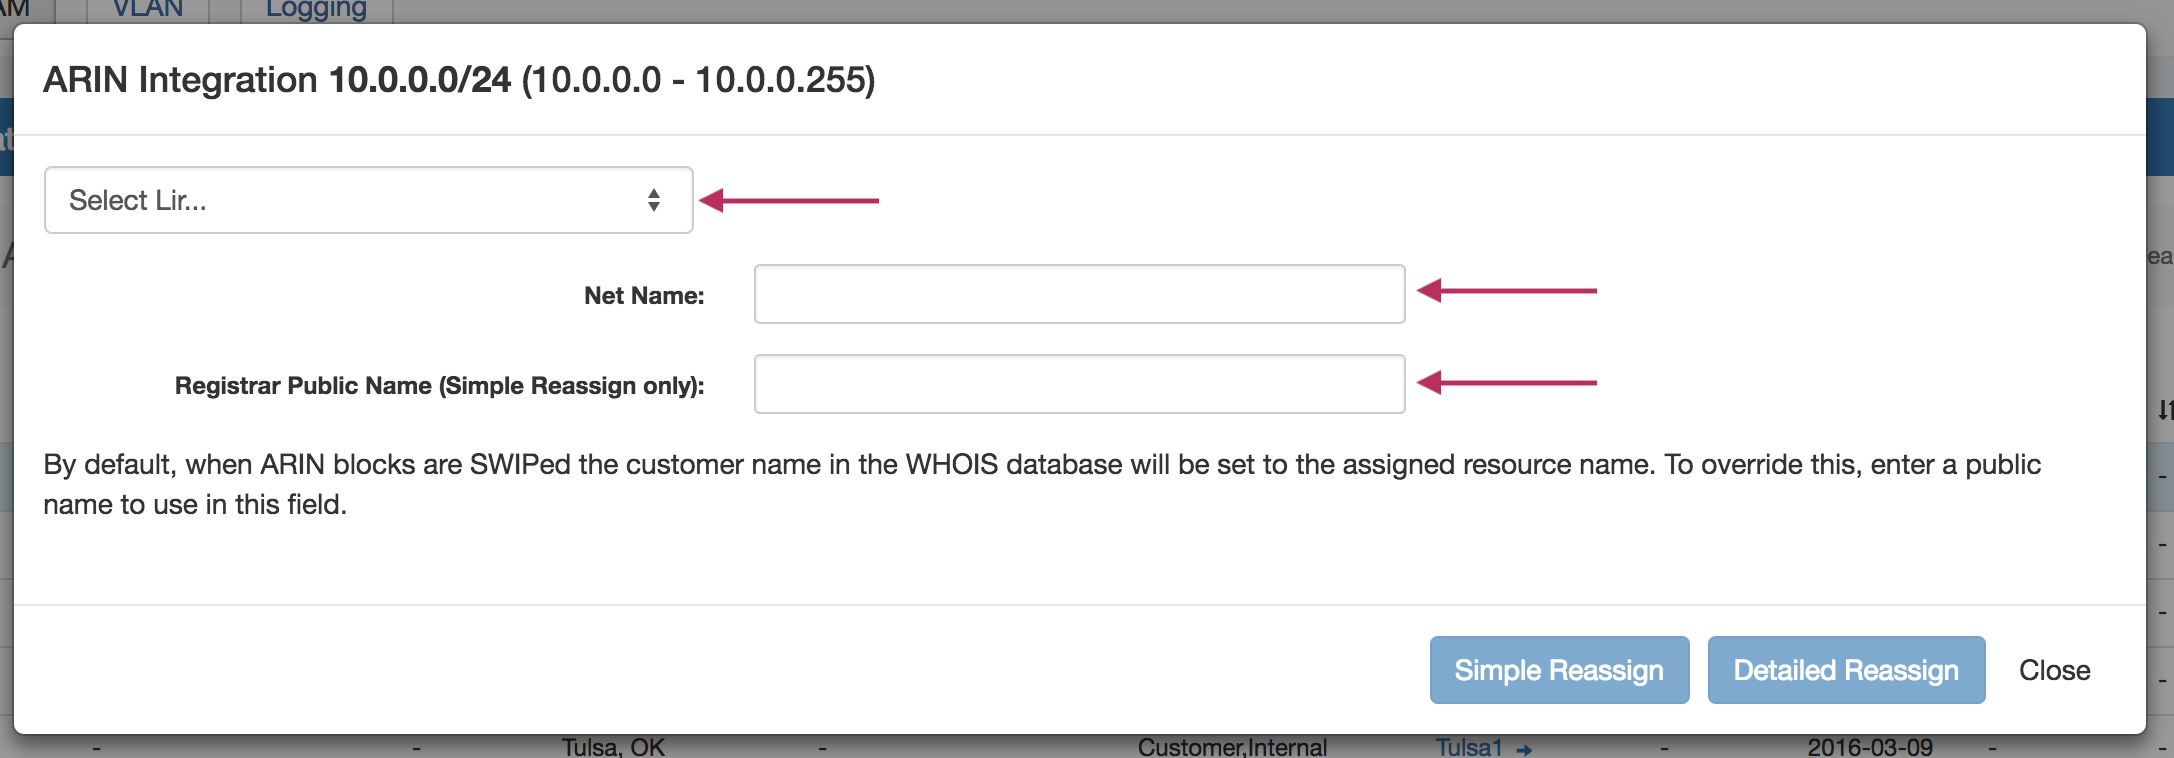
Select the ARIN LIR that has been created in ProVision, and add the Net Name / Registrar Public Name if desired.
Afterwards, you can select the Org Handle and chose Simple Reassign, Detailed Reassign, or Close to exit.
Simple Re-assign
From ARIN.net:
Used to subdelegate IP addresses to a customer that does not need to:
-
subdelegate the addresses to their own customers
-
maintain their own in-addr.arpa delegation
-
display their own point of contact (POC) information.
It can also be used to change the customer name and address information (but not the range) on an existing simple reassignment and to remove simple reassignments. It is submitted by an ARIN Online user account linked to the parent organization's Admin or Tech POC, or the Tech POC for the resource.
Detailed Re-assign
From ARIN.net:
Used to subdelegate IP addresses to a downstream organization that does not need to further subdelegate the IP addresses, but does need to maintain its own reverse name servers and/or display separate point of contact (POC) information. It is submitted by an ARIN Online user account linked to the parent organization's Admin or Tech POC, or the Tech POC for the resource.
SWIP Update Functionality Details
In the case when a user already has SWIPped blocks to ARIN, ProVision checks prior to actually performing a SWIP.
If the IP block is already SWIPped, it will check for existing ARIN customer data and update the ProVision data to reflect what ARIN has on file.
Once that is complete, the user can then perform a de-SWIP function using ProVision.