
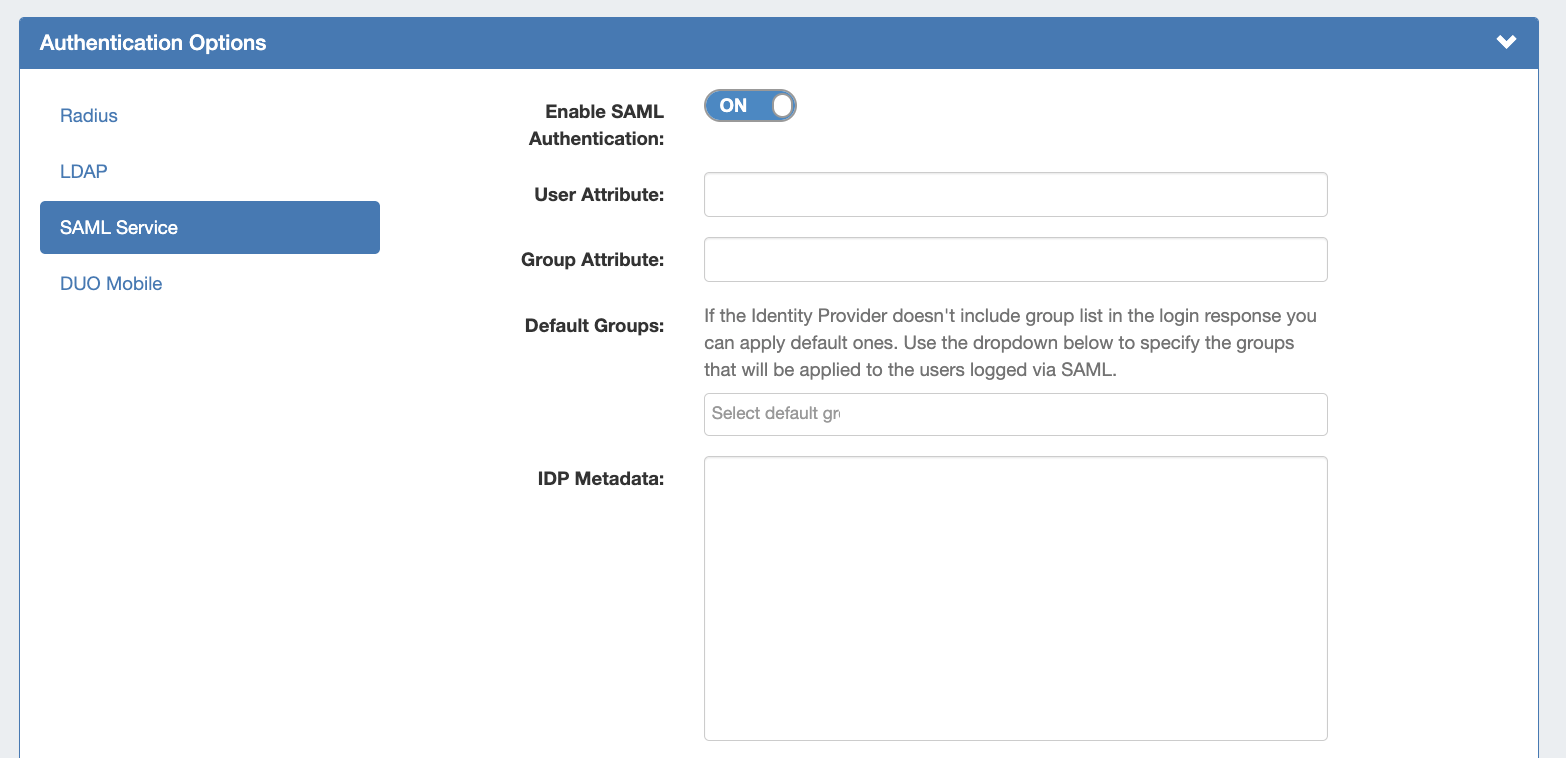
SAML is a Single Sign On (SSO) authentication method that uses an external identity provider to authenticate a user at their first login, saving a token to the user's browser that is then used for subsequent logins, so that the user does not need to re-submit credentials.
SAML Authentication options are accessed by clicking the Authentication sub-tab at the top of the Admin Settings page, then selecting SAML Service under the Authentication Options module.
SAML Setup
Before configuring SAML in ProVision, you must have an account set up with an Identity Provider (IdP) and ProVision users / groups set up in the IdP.
Set up the Identity Provider (IdP)
To use SAML authentication, you will need SAML set up for your instance with an Identity Provider (IdP), such as Microsoft ADFS, OneLogin, Elastic SSO, or others. You can view a list of available SAML IdPs at Wikipedia's SAML based products page.
Note
Some identity providers (such as Workspace One) have additional public/private key authentication requirements in excess of what is required in ProVision.
If you receive a SAML configuration error of "Unable to load private key" or similar, please check your IdP requirements and documentation.
Users and Permissions
User credentials will need to be created and associated with ProVision permission group names via the IdP. All user creation, management and permissions handling occurs via the IdP, externally from ProVision.
Configure SAML in ProVision
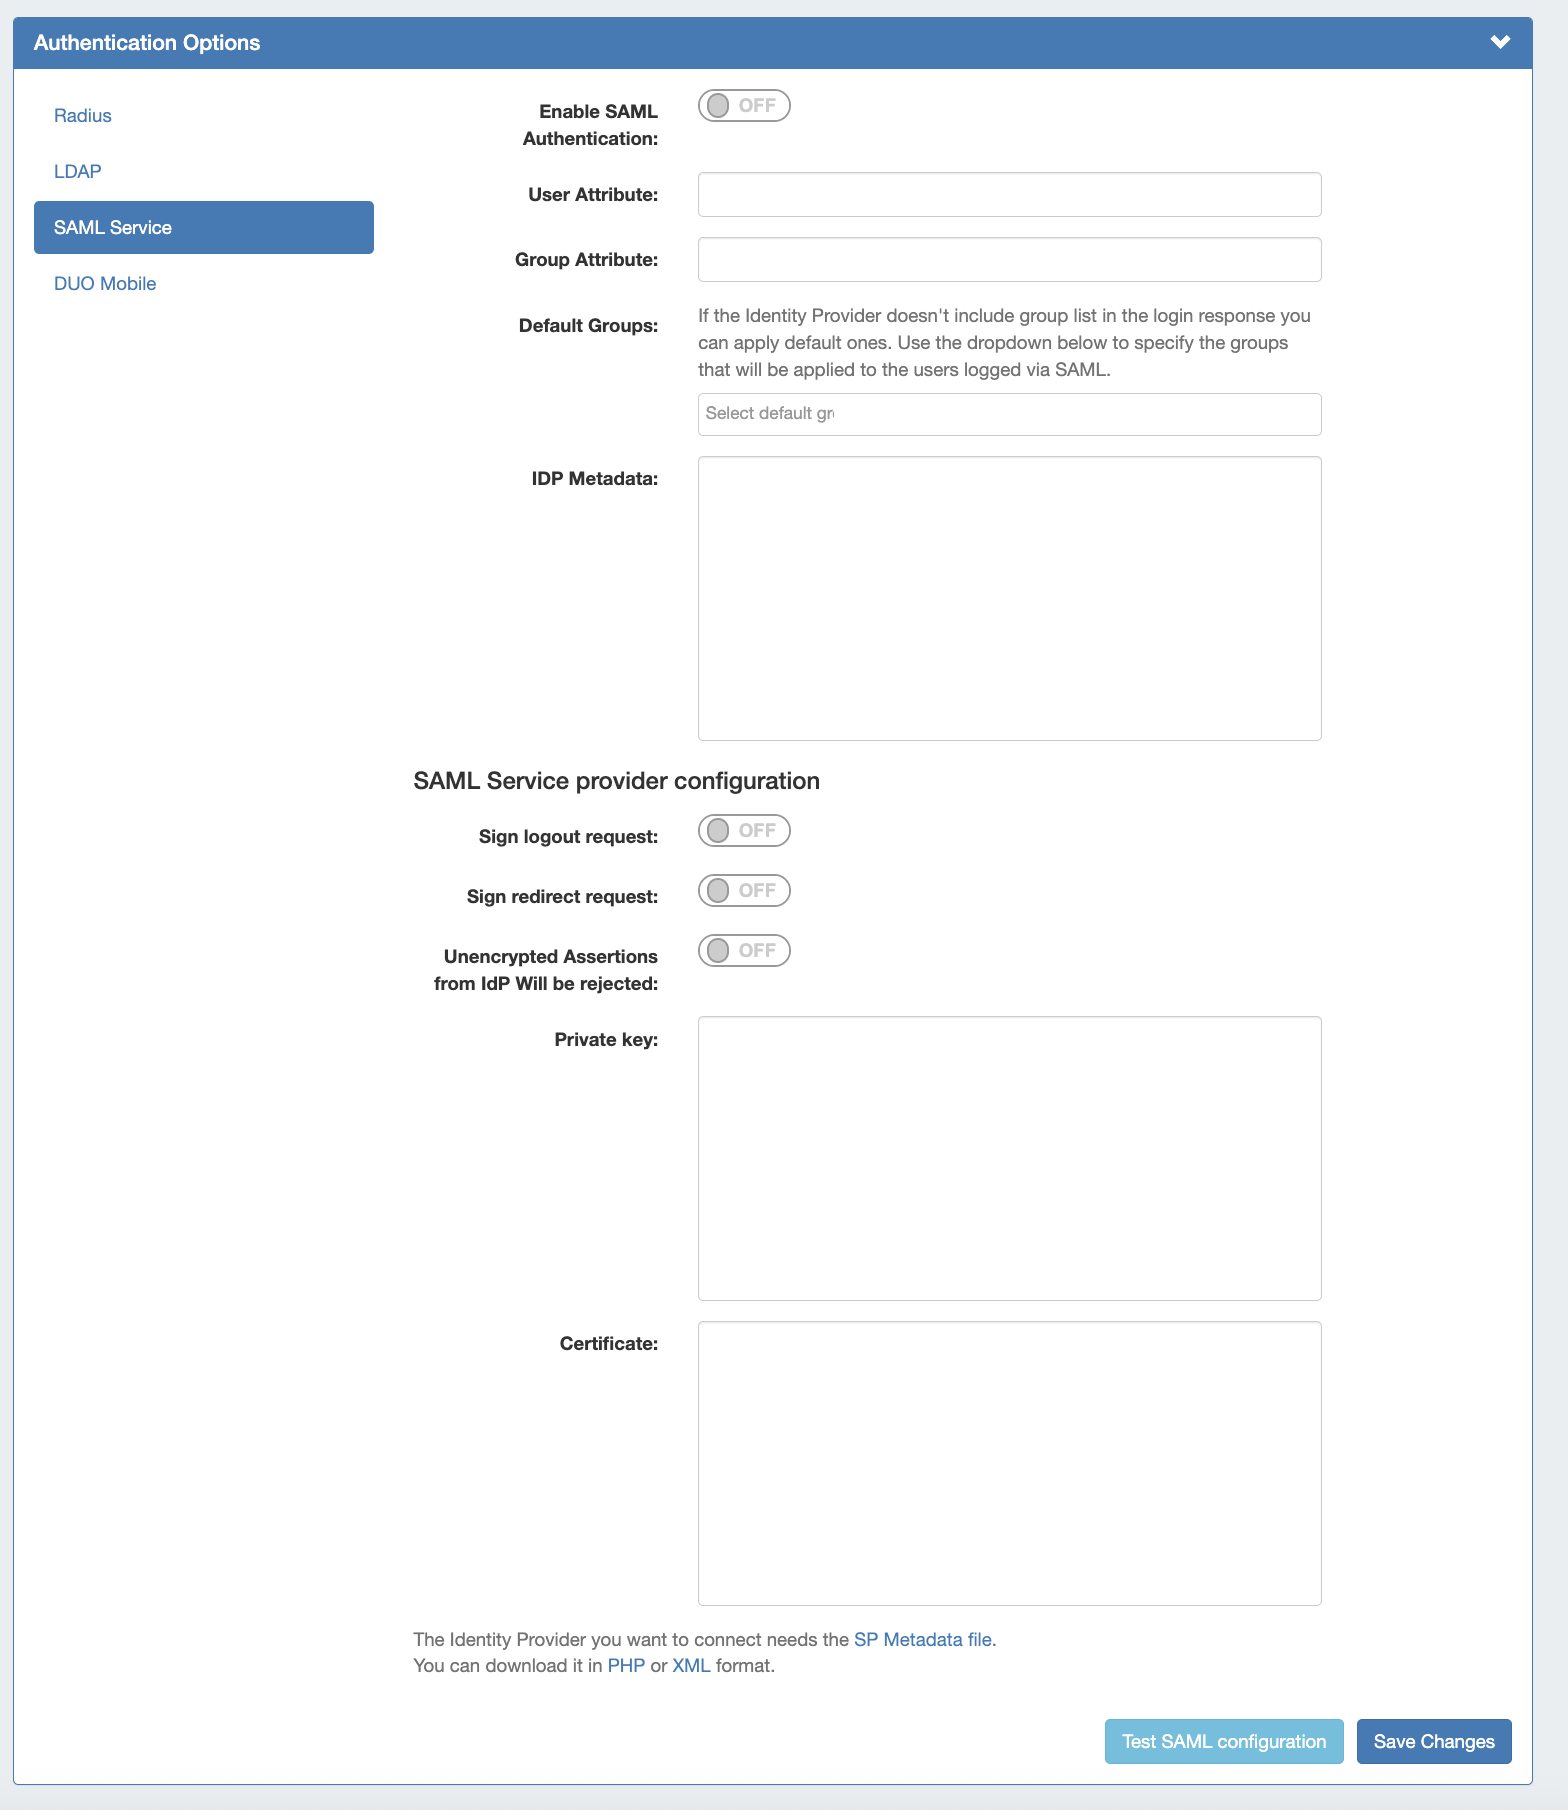
ProVision setup for SAML is located in Admin →Admin Settings → Authentication Options. Then, click the SAML Service tab.
-
Enable SAML authentication by clicking the Enable SAML Authentication toggle to ON.
-
Enter following fields - they are required and will need to be obtained from the IdP:
-
User Attribute(Required)
-
Group Attribute(Required)
-
IdP Metadata(Required)
-
-
Under SAML Service Provider Configuration, enter values for the following:
-
Sign logout request
-
Sign redirect request
-
Unencrypted Assertions from IdP Will be rejected
-
Private Key
-
Certificate (Required)
-
-
You can test the configuration by clicking the Test SAML Configuration button. A new page will open giving health check information for your provided attributes.
Links are provided below the configuration settings for the ProVision SP Metadata file in php and xml format, which will be needed to provide to the IdP.
Using the External ID Field
For some SAML providers it is not possible to have a user friendly group name.
For example, while ProVision tries to match ProVision group names against Microsoft Azure group names, MS Azure exports group names like "abc-GFHEKJSHD-123".
In these cases, you can set the "External ID" field for a group (in the below example "New Global Group") to be equal to "abc-GFHEKJSHD-123".
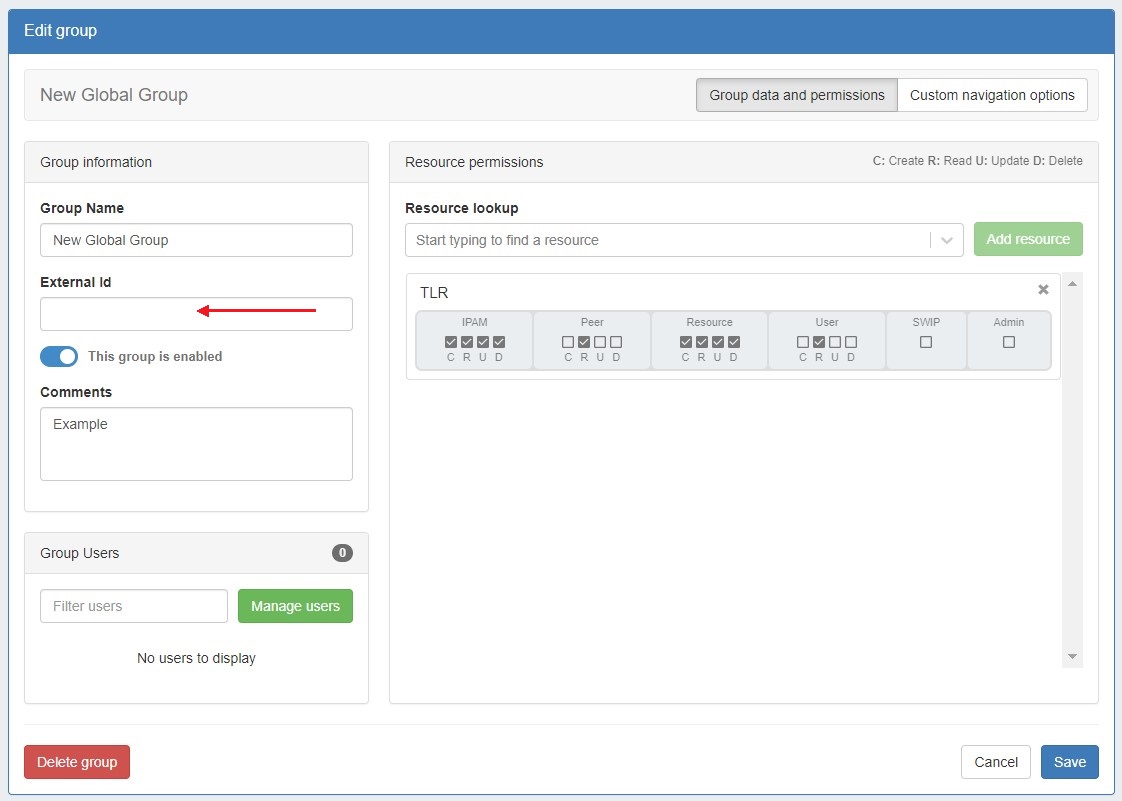
Then, when logging in via SAML, ProVision will correctly recognize that the SAML User should be part of the “New Global Group” group.
To add an external ID, go to Admin → User Groups. Select a group to edit, enter the external ID, and click "Save". For more details on working with permissions groups see Working with Groups.
SAML Login
Note: Depending on the IdP used, some screens may appear different from what is shown here.
Once the correct configuration has been established and users set up for SAML in the IdP, users will be able to use SAML logins.
Initial Login
The initial login process occurs for the first time a user logs in, and anytime afterwards if the browser token is not present (e.g., cookies are cleared from the browser, the browser closed, or a new browser is used).
From the ProVision login page, select SAML from the authentication options dropdown - you do not need to enter Username or Password.
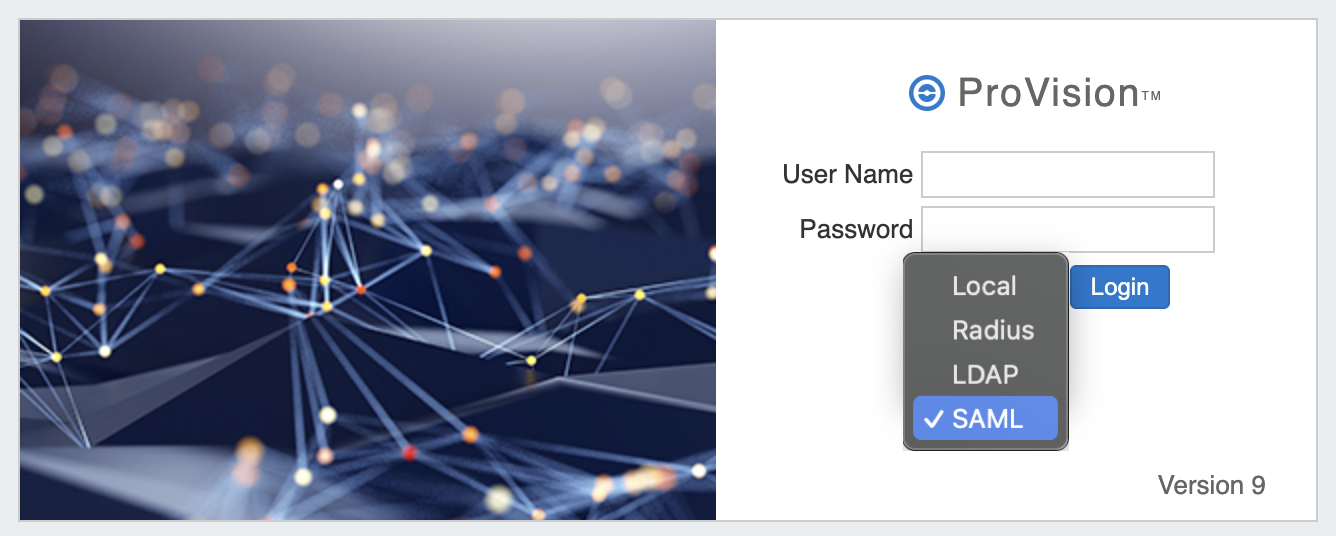
You will be redirected to the IdP site as set up in the Admin Configuration - here, we are using Microsoft ADFS (Active Directory Federation Services).
Log into the IdP site using your SAML credentials, and click "Sign In".
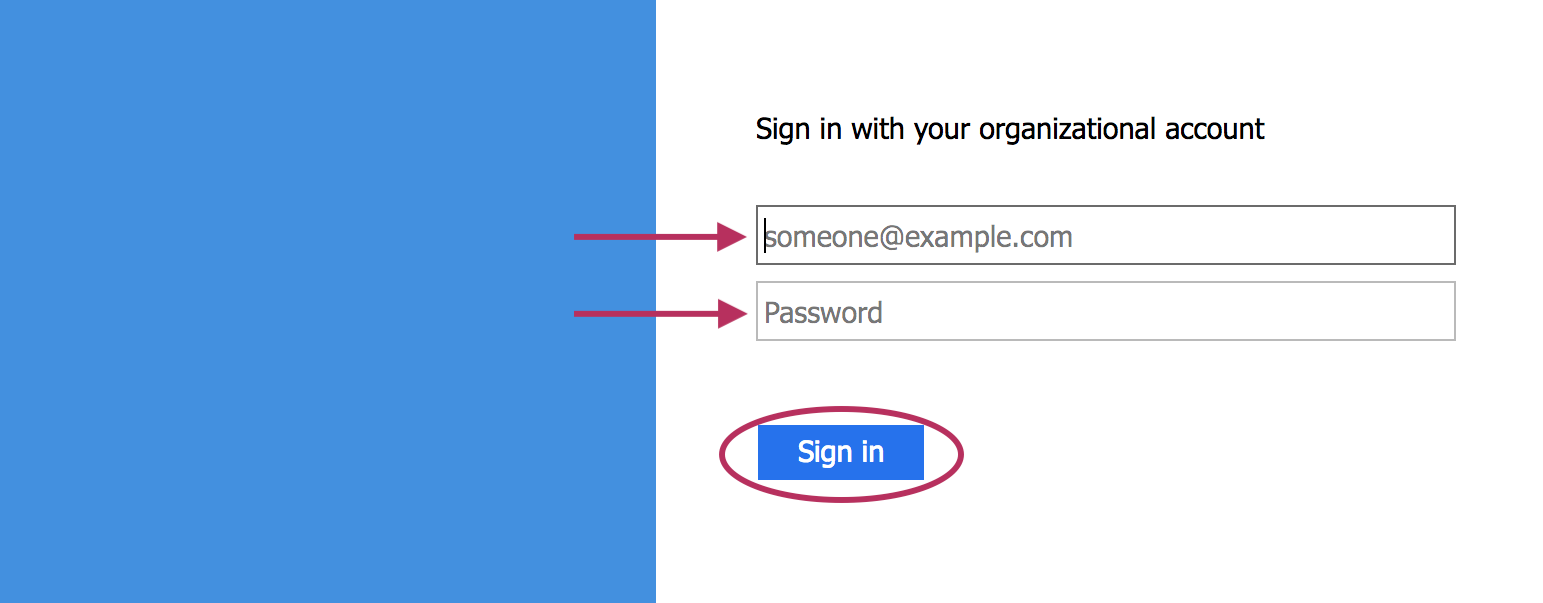
If the sign in is successful, you will be logged into the ProVision home page.
Subsequent Logins
After the initial login via the IdP (as long as the auth token is present), users will be able to login to ProVision simply by selecting the "SAML" options from the ProVision login page without entering credentials.
The auth token may be destroyed or not available if browser cookies have been cleared, a different browser used, or the browser fully closed, depending on security settings. In these cases, the user will need to sign in again via the IdP.
Setting default login authentication options
The default login is 'Local", but the default login method displayed may be updated by performing the following steps:
-
In the ProVision directory, navigate to the /data/globals.php open the file in vi (or other text editor)
-
Add in the following text as the last line of the file (before the closing ?>)
define('DEFAULT_LOGIN_TYPE', 'saml');-
Acceptable values are "local", "radius", "ldap" and "saml". If this line is not present in globals.php, the default option is "local".
-