
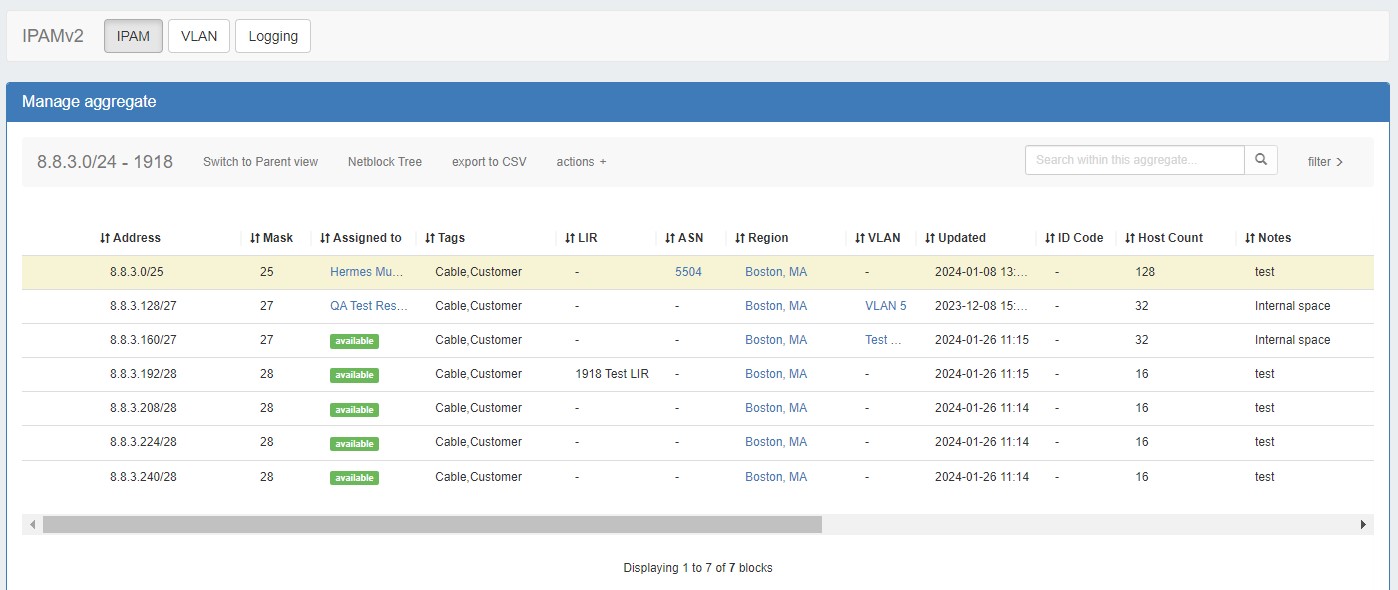
IP Aggregates are edited and managed from the IPAM Tab and IPAM Manage page.
Aggregates may be viewed, filtered, created, and deleted from the IPAM Tab, and setting IPAM alerts and using Aggregate Templates are performed in IPAM Manage.
For an overview of the IPAM Tab, see IPAM Tab. For information on working with individual blocks, continue to Working with IP Blocks.
Add an Aggregate
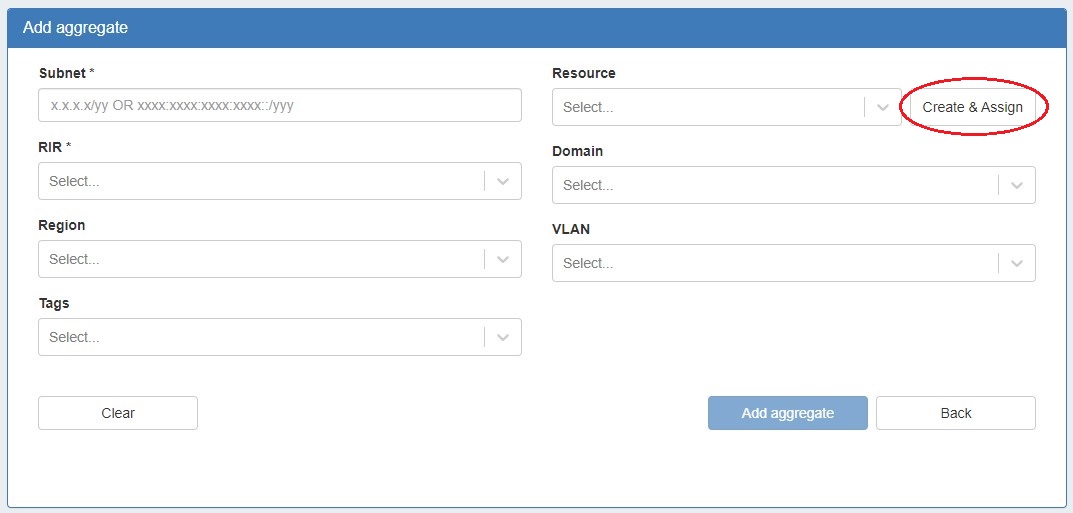
On the main IPAM Tab, click the "Add Aggregate" button. A new page will open to fill in details for a new aggregate block.
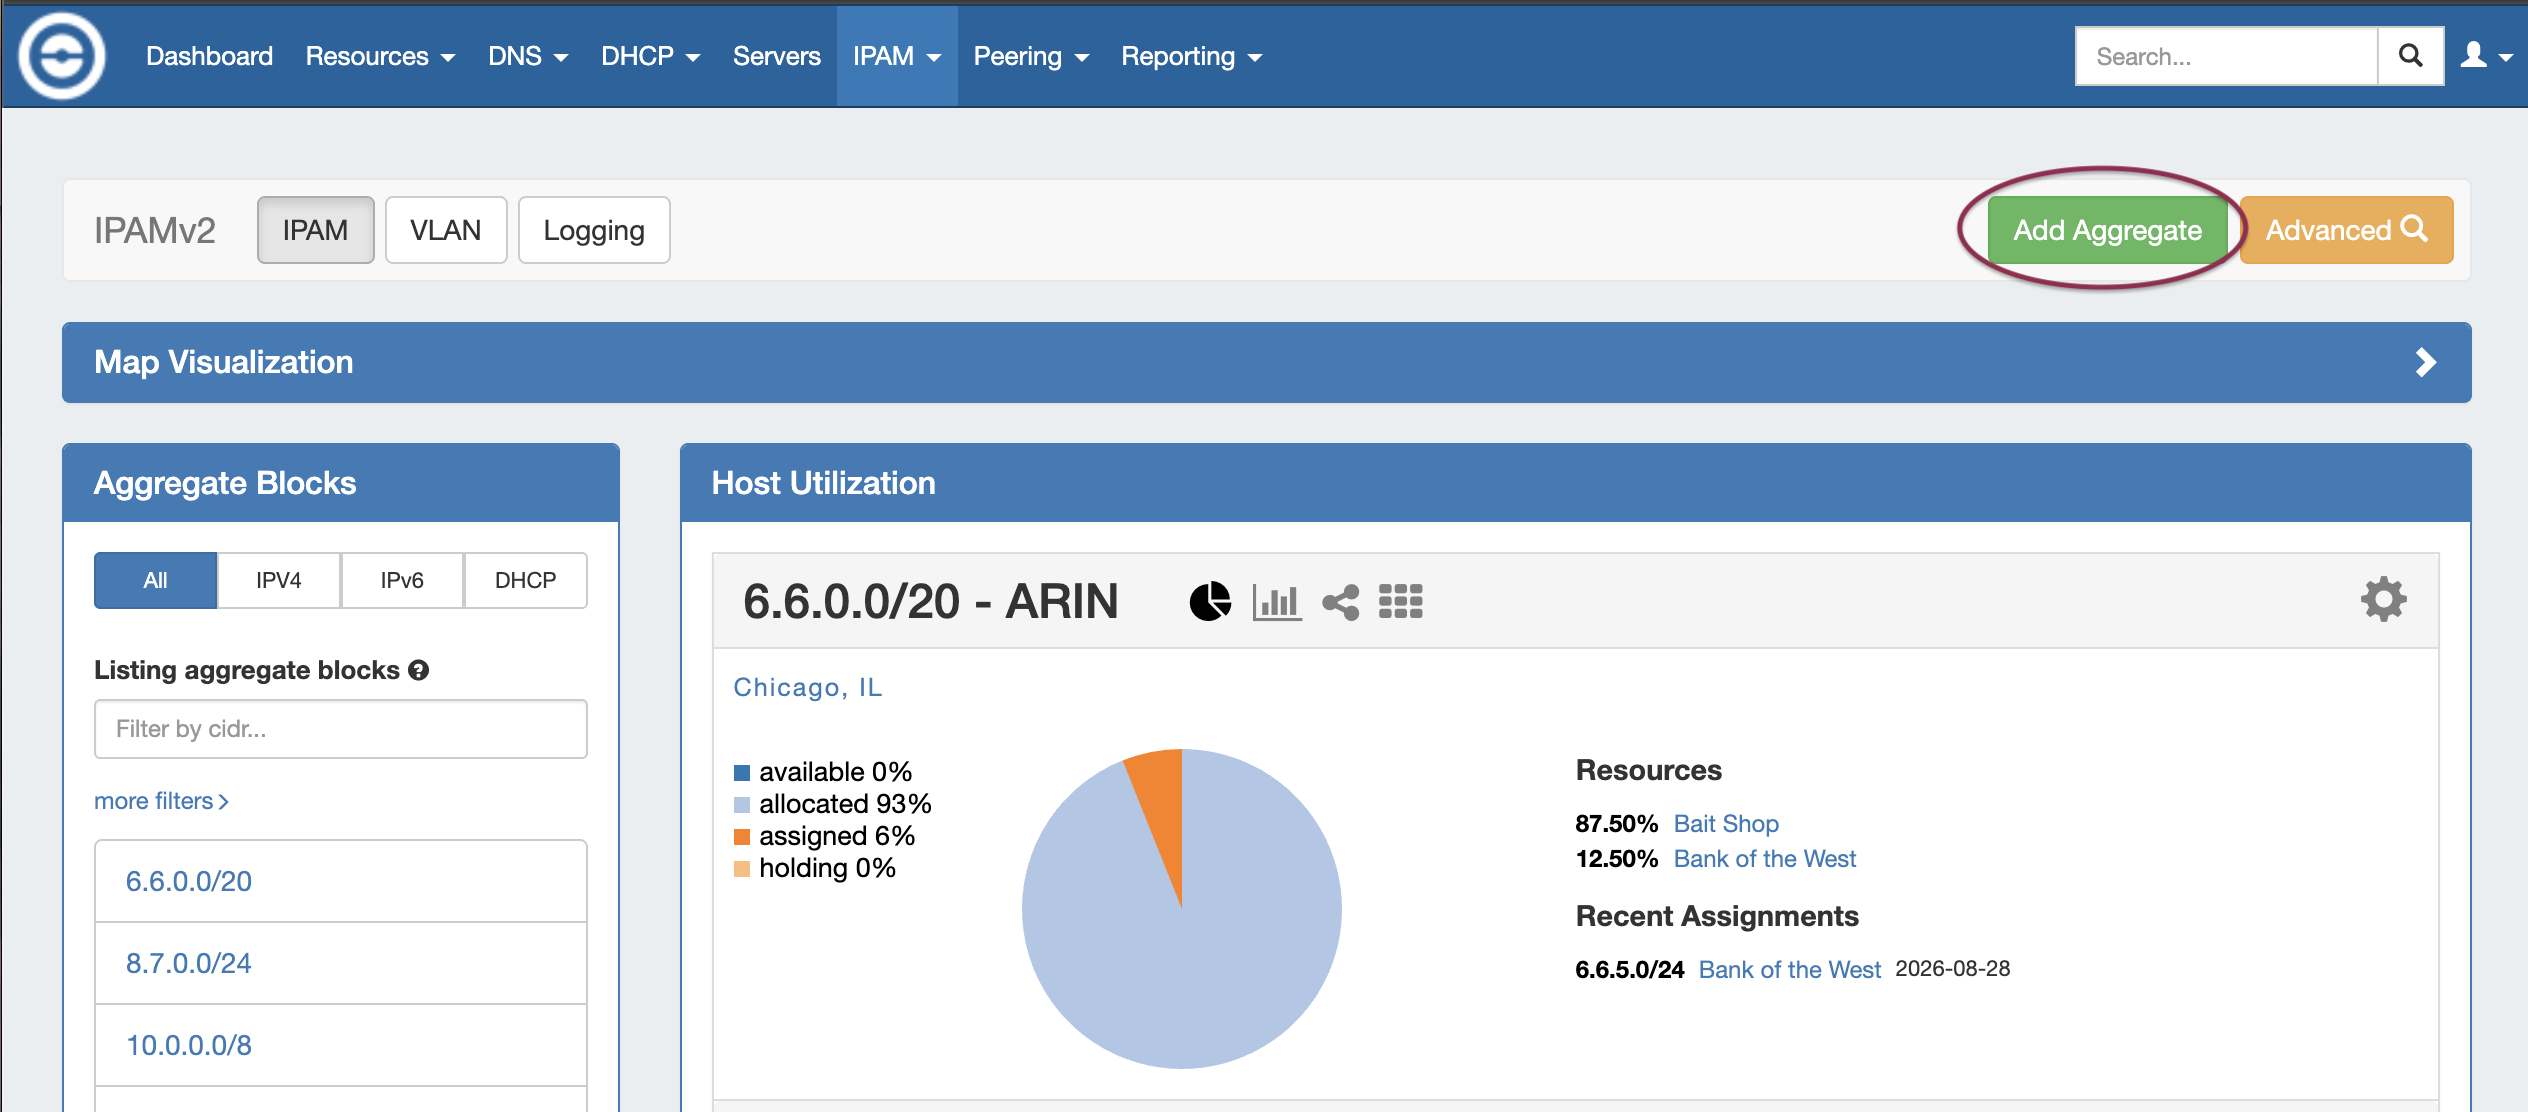
Add Aggregate Walkthrough
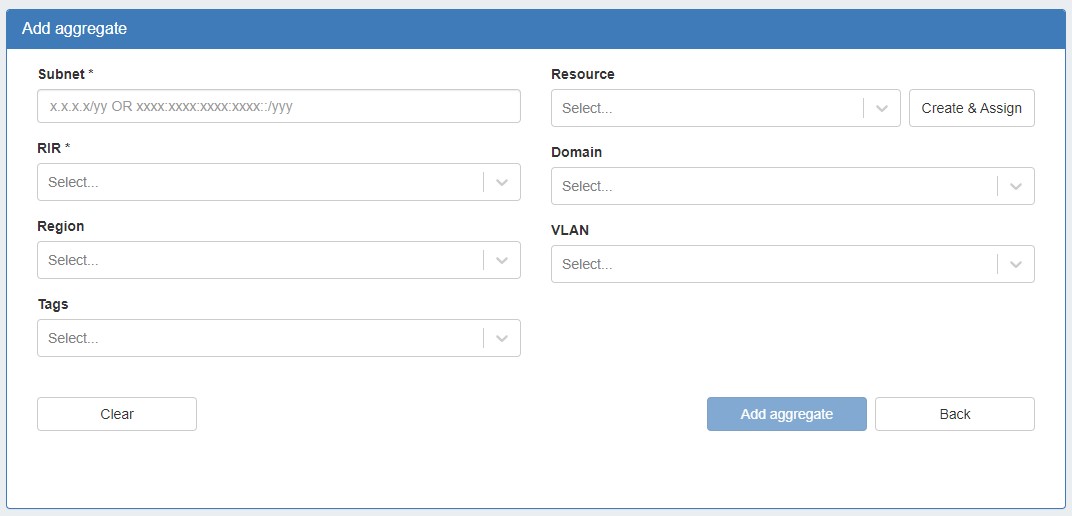
Enter in the desired IPv6 / IPv6 CIDR and RIR, at minimum. Region, Tags, Resource, Domain, VLAN, and subassignment status are optional, if desired.
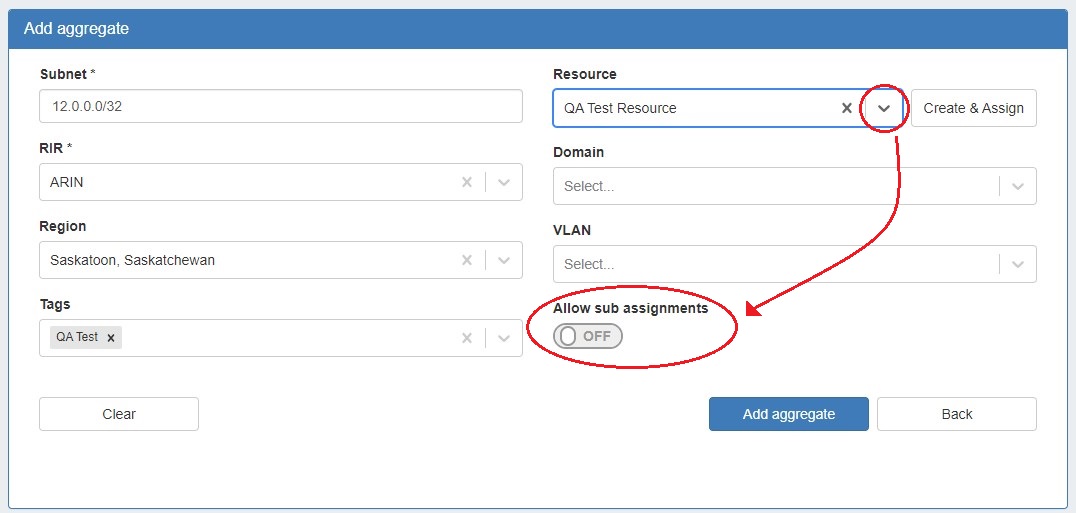
To enable subassignments, a resource must be selected. The "Allow sub assignments" selector will be visible once a resource is selected from the dropdown.
Select "Create & Assign" to create a new resource to which to assign the aggregate.
If creating the aggregate for a specific use, keep in mind that certain uses may require additional information is provided in the aggregate, such as requiring 1918 space (DHCP Pools), a region to be provided (DHCP Customer Configuration Gadget), or a resource to be assigned with subassignments enabled. In such cases, it may be useful to assign a specific IPAM tag to associate with that use to assign at aggregate creation (such as "DHCP" )
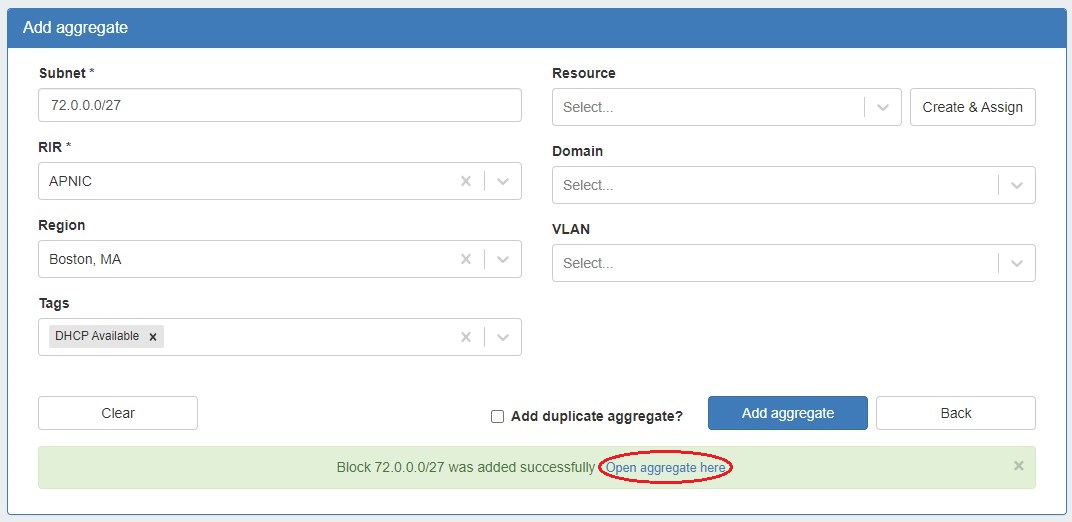
When done, click "Add Aggregate", and a link to the newly created aggregate will be available. You may also click "Clear" and create another aggregate. Aggregates will be listed under the Host Utilization and Aggregate Blocks list of the IPAM Tab.
Delete an Aggregate
Aggregates may be deleted from the Gear Icon in the top right corner of their Host Utilization box display.
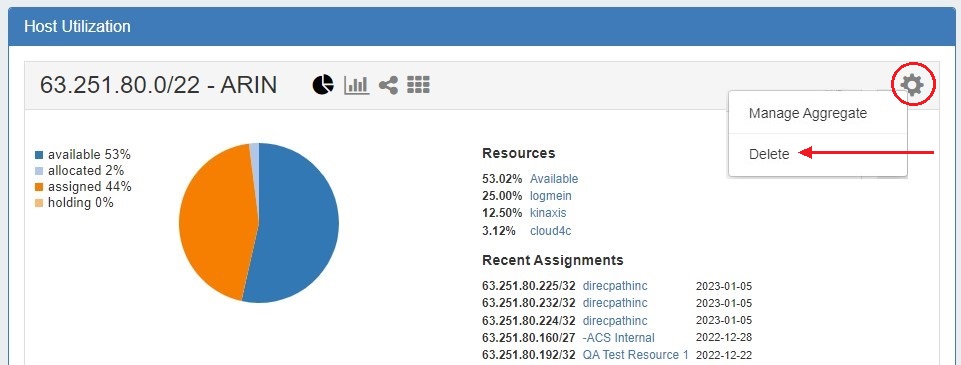
A warning dialog box will appear confirming the deletion, and noting whether assigned blocks exist in the aggregate that would also be deleted.
Merge Aggregates
Adjacent Top Level Aggregates may be merged into a single aggregate, if meeting validity criteria (adjacent, but not overlapping).
Merge Aggregates
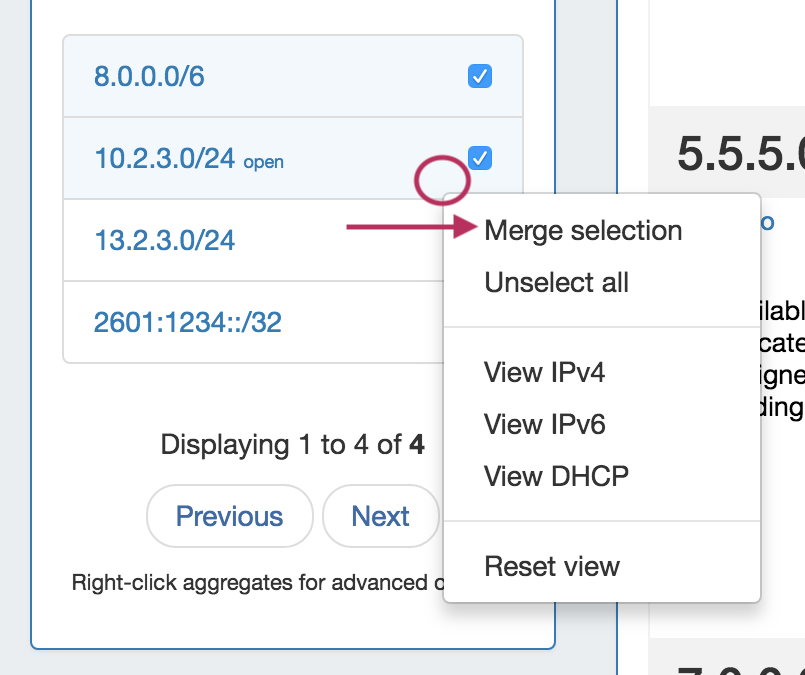
To do so, right click anywhere on the Aggregate Blocks list, and choose "Select Aggregates" from the menu.
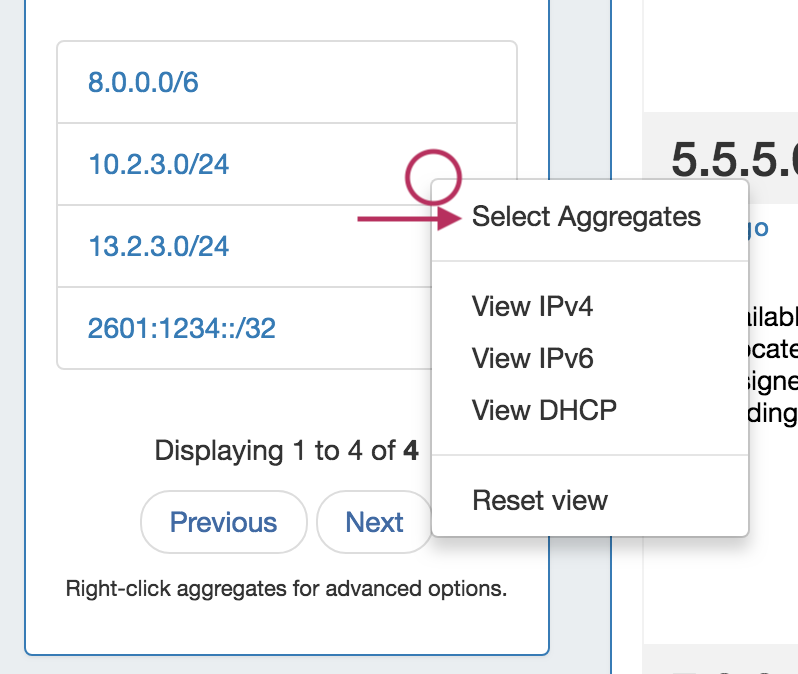
Then, click the check boxes for the two aggregates you wish to merge, and then right click and select "Merge Selection".
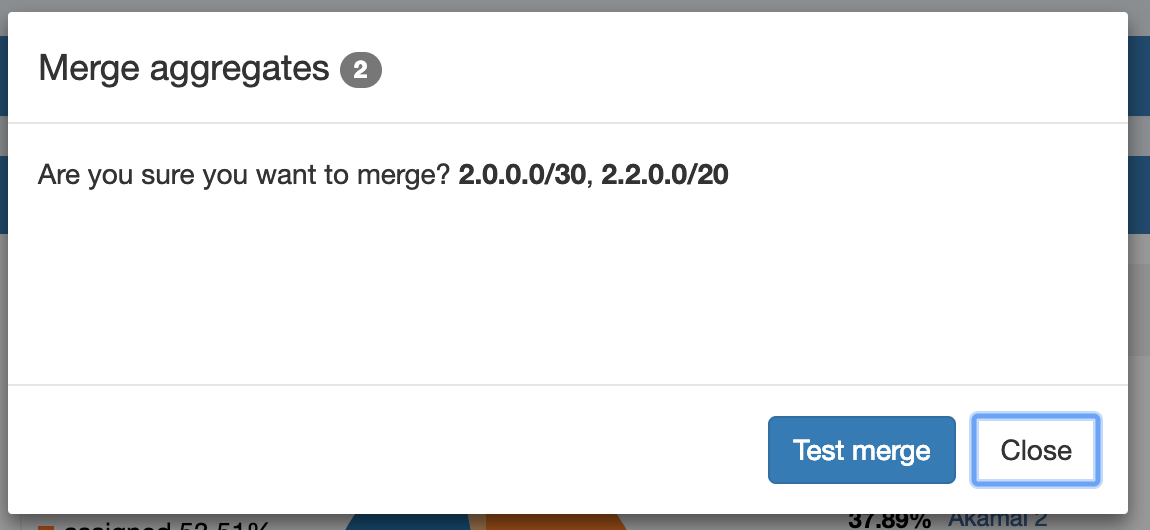
A confirmation dialog box appears to confirm the blocks to merge, and proceed with testing to see if the merge is valid. Click "Test Merge" to proceed.
ProVision will pre-test the merge, and if valid, give you the option to proceed.
Otherwise, an error message will display detailing why the aggregates are unable to be merged.
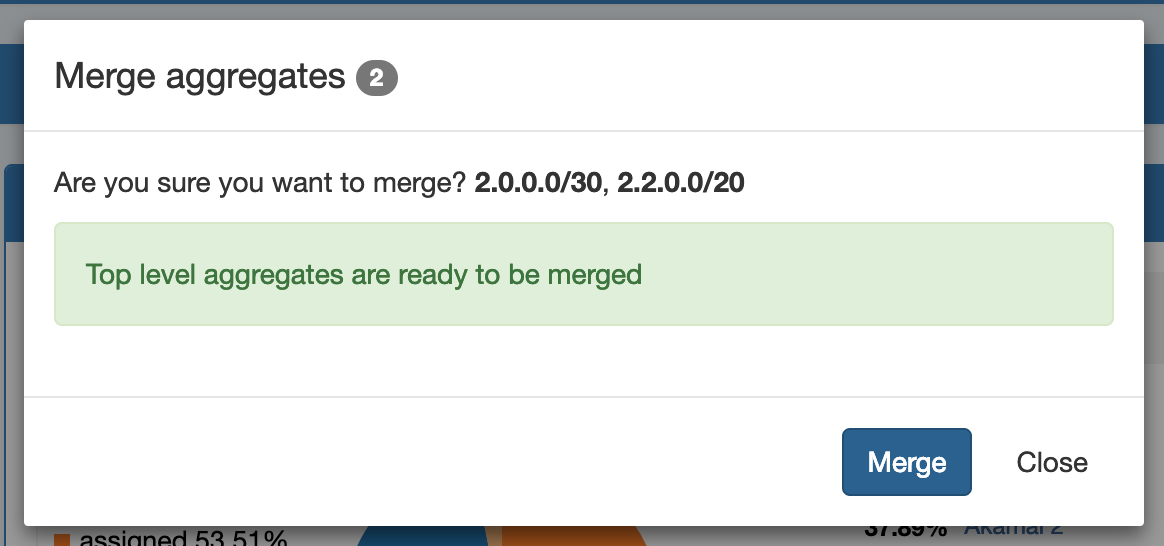
Complete the aggregate merge by clicking "Merge".
To Exit out of the selection prior to merging, select "Close".
Sparse Allocate in an IPv6 Aggregate
Sparse allocation evenly distributes assignments throughout an IPv6 range, using either a manually configured or automatically generated "Sparse Allocate" Numbering Authority domain algorithm to calculate the next block to assign.
Sparse Allocation Schemes
Sparse Allocation Schemes
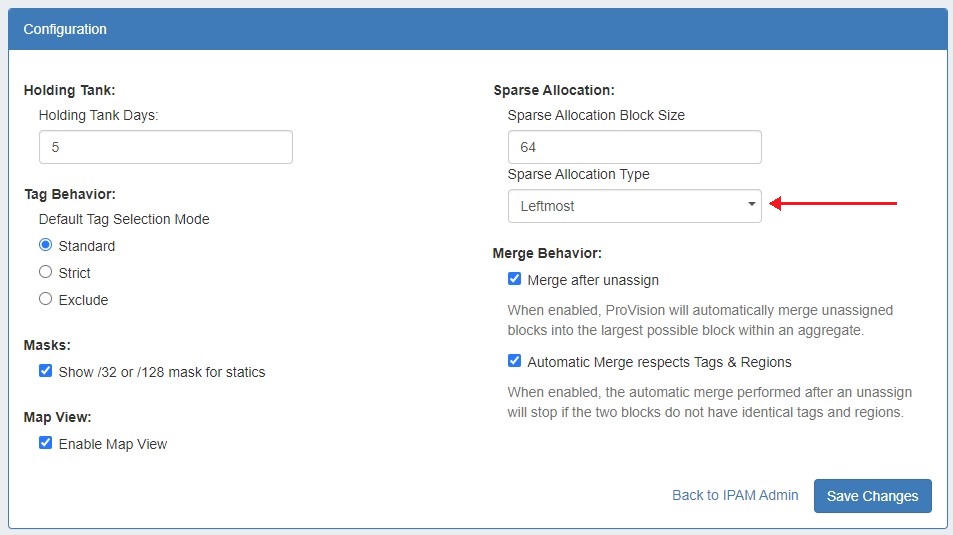
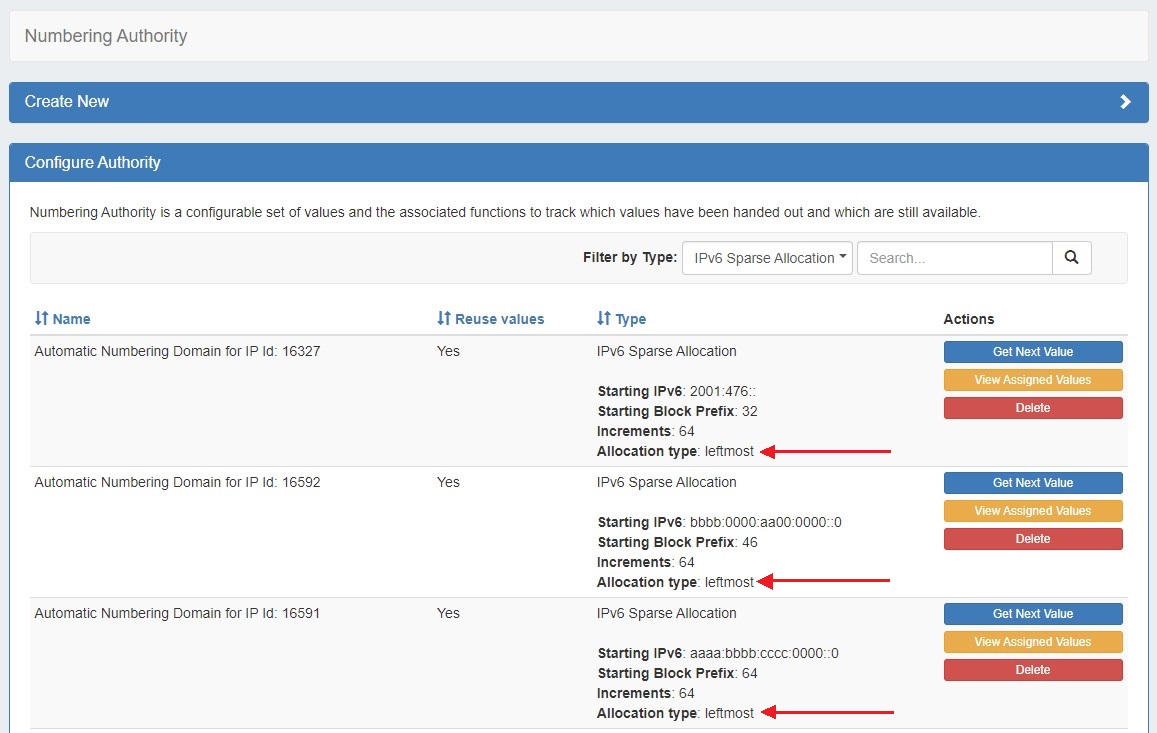
Admins may select a system default Sparse Allocation scheme to use for IPv6 Sparse Allocation. Available values are Leftmost, Center, and Rightmost. If not otherwise specified, Leftmost is the default.
To edit the Sparse Allocation Scheme, select the desired scheme in IPAM Configuration, then enable sparse allocation for the desired IPv6 aggregate. The Sparse allocation scheme is applied to the aggregate when sparse allocation is enabled for the aggregate, thus, pre-existing sparse allocation schemes will not be altered by later changes.
If you wish to change the scheme for an existing sparse allocated-enabled aggregate, you must
1) Disable sparse allocation for the aggregate → 2) Edit the selected scheme → 3) re-enable sparse allocate for the aggregate.
To verify which scheme is applied to aggregates, you may view the aggregate and scheme details in the Numbering Authority → Sparse Allocate listings.
Enable/Disable Sparse Allocation
Enable/Disable Sparse Allocation
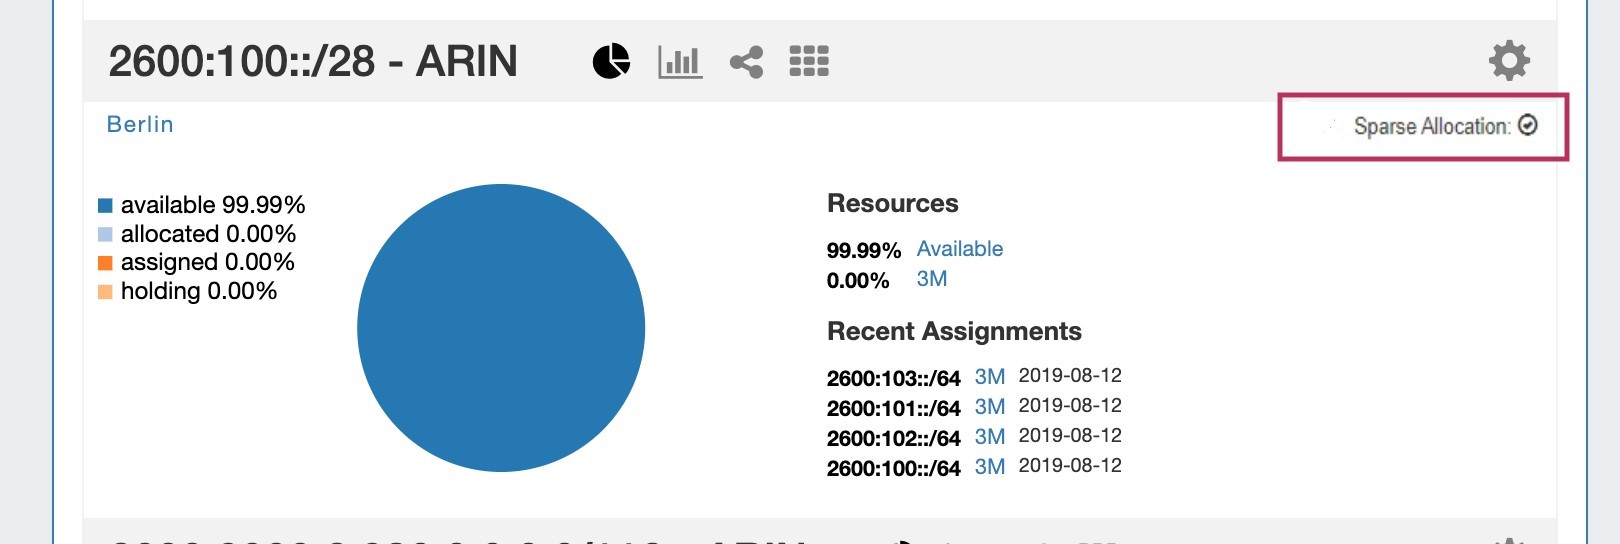
Sparse allocation options are accessed from the IPv6 Aggregate's Action Menu (gear icon). The top right corner of the Utilization module for the IPv6 aggregate will display whether sparse allocation is enabled or disabled for the particular aggregate.
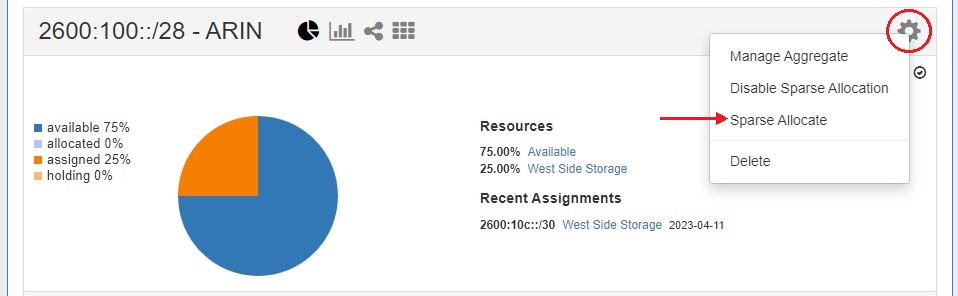
Enable or disable Sparse Allocation for the aggregate by clicking on the aggregate menu, and select to Enable / Disable Sparse Allocation for the aggregate. A "Sparse Allocate" Numbering Domain will automatically be generated for the aggregate in the Admin → IPAM Admin area, using the currently set Sparse Allocation Scheme setting.
Once enabled, the "Sparse Allocate" option will be available for the aggregate.
Sparse Allocate
Sparse Allocate
To Sparse Allocate assign the next IP generated, select "Sparse Allocate" from the aggregate action menu.
Then, select the resource to assign (or create a new one) and click "Assign".
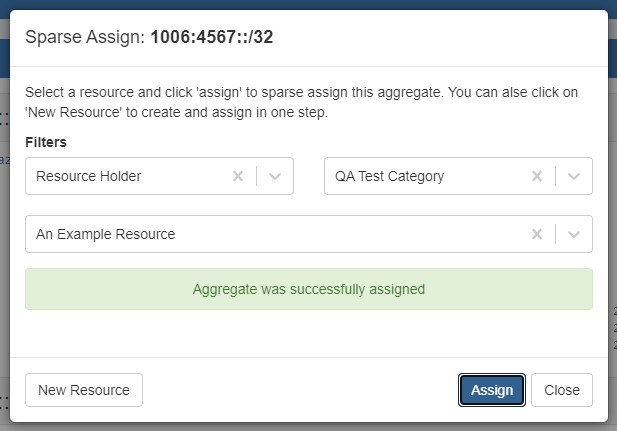
The resource will be assigned according to the distribution algorithm and may be further managed in IPAM Manage for the aggregate.
Manage an Aggregate
Managing an aggregate is mostly performed in the IPAM Manage screen for the aggregate.
From IPAM Manage, you can perform the aggregate template actions of Auto-Split / Clean-Up, Set IPAM Alert information, export the block list, as well as manage individual blocks.
For detailed information on using the IPAM Manage screen and managing at a block level, see Working with IP Blocks.
Open IPAM Manage for an Aggregate
Open IPAM Manage for an Aggregate
Open the IPAM Manage screen for a block by:
-
Searching for the block in the Global search, and clicking on the resulting CIDR
-
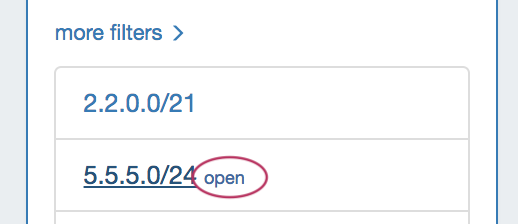
Clicking the "Open" link in the aggregate blocks list from the IPAM tab.
-
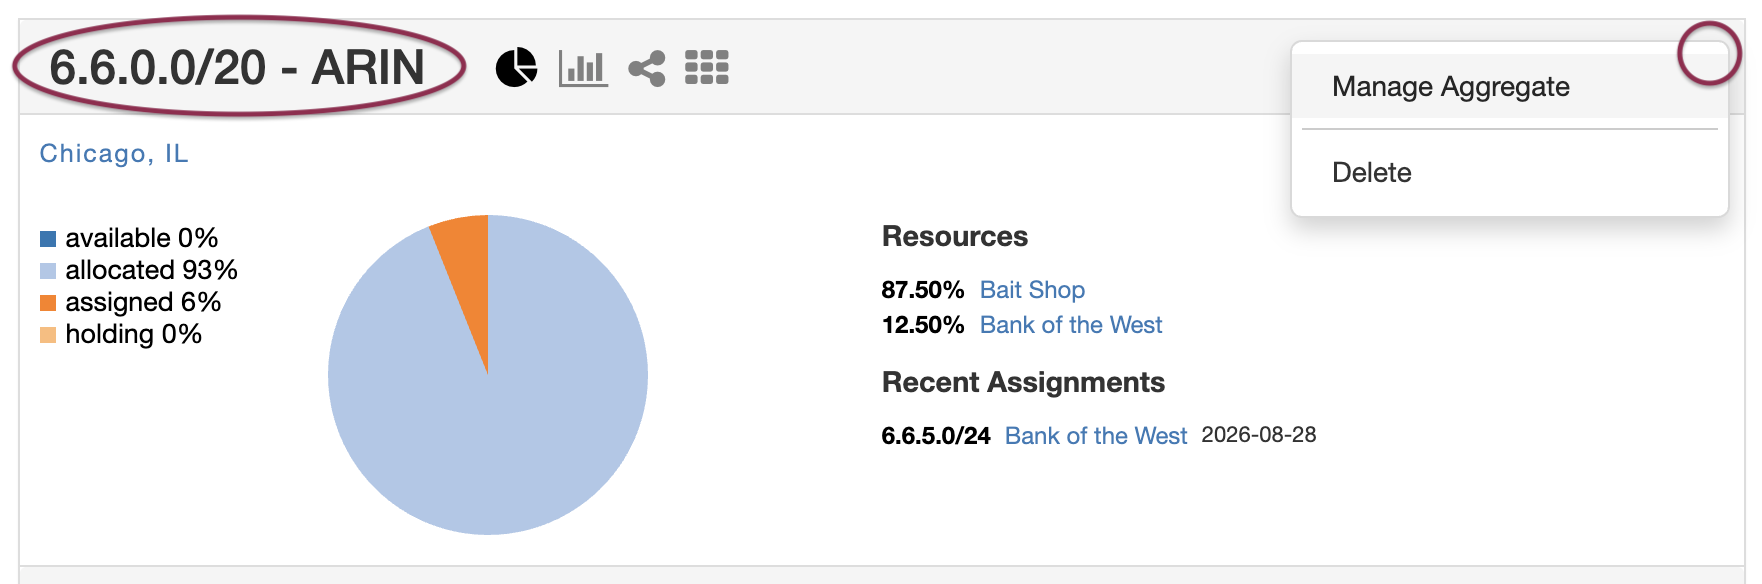
Clicking on the CIDR header of the Aggregate Block Host Utilization module, or selecting "Manage Aggregate" from the module's Gear Icon from the IPAM tab.
-
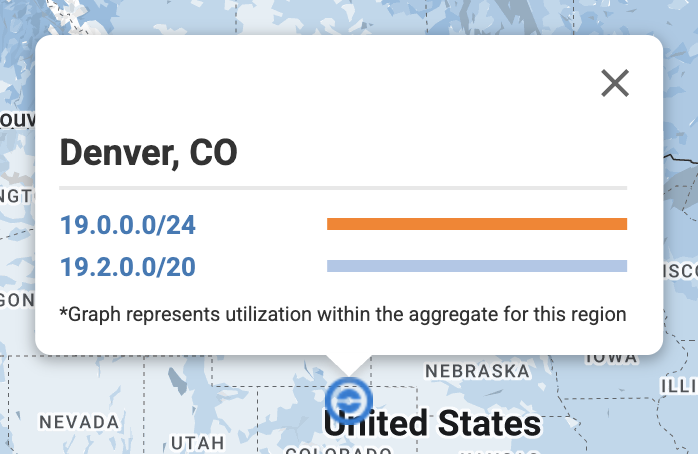
Clicking on the CIDR listed in the Aggregate Info box in IPAM Maps
Aggregate Actions
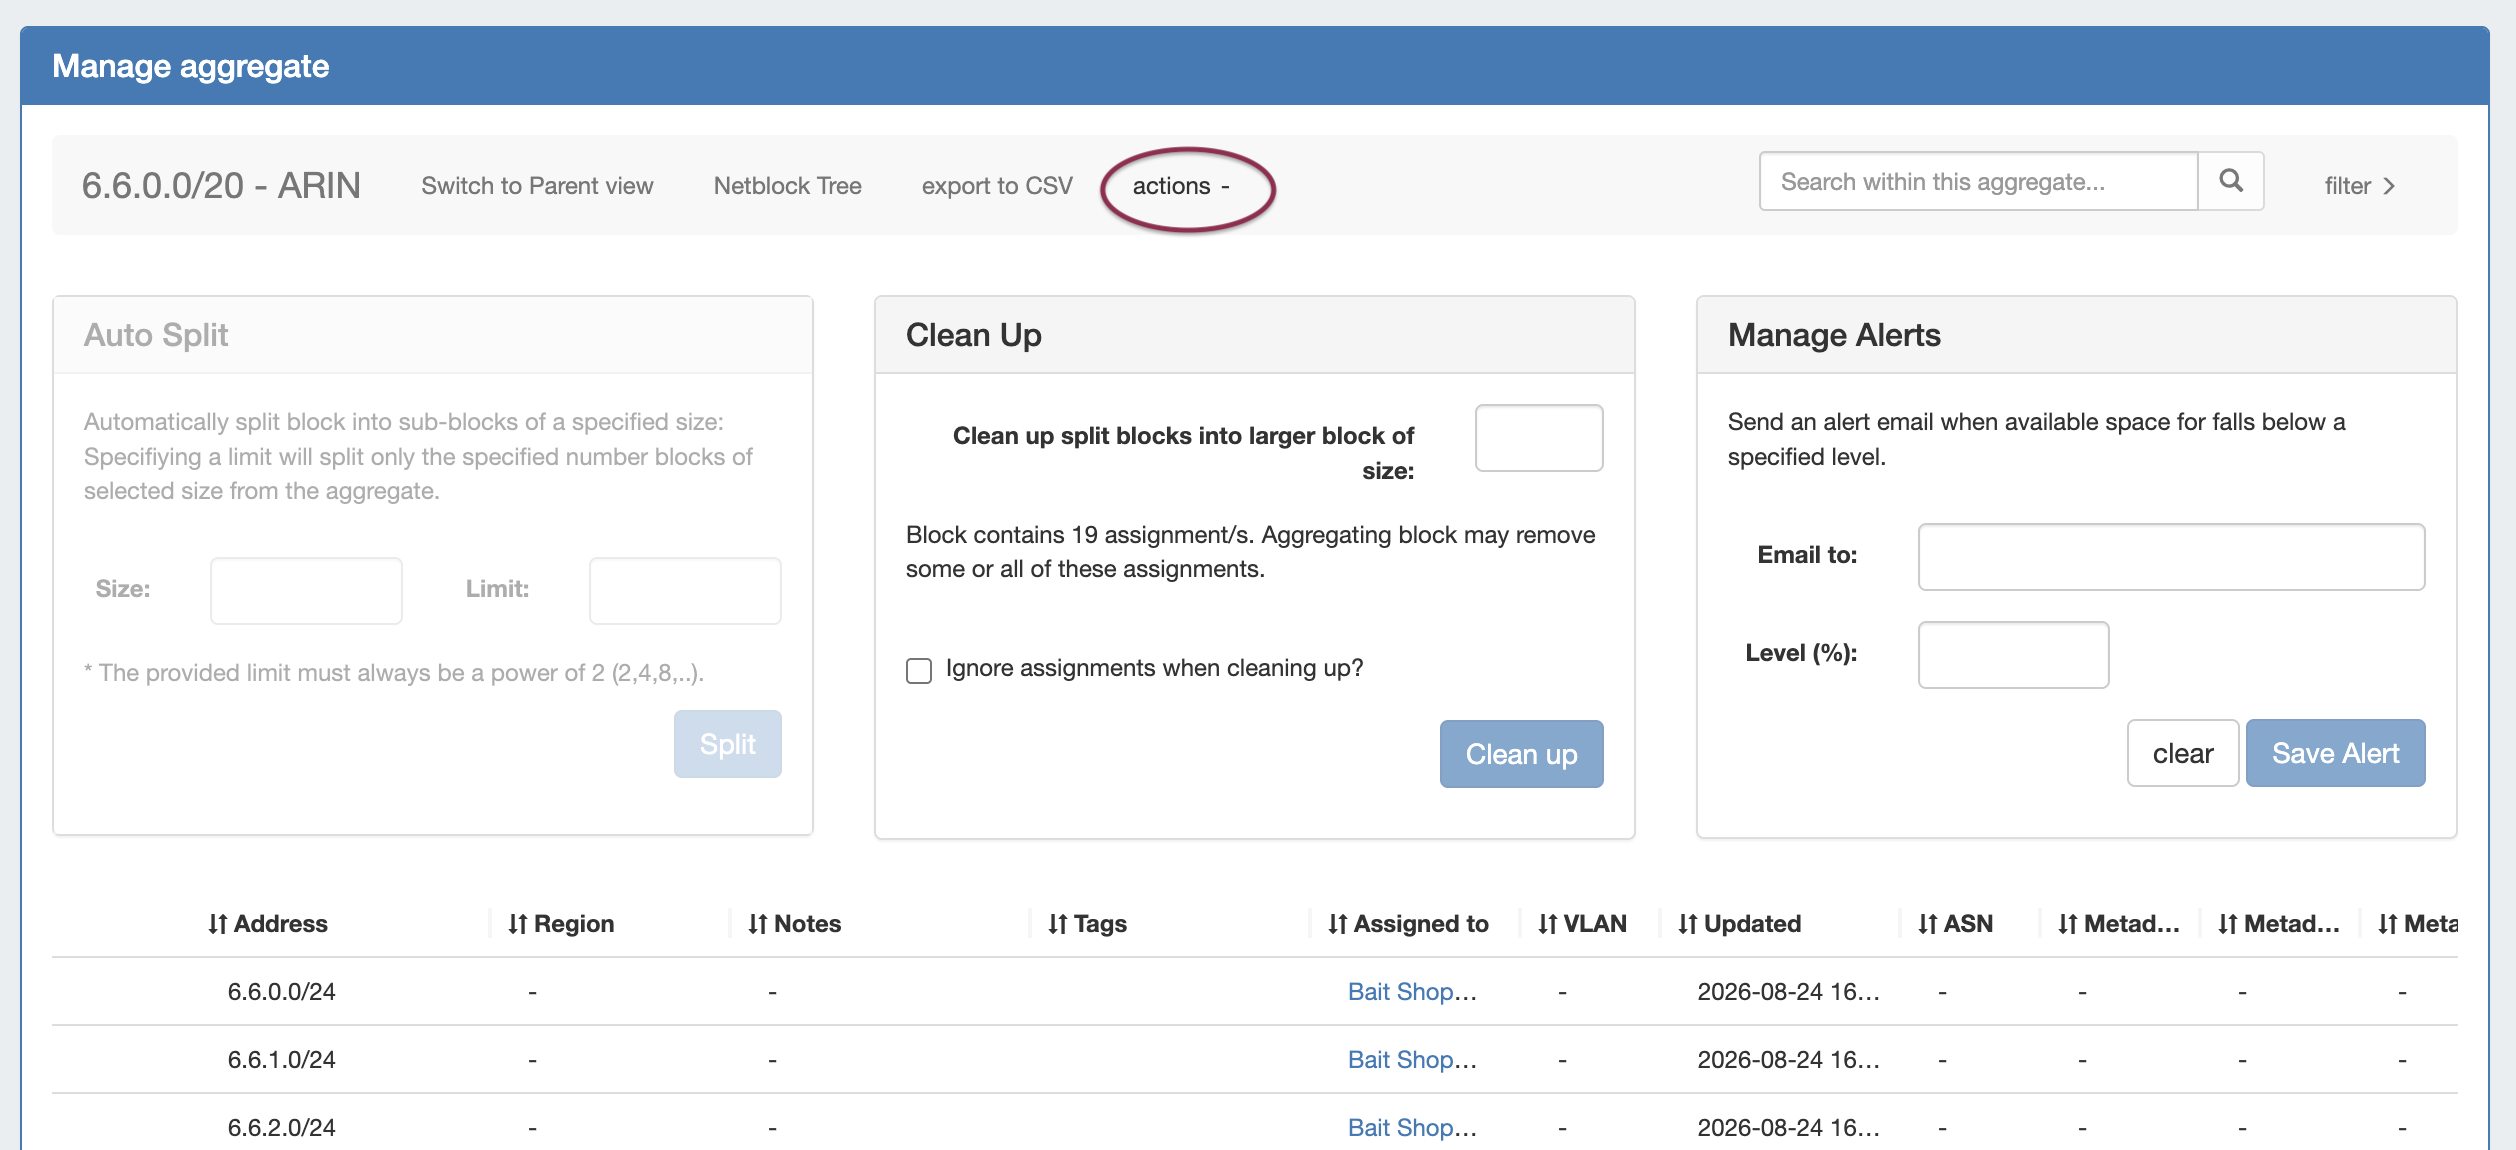
Open up aggregate level actions in IPAM Manage by clicking on the "Actions" link in the Manage Aggregate header.
Three options are available - Auto Split, Clean Up, and Manage Alerts.
Aggregate Actions
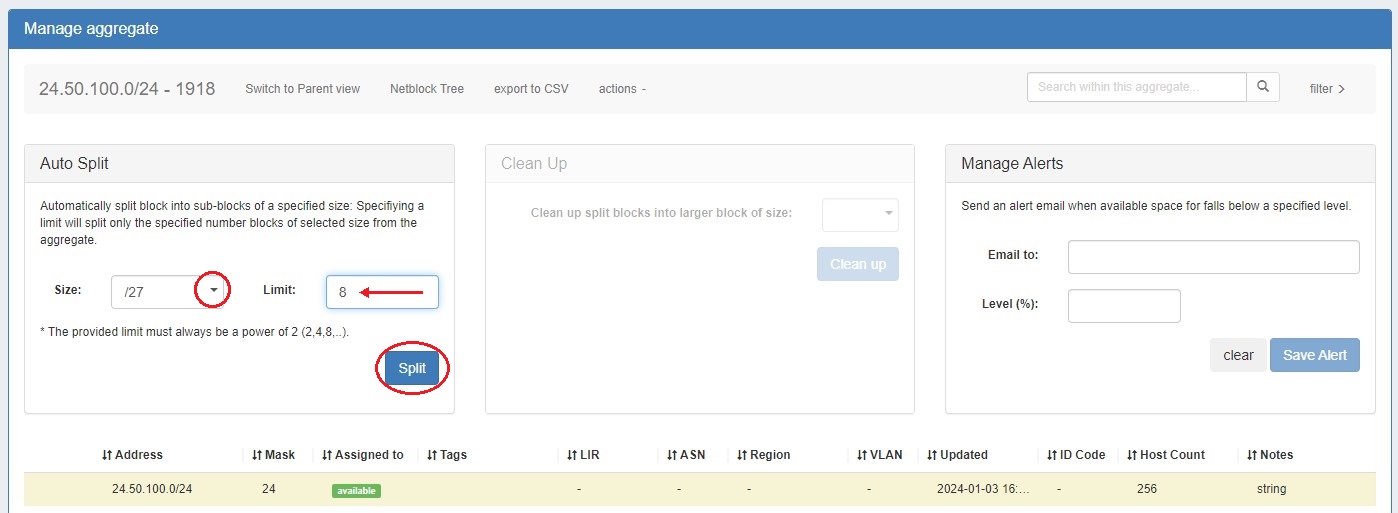
Auto Split Aggregate
Auto Split an available aggregate into blocks of a specific size, up to a specific quantity of blocks by selecting "Size" and "Limit" under "Auto Split".
The block limit must be a power of two, or an error will appear. When done, click "Split".
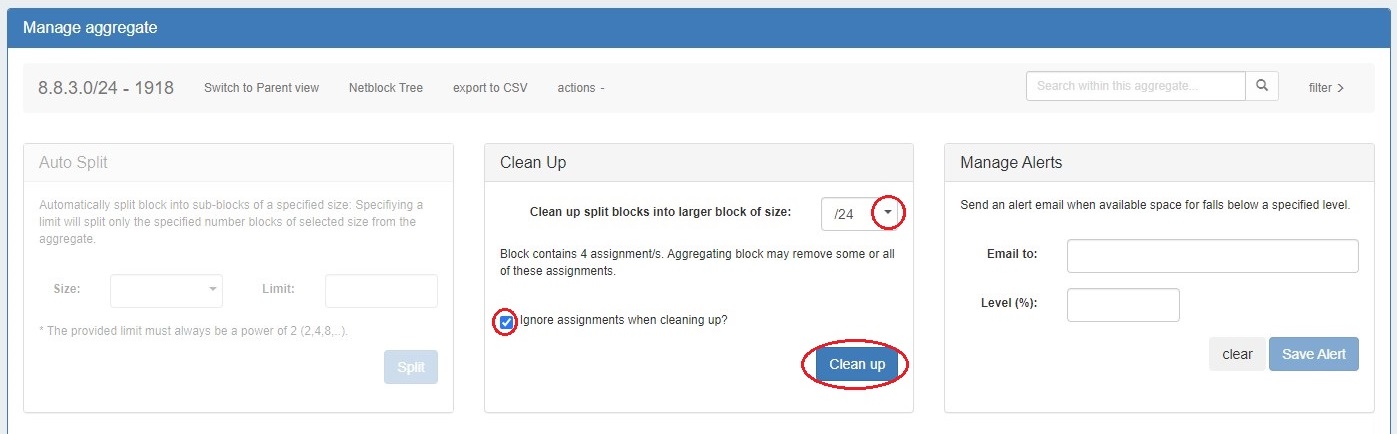
Clean Up Aggregate
Clean up an Aggregate into fewer blocks of a specific size, by selecting your desired block size and clicking "ignore assignments" (if blocks have assignments that would prevent merging).
When done, click the "Clean Up" button.
A confirmation modal will display the scope of the potential change.
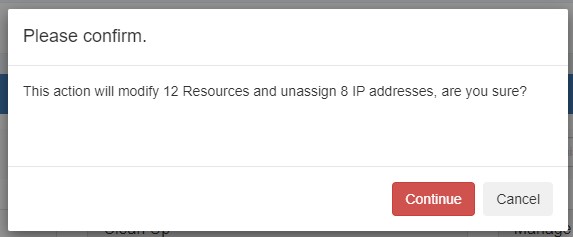
Click "Continue" to confirm and all blocks will be merged to the set size and reset to available. Click "Cancel" to exit.
Set Aggregate Alerts
Enable or clear aggregate alert emails for the aggregate by setting an email address and utilization percentage level.
When the aggregate is utilized to the set percent, an email alert will be sent to the provided address.
Note: the "IPAM Alerts" task is enabled by default when an alert is set. You can set the task to the desired notification frequency and review history in the Admin Scheduler Tab.
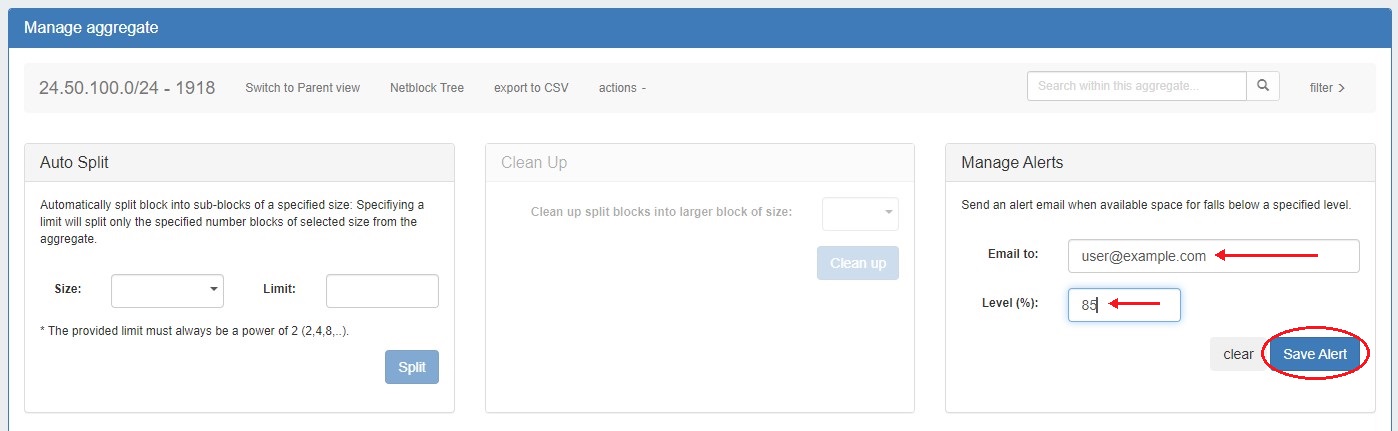
When done, click "Save Alert". To clear an existing alert, hit "Clear Alert", and the alert information will be removed and status saved.
For more on IPAM Alerts Management at the Admin level see Alerts Management in the Admin Guide.
IPAM alerts may also be set on individual IP blocks. For more information see Working with IP Blocks - Common Tasks.